Saturday, December 14, 2013

Christmas Crackers (no, not the food!)

Photo from Wikipedia
Have you ever seen a Christmas cracker before? They're primarily used in the UK on Christmas Day but my family has adopted the tradition and they're a great addition to any party or dinner. It's a cardboard tube with a toy, a tissue hat, and a joke inside, wrapped in paper and when two people pull on either end of the tube, it makes a "pop" noise. They're quite expensive at the store, though. A 6-pack can cost between $15-$35, depending on the toy. I decided to make my own from much less and you should too!

Here's what you'll need:

* Toilet paper or paper towel rolls
* Cracker snaps
* A joke
* A toy
* A tissue paper hat
* A hot glue gun
* Wrapping paper
* Card stock paper
* Tape
* Scissors
* Ribbon

First, you'll want to make a tissue paper hat. It's quite simple, really. Take a big sheet of tissue paper and cut it so it's roughly 3.5" x 24" (I just used the length of the tissue paper, I think it was roughly 27").

Tape the two ends together with tape.

Then fold it in half, then in half again, then in half again. Then take your scissors and cut one of the ends at an angle.

Unfold your hat and ta-da! A tissue paper hat -

Now that you've got your hat, you're ready to make your crackers! Take your wrapping paper and cut a 7.5"x12" square. Your toilet paper rolls (or paper towel rolls) should be roughly 2" x 4" (three should be able to go across the square).

Take your cracker snap and hot glue it a couple inches from the top of the wrapping paper.

Take your toilet paper roll and stuff it with a toy, a joke, and your tissue paper hat. Make sure they're in there tight enough so nothing can fall out of either end.

Next, take your roll and using two other rolls as guides, make sure your main roll is exactly in the center of the wrapping paper, above the cracker snap.

Glue the top of the wrapping paper to the center roll.

Remove the two side rolls and roll the toilet paper roll down, covering it with the wrapping paper and hot gluing it at the bottom.

Once your toilet paper roll is covered, take your card stock paper and cut 2.25"x 7" rectangles, as they'll be acting as your stiffener ends. Roll up the paper and stick it one end. Hot glue it to the wrapping paper and do the same thing on the other side.

Take one end and slightly twist it. The crease is where you'll be tying your ribbons.

Do that on the other end, tie on your ribbons, and voila! Your Christmas crackers are complete!


TOTAL COSTS: Approximately $20 to make as many as I wanted!
$3.99 for wrapping paper from Vons
$2.99 for tissue paper from Vons
$1.99 for ribbon from Vons
$7.50 for 25 cracker snaps from Olde English Crackers
Toys ranged in price from Michael's
Card stock, tape, scissors, hot glue gun, toilet paper rolls, and jokes all on hand

TOTAL AMOUNT OF TIME: Approximately 15 minutes/cracker
This included the time it took to make the tissue paper hat, cut out the card stock stiffer ends, etc.

EASY-PEASY SCALE (1 super easy - 5 very difficult): 2 out of 5
It's not difficult, it's just a bit time consuming, depending on how many you make but in the end, they'll be a lot of fun to pop open on Christmas Day!

Friday, December 13, 2013

How to Make a Crystal Snowflake

The entire country has been slammed with cold weather (except Florida... they're not participating in December) but here in LA, it's still not cold enough to see snowflakes. What's a girl to do? Well, make snowflakes in the kitchen! This post comes to us from Enchanted Learning.

First, grab 3 pipe cleaners (preferably white but I only had light green on hand) and make a 6-pointed star by twisting:


Next, grab some string and tie/wrap it around each stem, cutting off the excess string:


Then grab a wide-mouth jar (I used a pickle jar) and fill it with boiling water. If you want to add food coloring, you can, but after the fact I noticed it didn't do a thing. Might work better if the pipe cleaners had been white. Anyway, add in 20 Mule Team Borax to the water until it's super saturated - the original post said 3 Tablespoons for every cup of water. In my 2 1/4 cups of water, I added 3/4 cups of Borax.


Keep the snowflake in the Borax/water solution overnight. I kept mine in there from 9pm - 9am and this is how it turned out:

9pm
9am


It worked! Only... there was one teeny tiny problem. You see, when the crystals form on the pipe cleaners, you want to make sure you have ample room to get it out of the jar! My stems were the right length but the crystals added a few centimeters and thus my snowflake stayed in the jar. Oh well.


TOTAL COSTS: About $7 but you could make so many!
$1.79 for pipe cleaners
$5.46 for 20 Mule Team Borax on Amazon (realized it was cheaper in the store after I bought it online! Note this is for about 5 pounds worth and you're only using a small amount in this recipe)

TOTAL AMOUNT OF TIME: 12 hours
Ideally you want to leave it overnight

EASY-PEASY SCALE (1 super easy - 5 very difficult): 1 out of 5
You're just wrapping pipe cleaners around themselves, tying on some string, and sticking it in a water/Borax solution. Doesn't get much easier than that folks!

UPDATE: It has been 4 months since I wrote this post and someone asked me how long they last. Well, half of the snowflake still has crystals on it (though I did keep it in the jar the entire time). Hope this helps!


Thursday, December 12, 2013

Santa Hand Ornament

In my family, the ornaments that the kids are most embarrassed by and that the parents adore are the ones we made in elementary school. So this is one you could easily make with your kids and bring it out year after year without their faces turning too red! I found this post by Shelley Jo Moozings and while I don't have kids myself, I gave it a whirl to see just how easy it was to make.

Start off by making the dough - 4 cups of flour, 1 cup of salt, and 1 1/2 cups of water mixed in a big bowl. Now she recommends kneading the dough for 15-20 minutes but your arms will be tired after 5, maybe 10. Really, just knead it until you can form it into a nice ball.

Next, bust out your rolling pin! Take your ball of dough, place it on a floured surface, and with your rolling pin, roll it out to the thickness you want the ornament to be (note: in my experience, the thicker the dough, the longer in the oven. However, the thicker the dough, the easier to glue the pieces back together should it break when your cat tries to climb up the Christmas tree!). Take your child's hand, your hand, your pet's paw, and push it into the dough.

(I'm sure it's much cuter the small the handprint, so you'll have to bear with and my ogre hands.)

Trace around the print using a knife. Now this is a very important step: don't forget to put a hole in the top so you're able to hang it!

Now comes the waiting game. The instructions said to stick it in the oven at 300 degrees for 20-25 minutes or until golden. I had mine in the oven for 40 minutes but I probably should have left it in there for an hour. Wasn't golden but it worked!

Next came the painting. Now you don't have to paint it, you could take a red and black marker, draw on the hat, beard, eyes and nose and be done. However, if you want a pure white background, paint the sucker. Doesn't take that long to try, I gave it 20 minutes. Don't forget to paint the sides too, if your ornament is thick! Here's a photo of the four paints I ended up using - white, red, black, and yellow.


One tip I recommend? Once the white paint dry, take a red marker and black marker and trace around the areas you're going to paint before painting. This way, it'll give you a nice template and you can paint within the lines.

Now I tried to paint it exactly like the original but because I don't have the hands of a 5 year old, it did look a bit... longer. Still, it didn't take that long and it's a nice, unique, fun ornament for the tree!


TOTAL COSTS: Free!
But that's because I had flour, salt, water, and paint on hand. If you don't have paint available, you can pick up 2oz. bottles at Blick Art Supplies or Utrecht for as cheap as $1.99/bottle

TOTAL AMOUNT OF TIME: About an hour and a half
25 minutes to make dough and cut out hand
40 minutes to bake
40 minutes to cool 
30 minutes to paint

EASY-PEASY SCALE (1 super easy - 5 very difficult): 2 out of 5
This should be easy enough for a kid do to do (with adult supervision). This would make a great gift or pass down ornament in your family. Enjoy!

Tuesday, December 10, 2013

11 Different Ways to Wrap a Present

We're getting to that point where post offices have 30 minutes waits, all that's left is the tacky wrapping paper, and you're running out of creative ways to wrap a simple box. Need some help? Here are 11 wrapping ideas I've gathered from different sites and have compiled into one post. Hopefully there's an idea here for everyone on your Christmas list!

Idea #1: The Wordsmith

If you have a friend who loves word searches, you can either make one of these on the computer or get some blank paper, wrap the gift, then draw 1/4" lines vertically and horizontally with a pencil. Write in the words you know you want to include in marker (like "TOJOHN" or "FROMJANE") and then circle them in a bright color so they're easily found. Once those are done, write in a bunch of hidden words for fun! Fill in the rest of the boxes with random letters and you're all set. It's a gift that'll keep them guessing but also entertained!


Idea #2: The Music Lover

This is an easy one, all you need is some sheet music! You can either print some out for free online (just Google image search "sheet music") or you can buy Mod Podge "podgeable papers" made to look like sheet music, which is what I had on hand. See bonus instructions below on how to make the bow!


Idea #3: The Artist

Another idea from At Creative Home that's not terribly complicated. Plain paper + crayons = they gets to decorate their own gift! I recycled the paper that I received from IKEA when purchasing mugs, hence why it's a bit wrinkled.


Idea #4: The World Traveler

Find an old atlas or print out a map and use that as wrapping paper! Be creative with it - you could print out a map of where you're from, where the recipient is from, where the gift is from, and draw stars or hearts over certain locations! I also decided to make a mini bow - see bonus instructions below on how to make it yourself!


Idea #5: The Weaver


Ok, maybe you don't have that many friends who are weavers but this is still a creative idea I originally saw on MinieCo. Now you can do it all the way around the gift like they did, or you could just do it on top like I did. It's quite simple - take strips of paper and put them under, over, under, over and then over, under, over, under. It's a little time consuming and I used Elmer's glue which took a while to dry, so you might be better off using a hot glue gun to secure it.


Idea #6: The Reader


Using book pages, magazines, or leftover newspaper, use that as your wrapping paper for the person who loves to read! They might not appreciate pages being ripped out of a book so newspaper might be your best bet or find text online and print that out. I used a Mod Podge "podgeable papers" newspaper and it worked great!


Idea #7: The Teacher

This would be creative way to wrap a gift for a teacher (or a student for that matter). No, not with dry erase but with chalkboard liner! That way you can decorate it however you like and if you mess up, that's ok, just erase it and start over! Going Home to Roost's post used a chalk marker to design the packages but I'm old school, I like the feel of chalk dust between my fingers.


Idea #8: The Recycler


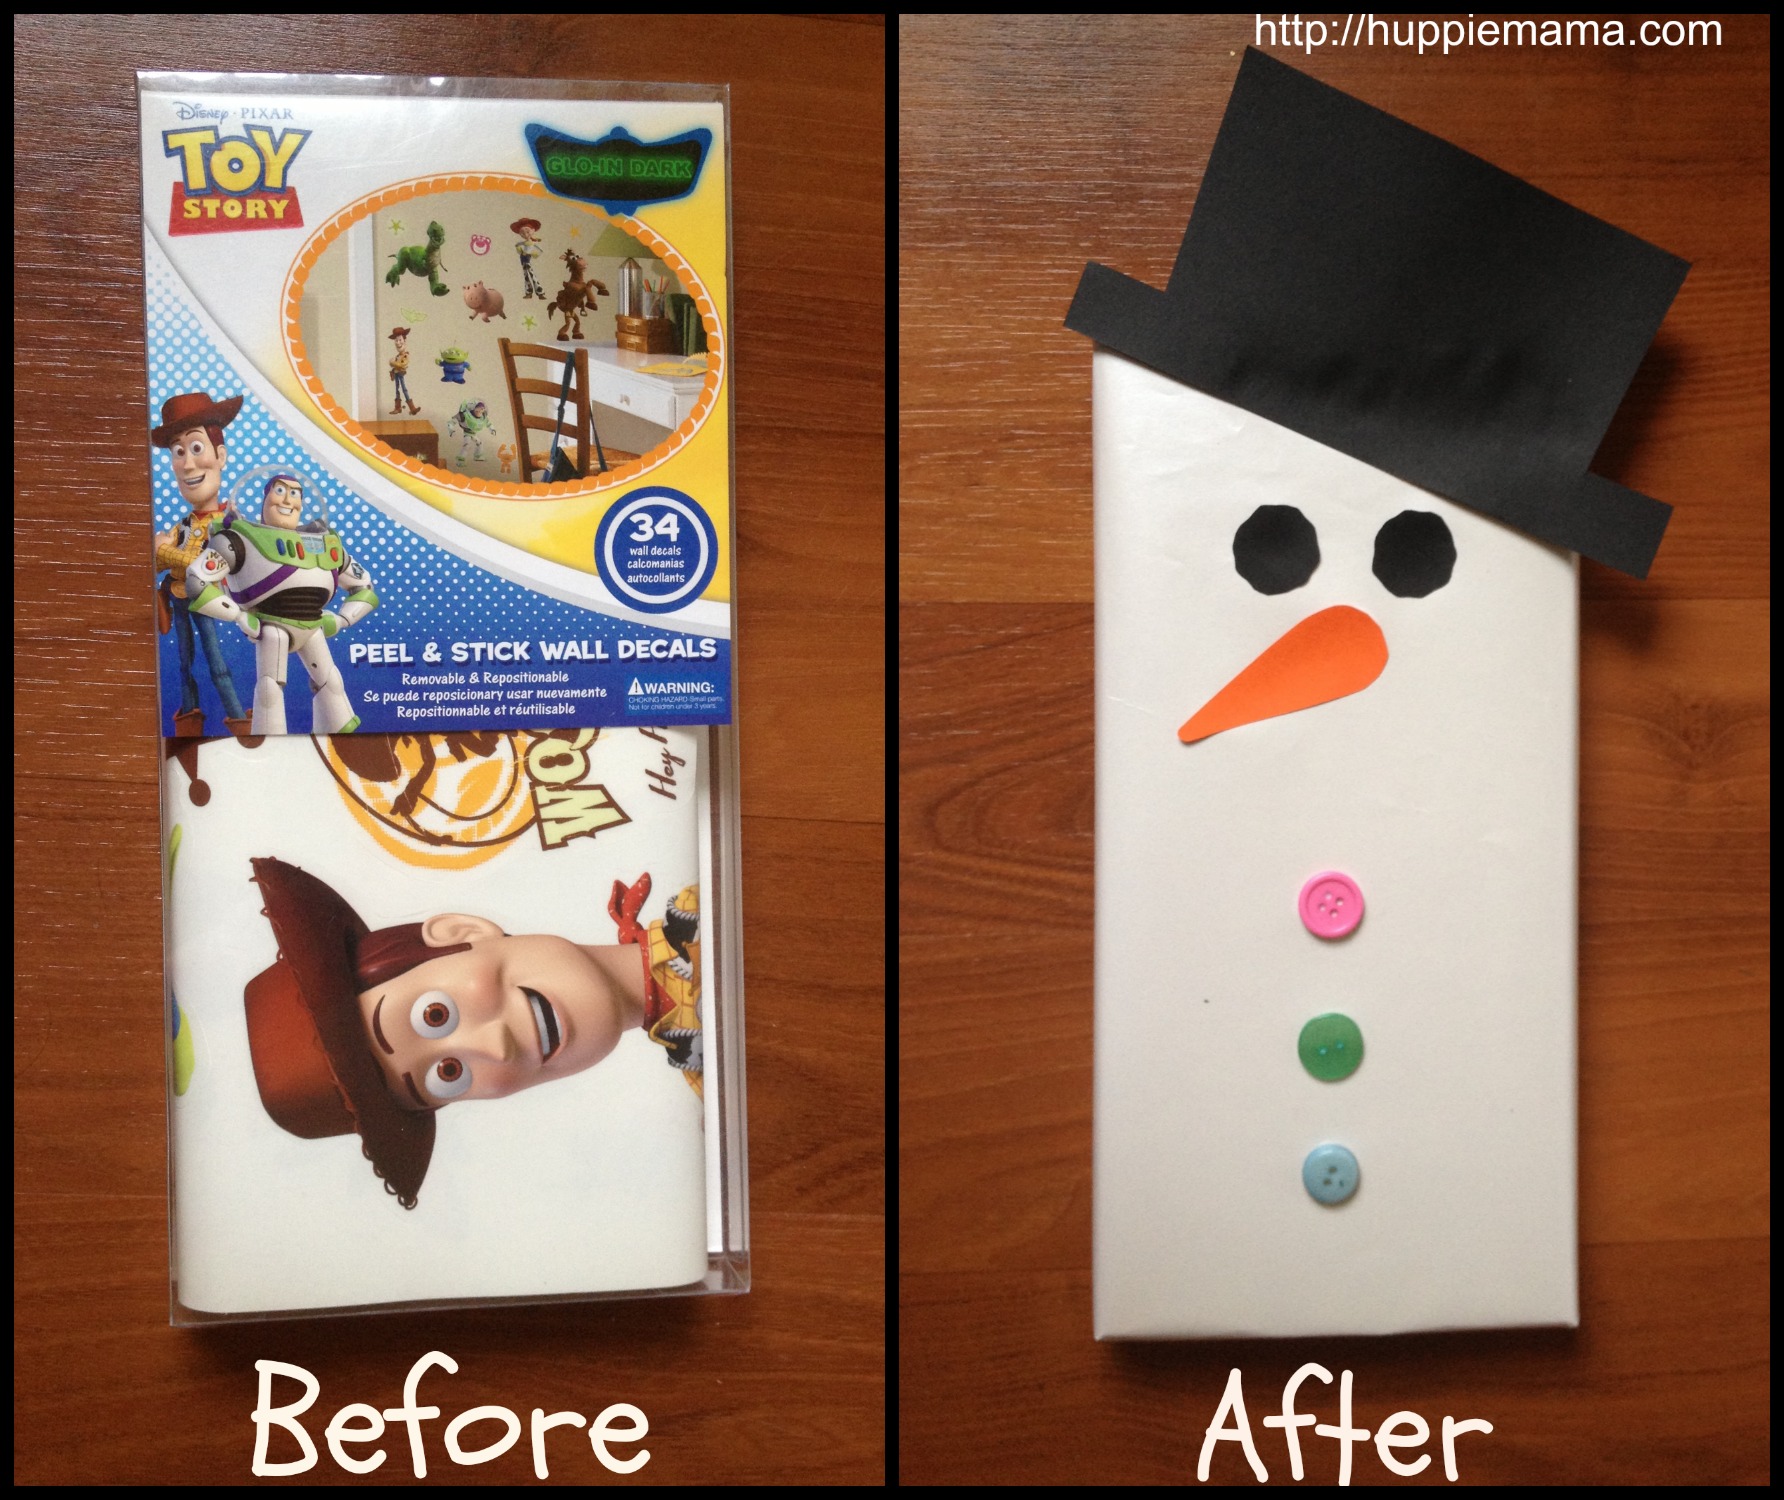
Do you know someone who likes to find multiple purposes for something? Well, here's one way to decorate a gift or wine bag and they can reuse it with a touch of festive flair! I originally saw this post by Huppie Mama, who decorated a box instead of a bag, so it's versatile!


Idea #9: The Noise Maker

Nothing says the holidays like jingle bells! Attach some bells to a gift to make it more festive, though make sure if the gift is for a child there is an adult nearby to make sure the bells aren't ingested. I don't think the ER would be a great place to be on Christmas morning...


Idea #10: The Nerd


Now I am a self-proclaimed nerd, so that word isn't meant to offend. If you're a fan of comic books, then wouldn't you love getting a gift wrapped in your favorite comic? I chose Batman for this one because that's my cat's name. Yep. Big nerd. So just Google image your favorite comic strip, print it out, and use that as your wrapping paper!


Idea #11: The Photographer

On Minted.com, you can pay $15 to have wrapping paper with your own photographs on it... OR, you could just print out your own photos and use that paper to wrap your gifts! Seems like a no-brainer to me! I just opened up a Word doc, inserted a bunch of different photos, and then printed it out.


Bonus tip #1: How to make a traditional bow out of paper
This comes to us from Studio Calico. Cut four long strips of paper (mine were 12" x 1/2" but you experiment with the width).

Cut three of those strips in half and mark an x in the middle of those 6 strips.


Then take one end of a strip and twist and glue it on top of the x.

Take the other end, twist and glue it on top, almost making a figure 8.

Do this for 4 strips. For the final two, cut them 1/2"-3/4" shorter and twist and glue, just like you did the others.

Then start stacking! Glue one on top of the other, until all are on except there that one long strip. Cut it to a 2.5" long strip, glue it into a loop, and glue it in the middle of your bow. Ta da!

Bonus tip #2: How to make a mini bow
I originally saw the photos here on Fun Substance but since the photos were backwards it was hard for me to follow so hopefully my photos and explanation below will make things a little easier for you!

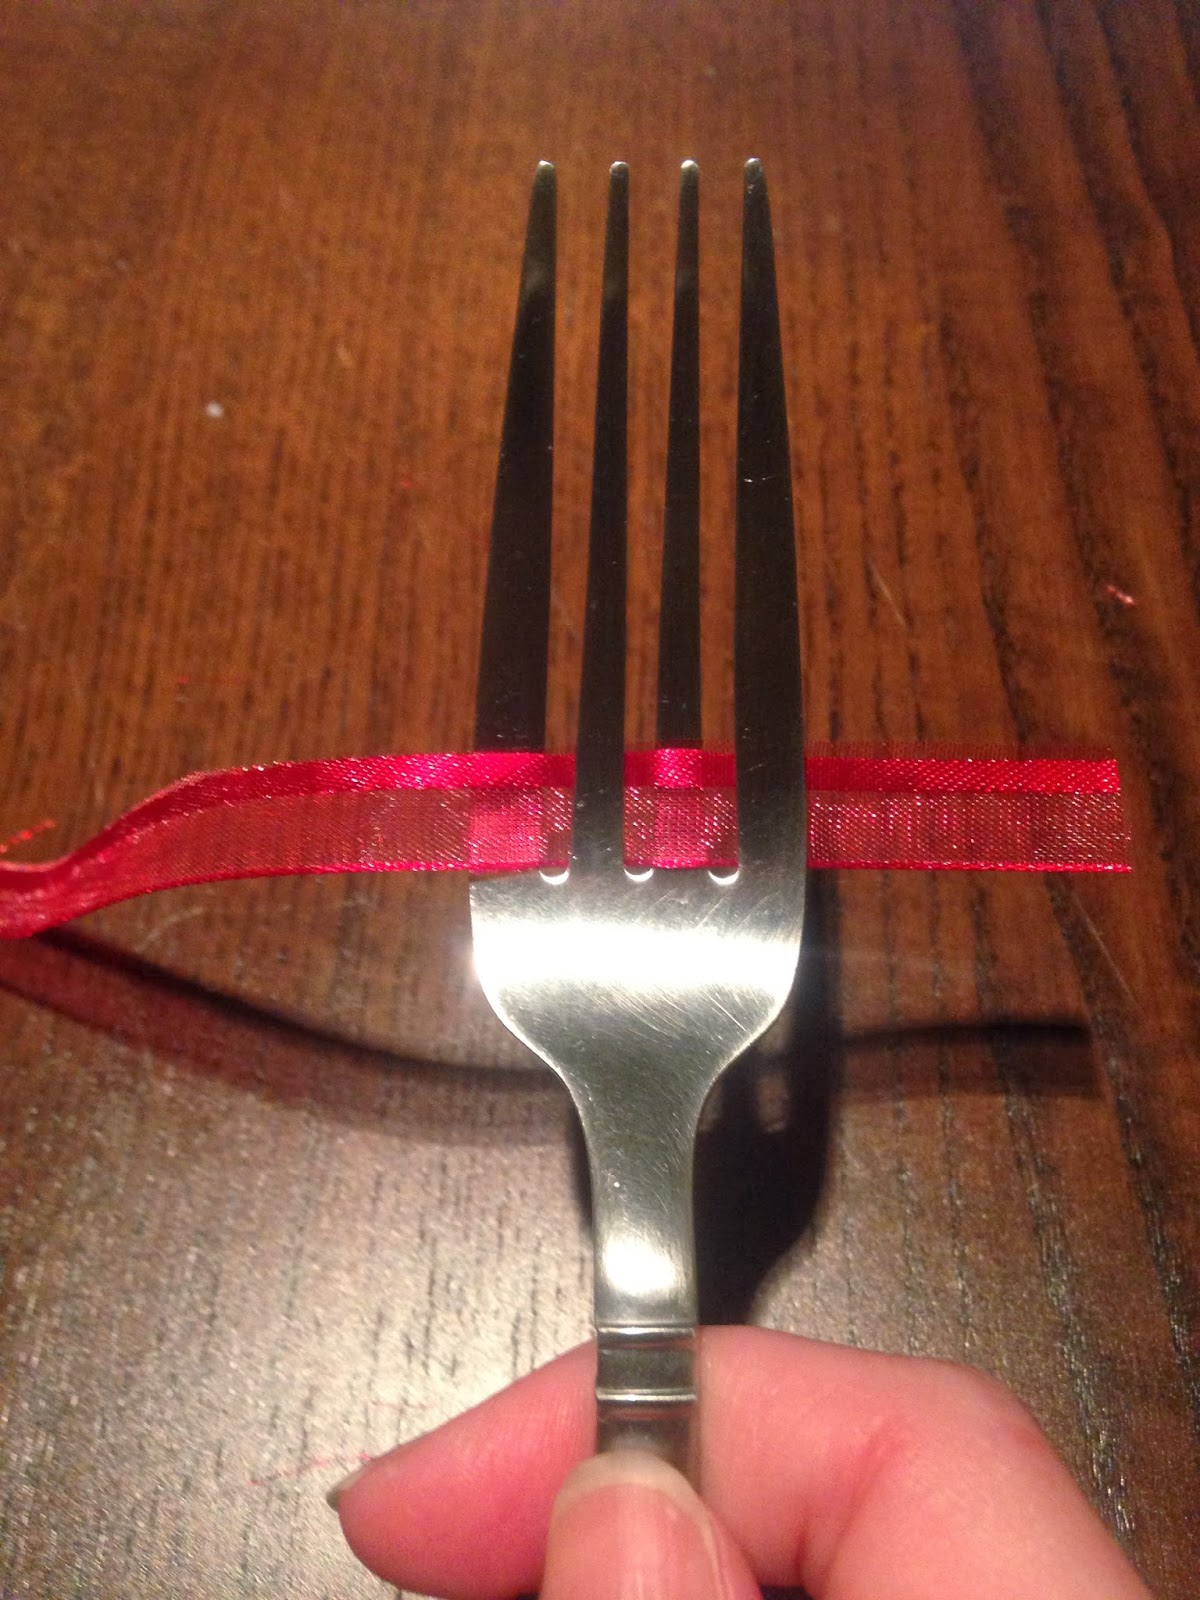
First, have the short end of the ribbon on your right and the long end on your left. Go over the first and third tongs with the ribbon.

Then, wrap the long end around the first tong and go over the second and fourth tongs.

Keep going back and forth until you have five rows of ribbon on the tongs.

Take another separate piece of ribbon and between the second and third tongs, tie the top and bottom rows together.

Make a knot

Slip the ribbon off, cut of the ends and ta da! You've got a little bow!

TOTAL COSTS: Varies with each wrapping project
You could spend nothing because you have a printer, paper, scissors and tape or you could spend up to $6 on chalkboard liner, $4 on jingle bells, etc.

TOTAL AMOUNT OF TIME: Varies with each wrapping project
Again, it's hard to give you a set amount of time. I can tell you the fastest project was "The Reader" because all it required was newspaper!

EASY-PEASY SCALE (1 super easy - 5 very difficult): Varies with each wrapping project
I found the easiest project was again "The Reader" because it was just wrapping a box with newspaper. The most difficult was probably "The Photographer" only because I had a hard time picking out the right photos! Be creative and have fun!

Monday, December 9, 2013

Spa in a Jar

After yesterday's gingerbread TARDIS catastrophe (click here for a good laugh), I decided I needed a blog post to help relax me, take the edge off, and not involve an oven. The answer? The Gunny Sack. She's a blogger who put together a bunch of different ideas of what you can incorporate in a spa-inspired mason jar -- this would be a perfect gift for a new mom, a friend, or even yourself!

She has a lot of different recipes but I decided to go with the peppermint foot soak and the hand scrub. I bought a couple 32 oz. mason jars from Whole Foods, a couple small glass containers from Michael's, and I already had a few 4oz. mason jars left over from my slow cooker apple butter days.

I started with the hand scrub and decided to use lavender hand soap because lavender has been shown to reduce stress (perfect for a spa jar, right?). However, if you decide to use this as well, be aware that you're not going to get much of a color and even one drop of food coloring can be overwhelming. I put in two drops and had to start over because it looked like I had liquified Barney. So you might be better off using a soap that is already tinted, like the original post.

Next, the peppermint foot soak. Now I love the smell of peppermint but if you're not a fan, you might not want to do this recipe because it will make your entire working area smell divine. Once you've mixed together the epsom salt, baking soda, peppermint extract and food coloring (I used two drops of pink food coloring instead of red and it looks lovely!), you need to lay it out on parchment paper for 30 minutes. While you wait, it's a perfect time to print out the free labels she provides, cut them out, and attach them to the jars. By the time you're done, the powder will be ready to put into jars!

Keep in mind, once you put those two jars inside your mason jar, you're not going to have much room to put in much else. I added some peppermint chapstick, 3 Lindor truffles, and 3 tea light candles . If there had been room for more goodies, I would have kept adding but as it was, it was stuffed to the top. If you want to add more, go for a bigger jar than just 32 ounces!


TOTAL COSTS: About $11
$2.49 for 1lb of epsom salts from Whole Foods
$2.99 for peppermint chapstick from Whole Foods
$.99 for 3 Lindor truffles from Vons
$1.50 for 13.5 fl. oz of lavender soap from Michael's
$1.69 for 32oz. mason jar from Whole Foods
$.99 for small glass jar from Michael's
4oz. mason jar, food coloring, sugar, baking soda, and peppermint extract already on hand

TOTAL AMOUNT OF TIME: 1 hour, 15 minutes
This included the 30 minutes of waiting for the foot soak powder to dry and redoing one of the jars of hand scrub because of a food coloring disaster.

EASY-PEASY SCALE (1 super easy - 5 very difficult): 1 out of 5
Have fun with this - it's so easy, you can include whatever you like, and the recipient of such a jar of goodies will be pleasantly surprised!

Sunday, December 8, 2013

How NOT to Make a Gingerbread TARDIS

I came across this clever Dr. Who TARDIS gingerbread house and thought, "How creative! Surely that's a project I can do!" Oh how terribly, terribly wrong I was. Kids, gather 'round and let me tell you a tale of how the TARDIS stole Kat's entire weekend with 8 magical mistakes...

Mistake #1: Converting all the measurements instead of finding a different recipe.
You begin by converting all the measurements into something you can understand. From grams to cups, from millimeters to inches, you'll spend quite a lot of time just figuring out how the heck to make the dough. And yes, this calls for 8 cups of flour. And no, the dough doesn't end up tasting good at all.

Mistake #2: Leaving it in the fridge for too long.
The post says to leave it in the fridge overnight, but that's a silly, silly thing to say. For you see, when you put it in the fridge, it becomes so hard that you can't knead it and end up pouring water on it, sticking it in the oven, breaking it into smaller pieces, doing anything you can just so that it can get back to how dough should be.


Mistake #3: Making all the templates they said.
I should have stopped when the dough was a big hard rock but no, instead I spent two and a half hours cutting out all the templates they say. To save you some time:
     *Do NOT make 4 sides -- make 1 and use it over and over
     *Do NOT make 4 side panelling pieces -- again, make 1 and use it over and over
     *Do NOT make 8 corner post pieces because there are only 4 corners, not 8, and make 1 template for it, not 4.

Mistake #4: Rolling the dough too thick
My dough was about 1/4" thick which was way too thick. The thinner, the better. Otherwise, you'll end up waiting for it to bake for 15-20 minutes instead of the 6-9 minutes recommended (and my oven was at 390 degrees).

Mistake #5: Not cutting out the windows in the dough before sticking it in the oven.
Now she doesn't say to do cut out all 8 windows, so I didn't. I just traced out the lines instead of cutting them out completely. Big mistake. When you read further down in the instructions, she says to put both panelling pieces on top of one another and then stick them in the oven (?!?) so you will need to have all windows cut out. If you don't cut them out beforehand, you'll end up having your poor husband help you cut them out when they're hard as a rock and crumbing beneath your fingers. And try not to have flour on your panels before putting them in the oven. The flour will stay there. Forever.

Mistake #6: Trusting their recipe for frosting.
Don't do it. Just don't. Go buy frosting at the store and use that. Or use a different recipe. Don't trust them for a second. Even with the tiniest hole in your bag, it will still come out like a drop of water. I ended up having to write the Police Box signs in marker, because I knew there was no way this thing was going survive.

Mistake #7: Putting the frosting on the entire two-window panel
Do not put your frosting all over the panel with two windows when wanting to put the other panel with eight windows on top. The frosting will show through the six windows and that's not the effect you want to go for. Put the frosting on the back of the eight windowed panel and then stick it to the two windowed panel (like the photo).

Mistake #8: Using tape to attach wax paper to panel for windows
Tape isn't going to stick to the panels so use frosting again. It's your only chance for making it look semi-decent.

When all was said and done, I'm glad I stuck with it to the bitter end, just so I could get this photo.


Moral of the story? Admire the work others can do, and admit that some projects are best if left alone.

TOTAL COSTS: Too much
However, if you're interested, you can pick up Lyle's Golden Syrup at Whole Foods for a little over $5

TOTAL AMOUNT OF TIME: About 24 hours
20 minutes to make the dough
17 hours in the fridge
2 1/2 hours to make the templates
3 hours to cut and bake the pieces
1/2 hour to frost (at which point, I pretty much gave up)

EASY-PEASY SCALE (1 super easy - 5 very difficult): My first 5 out of 5 blog
If I haven't convinced you enough not to do it, then give it a shot and let me know how it goes!