Showing posts with label Word. Show all posts

Sunday, December 29, 2013

How to Make Your Own 2014 Photo Calendar

As we're nearing the end of 2013, I see companies like Shutterfly, Vistaprint, and even Walgreens offer 2014 calendars with your photos and I thought, "There's gotta be a way to do this for less than $20, right?" Well kids, I did it for free! You can make one for free too if you have:

1. Microsoft Word
2. Digital photos
3. String/yarn/something to hold the pages together
4. Paper (I used white card stock but you could use printer paper, photo paper, etc.)
5. Hole punch

The hardest part was creating the actual calendar part. I could have copied a calendar from Google by searching "January 2014", "February 2014", etc. but instead I made it from scratch. To save you the time and headache, I'm offering my template here (click on the small down arrow on the left-hand side, next to the printer icon, to download). Feel free to change the font of the month (I used Betty Noir in 60 pt. font).

Once you have the template open, you can add in holidays, add photos, etc. For example, for every member of our family, I put their photo on their respective birth date. That way, I would know exactly whose birthday it was and when!

The easiest way I found to add photos in Word is by doing the following:
1. Go to Insert --> Picture --> From File
2. Find your photo, select it, and hit Insert
3. Double-click on the photo or go to Format --> Picture
4. Click on Layout and make sure "Behind Text" is selected and hit OK
5. Size photo to your liking

You can then print out each page, hole punch three holes (one on each end to loop string through and one in the middle to hang on the wall) or you can keep going like I did and add more photos to the opposite pages!


I used Word again and made new documents to add my photos (note that I kept the .5" border again) and I tried to keep separate documents, so as not to confuse myself. One document was called "January" and I included all photos taken in January, then next document was called "February", etc.

Now here's where it can get a bit tricky. I'm glad I punched the holes in all the pages before moving on because it was easier for me to figure out how to feed the pages into the printer. Every printer might be different but here's what I did:

For example, I created an "August" document and added all the photos I wanted for that month.

Then I took the July page face up and with the holes on the right side, so that the August photos would print out correctly on the opposite side.

And I did that for each page until it was all printed out. You'll have to punch in holes again for the center (if you want to hang it). However, if you don't want to hang it on a wall, you don't have to, as I ended up putting mine on the fridge!


TOTAL COSTS: Free!
However, I already had Microsoft Word, paper, string, and a hole punch on hand

TOTAL AMOUNT OF TIME: Times may vary
It depends on how many photos you want to include but my calendar took about 6 hours to complete

EASY-PEASY SCALE (1 super easy - 5 very difficult): 2 out of 5
If you're not familiar with arranging photos in Word, this might be a little difficult to get at first but you'll figure it out soon enough!

Friday, December 27, 2013

How to Make a Personalized Monopoly Game!

I'm back from the holidays! I hope everyone had a great time with their friends and family, wherever they may be. I gave this personalized Monopoly game as a gift to my parents and they thought it would be a great blog post, in case anyone else wanted to make one! This is great if you're family a.) has a lot of inside jokes and b.) loves playing games. Note that while you can purchase some on Etsy for $200, you can just as easily make your own for almost a quarter that price if you have access to the following:

1.) Adobe Photoshop and Microsoft Word
2.) A Kinko's nearby
3.) A lot of patience and creativity

If you have those three things handy, you can make one yourself for anywhere between $50-$100!

STEP 1: Making the Board
Start by going to BradFrostWeb's site to download his Monopoly template. From here, you'll be able to download the entire Photoshop template and edit the names of the tiles, add photos, customize the pricing, do anything and everything you like to personalize the board. FYI: this will be the longest step. You'd be surprised how nit-picky you'll get and which jokes to include/leave off the board.

Note that if you want it to be completely authentic to the original, you may have to scour the internet to find similar fonts for free like KabobLight for the property names and KabaleMedium for the "OPOPLY" name in the middle, but with a little Google searching, you should be able to download the fonts for free.

STEP 2: Making the Cards
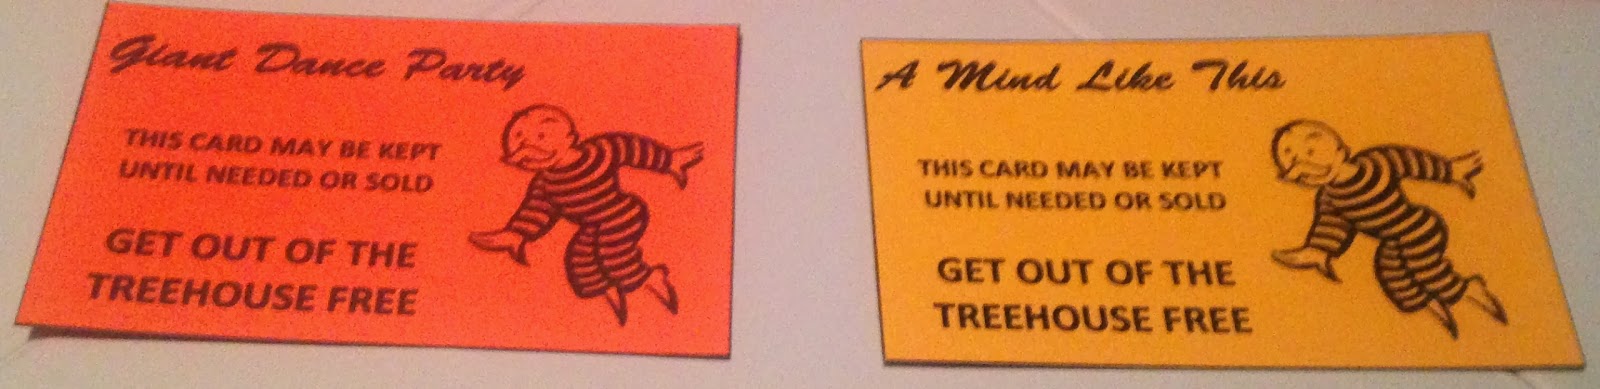
Once you have your board completed, next comes the community chest/chance cards. In this example, I used titles of books my mother and sister wrote this year ("A Mind Like This" by Susan Blackwell Ramsey and "Giant Dance Party" by Betsy Bird). I recommend using orange and yellow card stock paper and making the templates in Word. I fit 8 squares of 1.75" x 3" onto a sheet (only 6 pictured here) and for the text, I used Brush Script Std in size 18 for the title and Calibri for main font text, however the size changed depending on how much I wanted to write. I Google-searched as many images of "Mr. Moneybags" as I could find, then copy and pasted them into a Word doc to look authentic.

Note: you'll want to print on the front AND back of the cards. Keep this in mind, as one side will need to say the name of the card, the other side will have the juicy details. I probably went through 6-8 pieces of paper, just to make sure the title was evenly lined up on the other side of the paper.


STEP 3: Making the Deeds
If you have already decided what colored properties will be for what, then it won't be too difficult for you to make the property cards. These also come from the template you downloaded. A few things to note:
    1. If you choose to go with a thick, white, semi-shiny card stock paper, make sure your template is not near the edge of the paper. I found, after multiple trials and errors, that the closer the template was the edge (like if I wanted to try and print 8 deeds on one sheet), it was harder for the printer to catch the paper and therefore print correctly.
    2. If you print these at home, chances are the white font of "Title Deed" might not be legible. Perhaps if you bold the font it will be clearer, but otherwise it's very hard to read.
    3. I didn't print on the backs of these cards but you certainly can if you like. The main reasons I didn't were because it says how much the mortgage is on the front of the card AND I didn't want to deal with the front and back printing like the community chest/chance cards.

STEP 4: Assembling the Board
You'll need to find an 18"x18" game board - I found one for cheap on eBay and after scouring the internet, I don't think you'll find anything cheaper! Next: find a Kinkos in town. Take your Photoshop file, put it on a thumb drive, and take that thumb drive to Kinko's and ask for an 18" x 18" sticker. It'll take 24 hours to make but well worth it! Very carefully, apply the sticker to the game board. This may take several attempts and you might see bubbles but try to rub them out as soon as you can so they don't stay. If you have someone to help you, that might make things easier, but I did it by myself so it's not impossible to do alone.

STEP 5: Acquiring Remaining Game Pieces
You'd be surprised what else is involved in a Monopoly game! There's:
* game pieces (car, dog, thimble, etc.)
* money
* hotels and houses
* dice
* and most importantly, a box to carry the game and its pieces 

If you want to make it even more personalized, you can find specific game pieces to match the player's likes/hobbies! As for the box, I simply printing out sections of the game board and Mod Podged them to an existing game box (note: this was not a Monopoly box, as I found I originally couldn't get the board to fit!). 

What I later found out, and did do, was cut the board and the sticker so that it was easier to fold into fourths. Don't worry, your board will still look great, just remember to do this with either an x-acto knife or sharp scissors but be careful!


And there you have it kids! Your very own Monopoly game!


TOTAL COSTS: About $70
$9 (including shipping) for game board on eBay
$50 for sticker to be made by Kinko's
$5 for Monopoly pieces on Etsy
$6 for colored card stock from Michael's
White card stock, Mod Podge, x-acto knife, PhotoShop, Word, money, hotels/houses, and box already on hand

TOTAL AMOUNT OF TIME: Weeks!
But that's because I had no idea what I was going to call the properties, put on any of the cards, etc. Plus, you'll need 24 hours for the sticker to be made anyway.

EASY-PEASY SCALE (1 super easy - 5 very difficult): 4 out of 5
If you're familiar with PhotoShop (or even if you're not), you'll figure it out fast with help from the original template. Putting the sticker on the board without bubbles isn't easy but with a second person helping it should make it a lot easier. Have fun, be creative, put in as many inside jokes as you can, and hope you land on free parking!

Tuesday, December 10, 2013

11 Different Ways to Wrap a Present

We're getting to that point where post offices have 30 minutes waits, all that's left is the tacky wrapping paper, and you're running out of creative ways to wrap a simple box. Need some help? Here are 11 wrapping ideas I've gathered from different sites and have compiled into one post. Hopefully there's an idea here for everyone on your Christmas list!

Idea #1: The Wordsmith

If you have a friend who loves word searches, you can either make one of these on the computer or get some blank paper, wrap the gift, then draw 1/4" lines vertically and horizontally with a pencil. Write in the words you know you want to include in marker (like "TOJOHN" or "FROMJANE") and then circle them in a bright color so they're easily found. Once those are done, write in a bunch of hidden words for fun! Fill in the rest of the boxes with random letters and you're all set. It's a gift that'll keep them guessing but also entertained!


Idea #2: The Music Lover

This is an easy one, all you need is some sheet music! You can either print some out for free online (just Google image search "sheet music") or you can buy Mod Podge "podgeable papers" made to look like sheet music, which is what I had on hand. See bonus instructions below on how to make the bow!


Idea #3: The Artist

Another idea from At Creative Home that's not terribly complicated. Plain paper + crayons = they gets to decorate their own gift! I recycled the paper that I received from IKEA when purchasing mugs, hence why it's a bit wrinkled.


Idea #4: The World Traveler

Find an old atlas or print out a map and use that as wrapping paper! Be creative with it - you could print out a map of where you're from, where the recipient is from, where the gift is from, and draw stars or hearts over certain locations! I also decided to make a mini bow - see bonus instructions below on how to make it yourself!


Idea #5: The Weaver


Ok, maybe you don't have that many friends who are weavers but this is still a creative idea I originally saw on MinieCo. Now you can do it all the way around the gift like they did, or you could just do it on top like I did. It's quite simple - take strips of paper and put them under, over, under, over and then over, under, over, under. It's a little time consuming and I used Elmer's glue which took a while to dry, so you might be better off using a hot glue gun to secure it.


Idea #6: The Reader


Using book pages, magazines, or leftover newspaper, use that as your wrapping paper for the person who loves to read! They might not appreciate pages being ripped out of a book so newspaper might be your best bet or find text online and print that out. I used a Mod Podge "podgeable papers" newspaper and it worked great!


Idea #7: The Teacher

This would be creative way to wrap a gift for a teacher (or a student for that matter). No, not with dry erase but with chalkboard liner! That way you can decorate it however you like and if you mess up, that's ok, just erase it and start over! Going Home to Roost's post used a chalk marker to design the packages but I'm old school, I like the feel of chalk dust between my fingers.


Idea #8: The Recycler


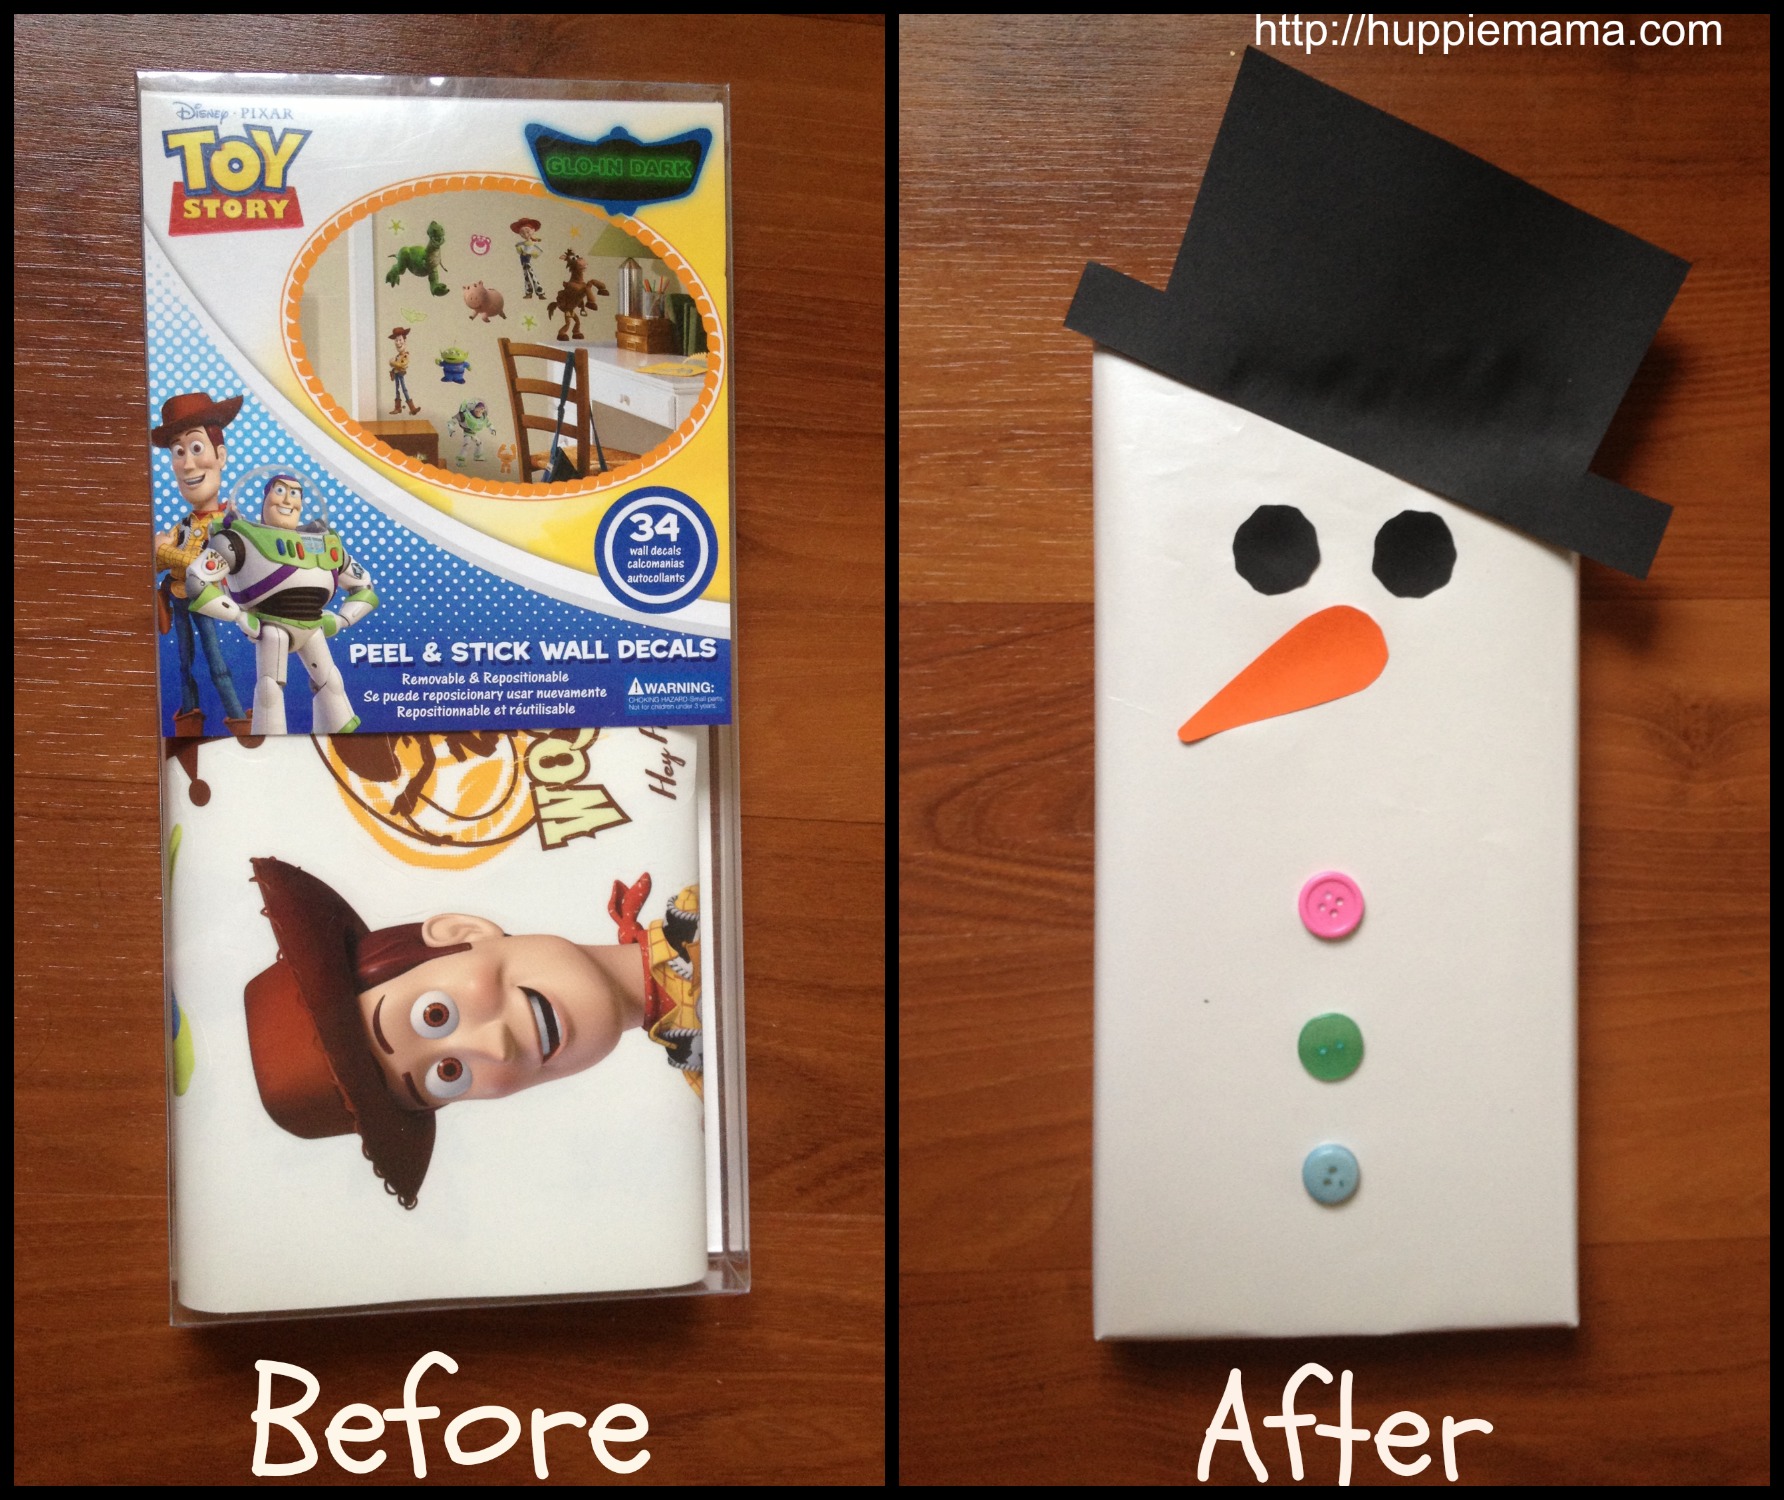
Do you know someone who likes to find multiple purposes for something? Well, here's one way to decorate a gift or wine bag and they can reuse it with a touch of festive flair! I originally saw this post by Huppie Mama, who decorated a box instead of a bag, so it's versatile!


Idea #9: The Noise Maker

Nothing says the holidays like jingle bells! Attach some bells to a gift to make it more festive, though make sure if the gift is for a child there is an adult nearby to make sure the bells aren't ingested. I don't think the ER would be a great place to be on Christmas morning...


Idea #10: The Nerd


Now I am a self-proclaimed nerd, so that word isn't meant to offend. If you're a fan of comic books, then wouldn't you love getting a gift wrapped in your favorite comic? I chose Batman for this one because that's my cat's name. Yep. Big nerd. So just Google image your favorite comic strip, print it out, and use that as your wrapping paper!


Idea #11: The Photographer

On Minted.com, you can pay $15 to have wrapping paper with your own photographs on it... OR, you could just print out your own photos and use that paper to wrap your gifts! Seems like a no-brainer to me! I just opened up a Word doc, inserted a bunch of different photos, and then printed it out.


Bonus tip #1: How to make a traditional bow out of paper
This comes to us from Studio Calico. Cut four long strips of paper (mine were 12" x 1/2" but you experiment with the width).

Cut three of those strips in half and mark an x in the middle of those 6 strips.


Then take one end of a strip and twist and glue it on top of the x.

Take the other end, twist and glue it on top, almost making a figure 8.

Do this for 4 strips. For the final two, cut them 1/2"-3/4" shorter and twist and glue, just like you did the others.

Then start stacking! Glue one on top of the other, until all are on except there that one long strip. Cut it to a 2.5" long strip, glue it into a loop, and glue it in the middle of your bow. Ta da!

Bonus tip #2: How to make a mini bow
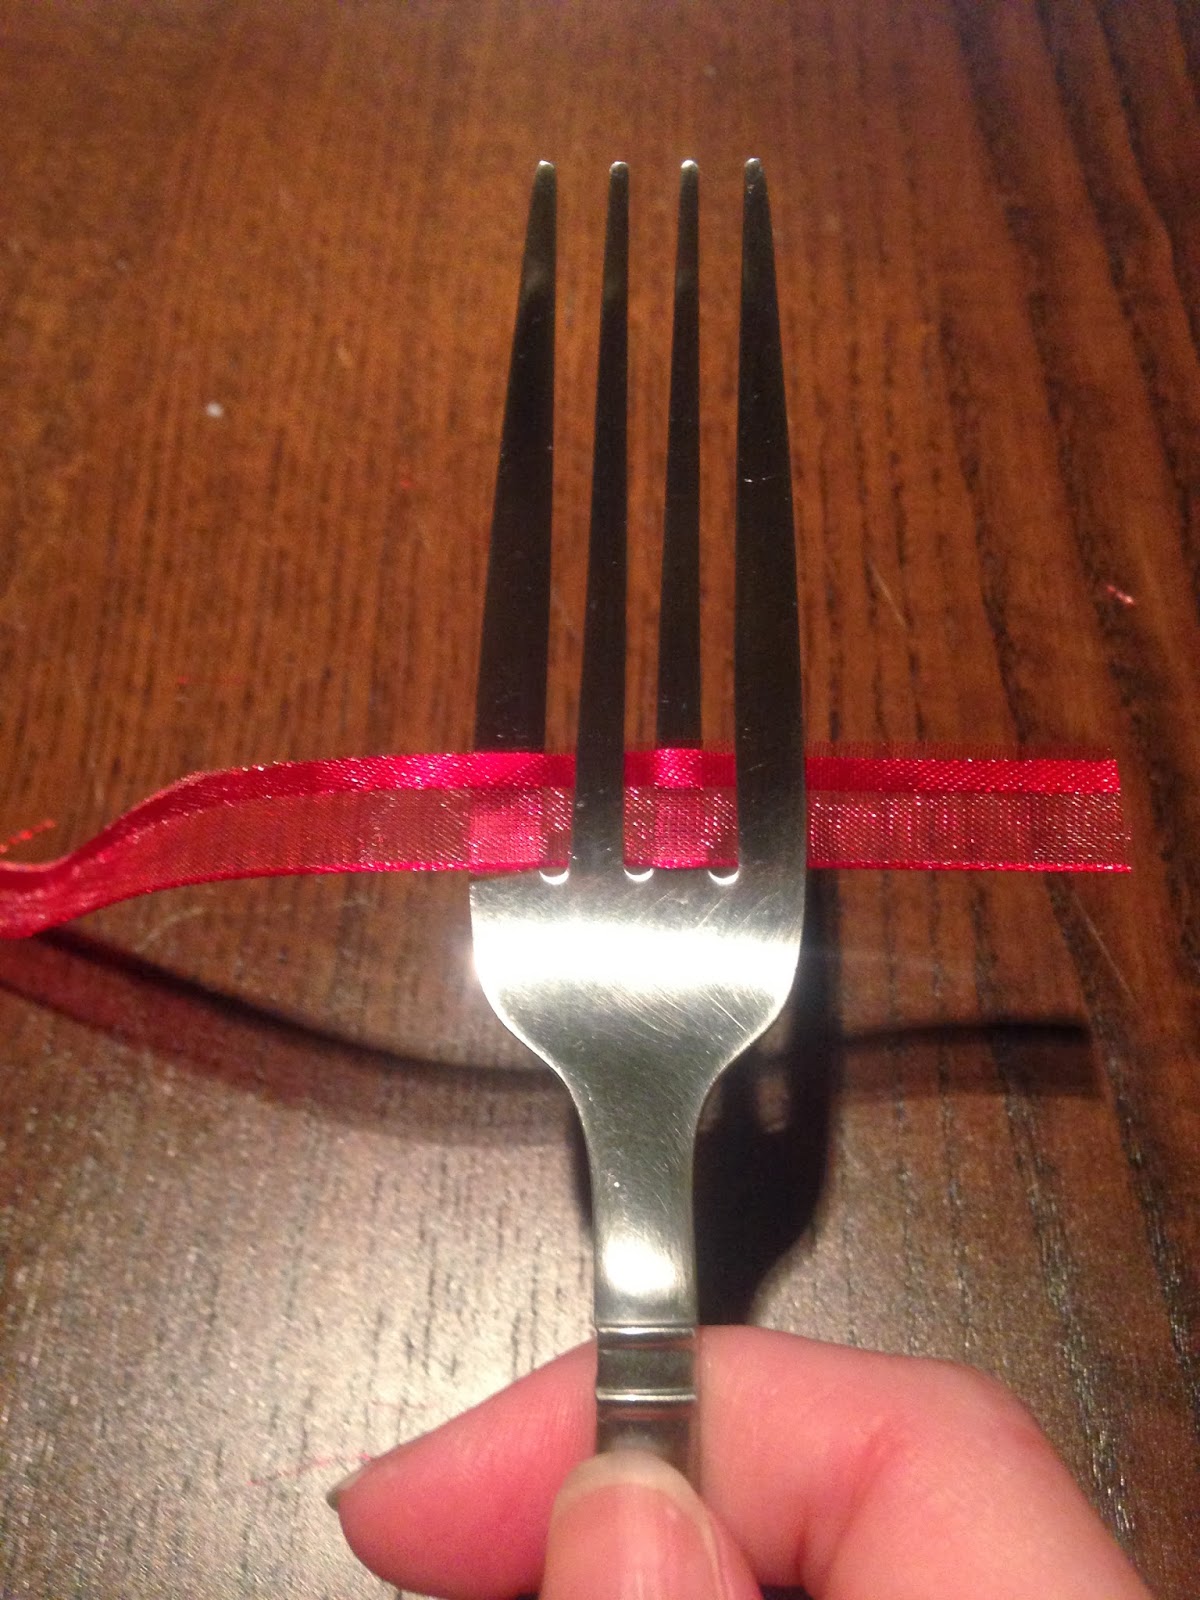
I originally saw the photos here on Fun Substance but since the photos were backwards it was hard for me to follow so hopefully my photos and explanation below will make things a little easier for you!

First, have the short end of the ribbon on your right and the long end on your left. Go over the first and third tongs with the ribbon.

Then, wrap the long end around the first tong and go over the second and fourth tongs.

Keep going back and forth until you have five rows of ribbon on the tongs.

Take another separate piece of ribbon and between the second and third tongs, tie the top and bottom rows together.

Make a knot

Slip the ribbon off, cut of the ends and ta da! You've got a little bow!

TOTAL COSTS: Varies with each wrapping project
You could spend nothing because you have a printer, paper, scissors and tape or you could spend up to $6 on chalkboard liner, $4 on jingle bells, etc.

TOTAL AMOUNT OF TIME: Varies with each wrapping project
Again, it's hard to give you a set amount of time. I can tell you the fastest project was "The Reader" because all it required was newspaper!

EASY-PEASY SCALE (1 super easy - 5 very difficult): Varies with each wrapping project
I found the easiest project was again "The Reader" because it was just wrapping a box with newspaper. The most difficult was probably "The Photographer" only because I had a hard time picking out the right photos! Be creative and have fun!

Saturday, November 23, 2013

Dry Erase Book - Perfect for Kids!

We're coming up on that time of year when long car or plane rides are inevitable for the holidays. We're also coming up on flu season. Need something to entertain the kids if they're sick and/or on a long trip? Make one of these dry erase books and guarantee yourself at least a few minutes of peace and quiet! I found this post by All For The Boys and thought I'd give it a shot!

Here's what you need:
1. A binder
2. Clear page protectors
3. Elastic
4. Dry erase markers
5. Pictures of family members
6. Microsoft Word or some other program to make cover and print out photos
7. Hot glue gun / hot glue
8. Scissors

Now I went with Word because I wanted to kill two birds with one stone - make a cover label and print out the photos.

I didn't like the original posts cover of the binder so I went with something different - if you want to do this, on the left hand side go to the icon below the square, choose "Callouts" and choose which bubble you prefer (I went with the second from the left and "Stencil" font)


Then print it out and stick it between the plastic cover and the binder! Voila, step one is done. But again, feel free to make the cover however you like!


Now to the inside. First, go back to your Word doc and either create a new document or erase what you just did. Then, change the document's margins (Format --> Document and change margins to .5"). Then insert a photo (Insert --> Picture --> From file) of your choosing. The bigger the photo of the person, the better, otherwise the kid will have to stick with drawing in the space around you.

I chose to grayscale my photo, like the original, because it makes the color of the markers pop. To do this, either double-click on your photo or go to Format --> Picture and then under Color, change it to Grayscale. Print out your photo and you're done with step two!... that is, unless you'd like to print out more photos, which I recommend.


Once you have your photos printed, put them in the plastic page protectors, and then put those in the binder. Next comes the final step: gluing the elastic to the binder.

The easiest way I found to do this was glue down a small section of elastic, then place the marker down with the elastic wrapped tight around it, then place a little hot glue right next to the marker and glue the elastic down. Do this for however many markers you have, just don't glue the marker. If you do, it'll be very hard to get it out.

And that's it! Best part? There's no mess - it wipes right off so they can make as many illustrations on you as they like!


TOTAL COSTS: About $13
$3 for 4-pack of dry erase markers from Staples
$3.49 for 1" binder from Staples
$3.99 for set of 10 page protectors from Staples
$2.49 1/4" for 8 yds. from Michael's
Hot glue and printer on hand

TOTAL AMOUNT OF TIME: About 15 minutes
But note that I only printed out 1 photo so if you have more photos, it will take more time to size them, grayscale, etc.

EASY-PEASY SCALE (1 super easy - 5 very difficult): 2 out of 5
The hardest thing is just making sure you don't get glue on the markers because then that glue sticks to the elastic and you can't pull it out. Other than that, piece o' cake! If you want to skip the elastic/hot glue part altogether, you can, but I wasn't able to fit the markers in the pocket very easily.

Sunday, October 20, 2013

State to State Love - A Perfect Engagement/Wedding/Anniversary Gift!

Philly/Kalamazoo Love
A friend of mine posted some photos of her engagement on Facebook and she had decorated her wall with cute sayings, photos, etc. One piece of art that I particularly liked she got from Near and Dear Designs on Etsy. $32 for a very cute piece of art, showing the home states of the bride and groom. I figured, why not try and do it for less?

Of course there weren't any instructions available so I made it up as I went along - feel free to tweak these however you see fit! The original design was all on 1 print so if you have a color printer and Photoshop, you're welcome to print it out there on an 8 1/2 x 11 sheet. I, however, wanted to make it pop just a little more:

Step 1 - Pick your states

Since I'm from Michigan and my husband is from Pennsylvania, I figured those would be ideal for this project.

Step 2 - Take outlines of those states and put them onto a Word doc.

I found perfect examples here: http://www.netstate.com/states/maps/(enter initials of state here)_maps.htm. So for Michigan, I put in http://www.netstate.com/states/maps/mi_maps.htm and clicked on "Blank Outline Map". For Pennsylvania, I entered http://www.netstate.com/states/maps/pa_maps.htm and did the same thing. Just click and drag those states onto a Word doc.

After you've dragged them to the Word doc, double-click on them and click on "Layout". Make sure they are "Behind Text". Also, you'll want your document to have .5" margins around the borders.

Step 3 - Decide where you want to place the states and the ampersand sign (&)

This took the longest for me, because I'm so picky. In the original design, the ampersand sign takes up a quarter of the entire page, the states are relatively the same size, they're close together, and not near the borders. For a perfectionist, this proved to be more difficult than I anticipated. Because the states I chose are so awkwardly shaped (damn you Upper Peninsula!), it took a while to figure out where I wanted to place them. After 45 minutes of moving, resizing, and moving them again, I finally got them where I wanted them. My ampersand was Size 450 and Times New Roman.

Step 4 - Print out your states on white cardstock and cut them out

I recommend states like Colorado or Wyoming...

Step 5 - Print out the ampersand only on whichever color paper you like

In the original design, the ampersand is lighter than the color of the paper. I had to go darker because otherwise it wouldn't show up at all. My color printer wouldn't print out white. Who knew?

Step 6 - Tape or glue the cut-out states to the paper with ampersand

Now I used Elmer's glue and I regret that decision. You can see the bumps under the paper where there was too much glue used so the state is not flush with the paper, which is why you might want to use double-sided tape. However, if your state has a bunch of little ins and outs, the tape might not be your friend.

Step 7 - Print out and cut tiny red hearts and tape/glue them to where your hometowns are on the states

Step 8 - Draw on a dotted line between the two hearts. Another mistake I did - doing it freehand, which allowed for my dotted line to look sloppy. If you can follow the curve of a cup or bowl, do that.

Step 9 - Put in frame!


TOTAL COSTS: FREE
I already had these supplies:

1. Colored cardstock
2. White cardstock
3. Glue (though you might want to use tape)
4. A 8x10 Frame
I bought the frame from Target over a year ago in West Hollywood and I think it cost somewhere in the ballpark of $15-$20.

TOTAL AMOUNT OF TIME: 1 hour, 30 minutes
45 minutes trying to figure out the layout of the states
10 minutes with printer issues
The rest of the time used to cut out states and hearts, glue them to paper, draw dotted line, and put in frame

EASY-PEASY SCALE: 3 out of 5
If you're not a tech-savvy person, placing the states and getting them the size you want on the Word doc might be a little more difficult for you, but not impossible. You're just putting them on the Word doc to see how big they should be before printing and cutting them out. If you're familiar with editing photos in a Word doc, this will be a piece of cake.