Showing posts with label scissors. Show all posts

Sunday, July 13, 2014

Turn your shampoo bottle into a caddy!

Have you ever walked out of your home forgetting something like your wallet or your keys? Have you tried to have a designated bowl by the door so you don't forget these things, but then end up with a bowl that contains random things like gum, baseballs, or markers? That's the problem we have at our place. So when I saw this post by ProjectSunlight (after seeing it on the Today show), I figured I'd give it a try! If you want to reuse and make your own caddy, here's what you'll need:

1. An empty bottle (you could use a shampoo or body wash bottle but the flatter and taller, the better!)
2. Scissors and/or a knife
3. Sandpaper
4. A marker
5. Paint, fabric (with spray adhesive), markers, whatever you want to use to decorate it!

Start by taking off the top of the bottle. This will be a little tricky, I'll be honest. I drew a line where I wanted to make the cut, however scissors just didn't do it. I had to use a large kitchen knife and saw at it like a piece of wood. Once you cut through the front of the bottle, the sides and back of the bottle will be a piece o' cake.


Next, draw a square on the back of the bottle about 1-2" from the top. Keep in mind you can always make the square bigger but not smaller. If you have doorknobs, you'll need a wide square.


Once you're done drawing your square, draw lines halfway down the side of the bottle (you can put your phone or wallet up against and see how much space from the bottom to give). Draw a line across the front of the bottle (it helps to remove any labeling you might have).


Just like before, take your scissors or knife and cut out the square and the lines.


Use sandpaper to smooth out the bottle, so you don't have stray pieces of plastic sticking out.


Now you're free to decorate however you want. I tried putting on fabric but it didn't look good at all. It's such an awkward shape, I just couldn't get the fabric to fit on the bottle so I opted for permanent marker instead.


Put it in your kitchen, by your front door, your bathroom, wherever you want, and enjoying using your new/reusable caddy!


TOTAL COSTS: Free!
Shampoo bottle, scissors, knife, sandpaper, and markers all on hand

TOTAL AMOUNT OF TIME: 30 minutes
20 minutes to draw, cut, and sand the bottle
10 minutes to decorate 

EASY-PEASY SCALE (1 super easy - 5 very difficult): 3 out of 5
The hardest parts would be cutting off the top of the bottle and making sure the hole was big enough for your doorknob. I had to make quite a few adjustments before I was able to slip it on. Other than that, this would be a great project for kids to help with, as they learn how to reuse items and can decorate the caddy to their hearts content!

Sunday, June 22, 2014

DIY No-Bake Candy Buttons!

If you were a child of the 90's (heck, if you were a child of the 1930s!) you're familiar with candy buttons, or candy dots. They're drops of colored sugar on a piece of paper. While they're a classic of everyone's childhood (ok, most people), they did have a couple of disadvantages:

1. You always had paper stuck to the bottom of them and you subjected yourself to eating paper.
2. You were stuck with the three flavors made - cherry, lime (the blue ones), and lemon.

But did you know you can make your own? With the help of some Jello and wax paper, you can pick any flavors you want (grape, orange, berry blue - you name it) and not have to deal with eating paper anymore!

Here's what you'll need to make your own candy buttons:

1. White card stock paper
2. Wax paper
3. Jello (I chose cherry, orange, and lemon)
4. Powdered sugar
5. An egg white
6. Scissors
7. Double-sided tape
8. Plastic bags (for however many flavors you're making. 3 flavors = 3 bags)


Start by cutting your paper into 2"x11" strips (1 sheet of paper should get you 4 strips).


Do the same for the wax paper - cut four strips of 2"x11" wax paper.


Use double sided tape to attach the wax paper to the card stock.


Mix together 1 1/2 cups of powdered sugar with 1 egg white in a mixer for 3-4 minutes.


Divide the mixture into as many bowls as you have flavors. Add 1/4 tsp. of Jello powder to each bowl.


Put each mixture into it's own plastic bag, cut off a bit of the corner, and squeeze the filling through the bag onto the wax paper. I did four rows of each color but however you want to divide it up is totally up to you.


Let them harden overnight and that's it! Your homemade candy buttons are ready to be eaten! The great thing about choosing the flavors you want is that you can color-coordinate with whatever holiday is nearby (red/white/blue for 4th of July, green/red for Christmas, and the ones I made look ideal for Valentine's Day).

Be warned: you'll have enough to make quite a lot! I made 8 paper strips and probably could have made 9!


TOTAL COSTS: About $12 to make 288 buttons, or 8 strips of 36 buttons
$.99/box of Jello
$2.49 for powdered sugar
$2.49 for a dozen eggs (but you only need 1 egg white)
$4.09 for double-sided tape
$2.09 for box of sandwich bags
Wax paper, card stock, and scissors already on hand

TOTAL AMOUNT OF TIME: About 40 minutes + overnight to harden
15 minutes to cut out the paper and wax paper strips (though I used a ruler and was very exact, which took time)
15 minutes to whip up the powdered sugar and egg white and to add the Jello powder
10 minutes to pipe on four sheets
Overnight to harden

EASY-PEASY SCALE (1 super easy - 5 very difficult): 2 out of 5
The only "difficult" part might be getting even-sized dots, if you're not used to piping. However, the more you do it, the easier it'll be and this project certainly gives you enough to practice with!

Monday, June 16, 2014

Yarn Dryer Balls - No More Dryer Sheets!

Want a way to save money, be eco-friendly, and also chemical-free when drying your clothes? If you don't have a clothing line handy, this is the next best thing: dryer balls. Now you could buy your own for around $15-$20 (Woolzies or West Elm, for example) but chances are, they're pricey AND they're made of plastic, which isn't good for the environment or for you because plastic releases chemicals when heated. If you make your own from wool yarn versus using dryer sheets, you'll decrease the drying time of your load because unlike dryer sheets, the dryer balls pull the moisture from the clothes while beating the laundry to make it softer. And if you're saying, "But dryer balls won't make my clothes smell fresh!"... well, add a couple drops of essential oil to the balls and voila! Problem solved!

Seriously, do you really need more reasons to make these? If you do, DIY Natural has a lengthy post on the benefits of making dryer balls. If I've persuaded you enough, you just need:

*100% wool yarn (one skein makes two balls, two skeins make four balls)
*One leg of a pantyhose (you know, that pair you've kept in your drawer because there's a run in the thigh but you can't bring yourself to throw it away because if you wear long skirts maybe no one will notice)
*Some string (I used embroidery thread)
*Scissors

Start by taking the yarn and wrapping it around your index and middle finger 10 times (give or take).


By grabbing the middle, slide the yarn off your fingers and wrap the yarn 10 more times around the middle.


Keep turning and wrapping until it starts to form a ball. The size of the ball is completely up to you.


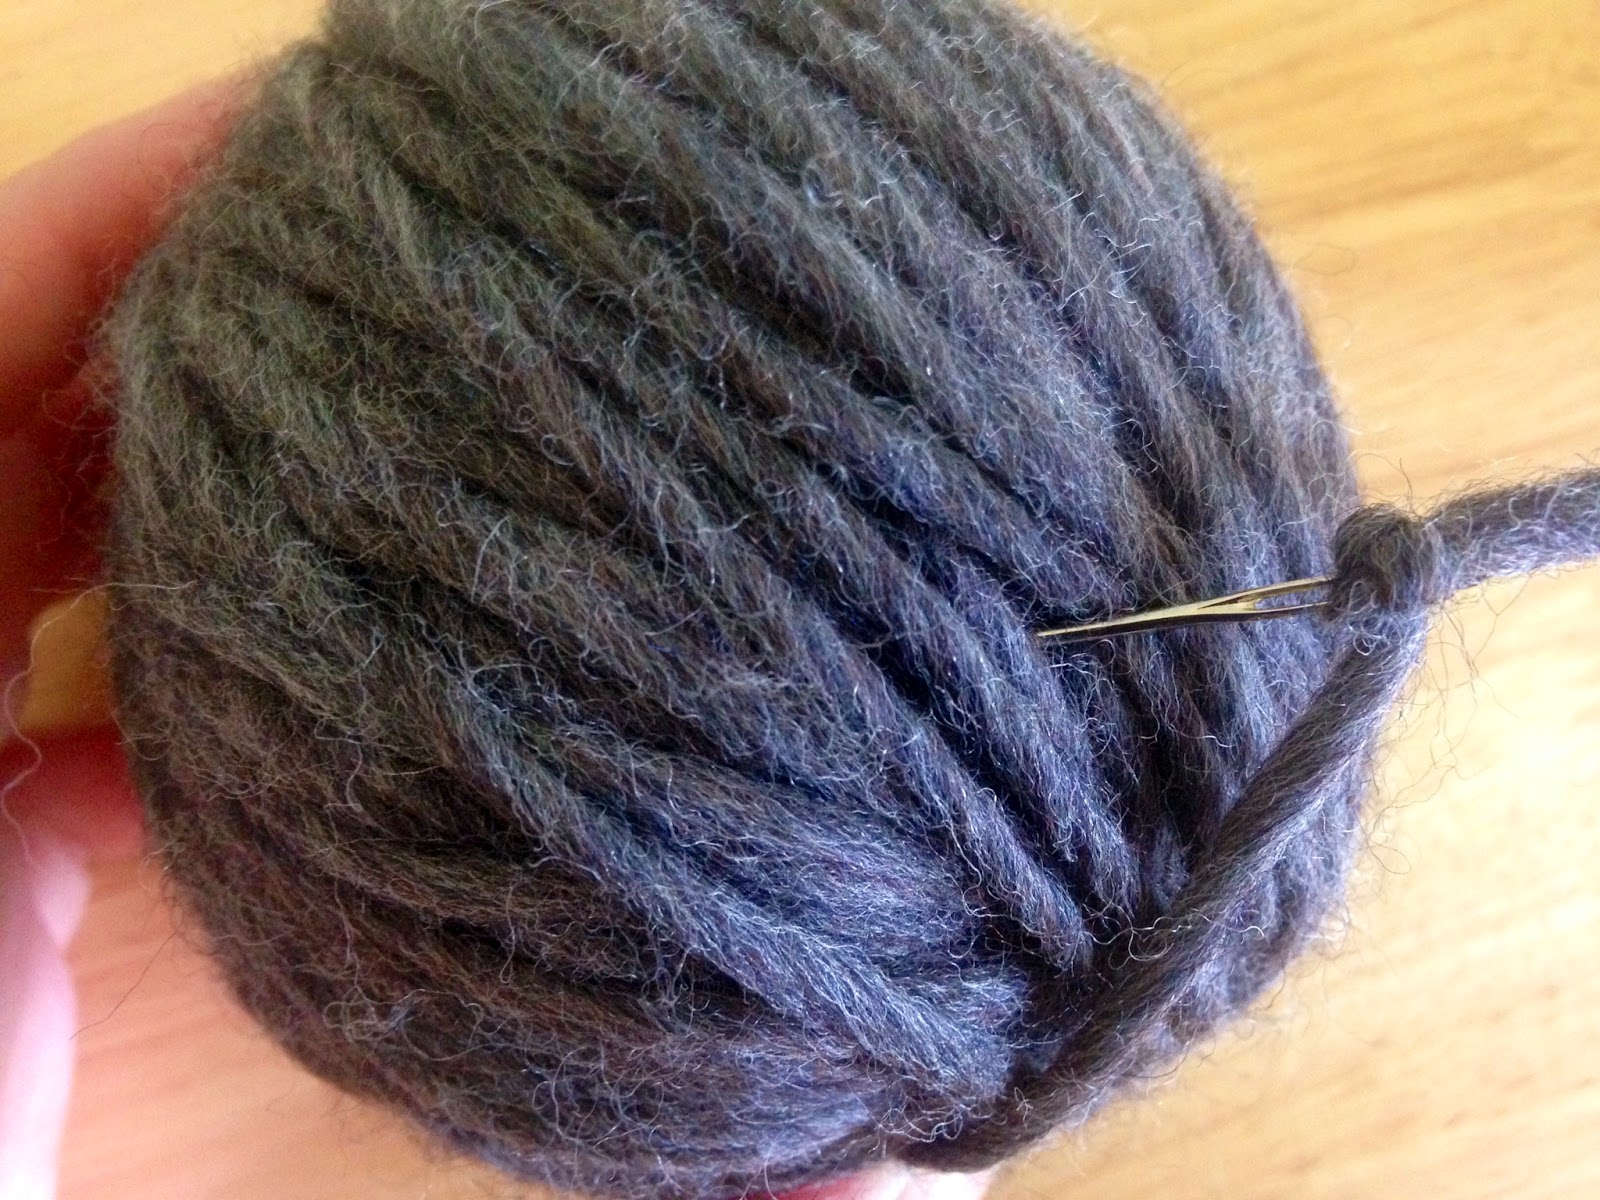
Once it's the size you like, either using a needle or your fingers, tuck in the end inside the ball.


Take your grandmother's pantyhose and slice off one leg. She'll never notice.


Stick a ball of yarn all the way down to the toes and tie a piece of string at the end, to separate it from the next ball of yarn. Do this for each ball, and then play with your yarn caterpillar. I was able to spin mine like a lasso. Freaked the cat out but it was fun.


Now the original post says to put these in with a hot wash and a cold rise cycle. That's way too fancy for my 1985 washing machine so I just put my caterpillar in on the "whites" load. When it comes to drying, put it on the hottest setting (again, depending on your dryer, it might just say "whites"). The original post says you might have to go through the washing/drying process 3-5 times but for me, the first time did it. I put it in another wash/dry, just to be safe, but the yarn strands weren't separating one bit.

Here what it looked like after the first wash/dry:


And here's the second wash/dry it went through. Not much of a difference, as you can see, just made it smaller:


Now they do shrink a bit. Before I put them in the washer/dryer, my balls of yarn ranged from baseball to softball size. Here are some before and after shot of the yarn balls next to a baseball and tennis ball to give you some frame of reference.

Before
After

So grab your mom's yarn (sorry Mom), grab your laundry, and go on with your eco-friendly self!


TOTAL COSTS: $14.37
$6.99/skein of yarn from Michael's (I used two skeins)
$.39 for embroidery thread from Michael's (but you could use string)
Old pantyhose and scissors already on hand

TOTAL AMOUNT OF TIME: About 2 hours
20 minutes to make four balls
5 minutes to make the pantyhose caterpillar
1 hour, 30 minutes to wash and dry the balls

EASY-PEASY SCALE (1 super easy - 5 very difficult): 1 out of 5
It's super easy, you could even have your kids help by holding onto the skein while you roll it into a ball!

Friday, April 18, 2014

How to Make a Felt Box

There always comes a time when you need a small box and you can't find one. Maybe you're giving someone a gift, or you need a place to put your jewelry or cufflinks, or maybe the Easter bunny has a great place to hide an egg! In my case, I was trying to find a creative DIY way to give baby onesies. So when I found this photo of felt boxes, I figured they were easy enough to make! And by golly, they are!

Make sure you have stiff felt, scissors, a pencil or pen to mark your measurements, and a hot glue gun, as you'll need a way to connect the sides together.

Pick two pieces of felt and cut one 9" x 9" (this will be the bottom of the box) and one 6 1/4" x 6 1/4" (this will be the top).


Lets start with the bottom. Mark every 3" around the square until you have 2 marks on every side.


Fold and crease the square into thirds both horizontally and vertically. Once that's done, you can either eyeball this or get your pencil/pen and draw the lines like you see on the squares below. Whether you draw the diagonal lines from inside corner to outside corner or from inside corner to halfway between the crease and the edge, it's up to you. I tried both ways and the boxes came out fine.


Cut where you made your lines and your square should look like this. The bottom is done!


Onto the top piece! Grab your 6 1/4" x 6 1/4" square and mark 1 1/2" on either side of every corner.


Just like with the bottom, fold and crease the square into thirds both horizontally and vertically. Again, you can either eyeball this or using your pen/pencil, draw lines like the ones you see below.


And cut out the triangles so your top looks like this.


Now comes time to assemble. Grab your hot glue gun, fold in one of the triangles, and apply glue to all of the edges of that triangle. Push the triangle into the square or rectangle piece and hold it until it's secure. Do this for all the triangle pieces until the top is complete.


 Do the same thing for bottom, fit the top on, and you're all set!


TOTAL COSTS: $6/pack (though you could find single sheets of stiff felt at Michael's for much cheaper!)
$6 for a pack of felt from Fiddlesticks in San Francisco
Scissors, hot glue, and pencil already on hand

TOTAL AMOUNT OF TIME: 15-20 minutes
It depends on if you measure everything out or eyeball it and cut without measuring

EASY-PEASY SCALE (1 super easy - 5 very difficult): 1 out of 5
This isn't hard at all, it's just a matter of cutting felt, folding it, and gluing the pieces together!

Monday, March 31, 2014

DIY State Necklaces

When I moved across country from the Midwest to LA, I missed the Mitten State for so many reasons. The seasons, the people, the food, the accents... you just can't beat it. So when I saw this post by VJuliet on how to craft your own state necklaces out of wire, I thought this would be a perfect way to show some state pride. However, I did also create a California one, since I do live here after all...

So it's quite simple, all you'll need is:

1. 22 gauge wire
2. Round-nose pliers (I did use my fingers but the pliers really help with sharp corners)
3. Wire cutters (or really sharp scissors)
4. Tape (masking you can reuse easily)
5. An outline of your state, printed out on card stock
6. A necklace chain, to wear your state with pride
7. Microsoft Word or Photoshop
First, find an outline of your state and using Microsoft Word or Photoshop, make the image 2" x 2". Print it out on card stock (as printer paper may easily tear during the process).

Next, make a small loop with the wire, as this will be at the top of your state. Make sure it's big enough for your chain to go through, or all your work might be for nothing!


Tape the loop to the top of your state and start bending around the outline! When you're done with a small section, put tape over it so it stays in place and doesn't change shape.


By the end, your paper should look something like this.


My first try was a bit sloppy, my second try I tried just the lower peninsula but I felt guilty about leaving da Yoopers out, but I finally got it down with my third try! If you live in a state like Wyoming or Colorado, this project might not be for you, unless you want a bunch of people asking why you're wearing a square or rectangle.


Surprisingly enough, California was much easier than Michigan! But take your time and if it doesn't work the first time, try again!


TOTAL COSTS: $3.99
$3.99 for 22 gauge wire from Michael's
Masking tape, card stock, and pliers on hand

TOTAL AMOUNT OF TIME: Depends on state
I took me 8-9 minutes for Michigan and 6 minutes for California

EASY-PEASY SCALE (1 super easy - 5 very difficult): 2 out of 5
If you use your fingers more than the pliers to bend the wire, your fingers will be sore, just as a heads-up. The more you do it, the easier and better they'll turn out.