Friday, May 30, 2014

Have You Washed Your Pillows This Decade?

Have you ever washed your pillows before? Not your pillowcases, the actual pillows? Apparently you're supposed to wash them 2-4 times a year but I can't say I've ever met someone who has done this (or least no one who has admitted to doing it). I noticed our pillows were getting a bit yellow (purchased from IKEA a 1-2 years ago) so I figured I'd try this method from OneGoodThingByJillee and see how well it works.

Here's what you'll need per wash (note: you'll probably want to double this and wash them twice):

* 2 yellowed pillows (so the load will be even in the machine)
* 1 cup of laundry detergent
* 1 cup of powdered dishwasher detergent
* 1 cup of bleach
* 1/2 cup of borax
* 3 tennis balls in socks or dryer balls like Woolzies (tennis balls are cheaper!)

Start by filling your washing machine with a 1/3 of hot water (or the "Whites" load, depending on what kind of machine you use). Next, add your laundry and dishwasher detergent, bleach, and borax. 
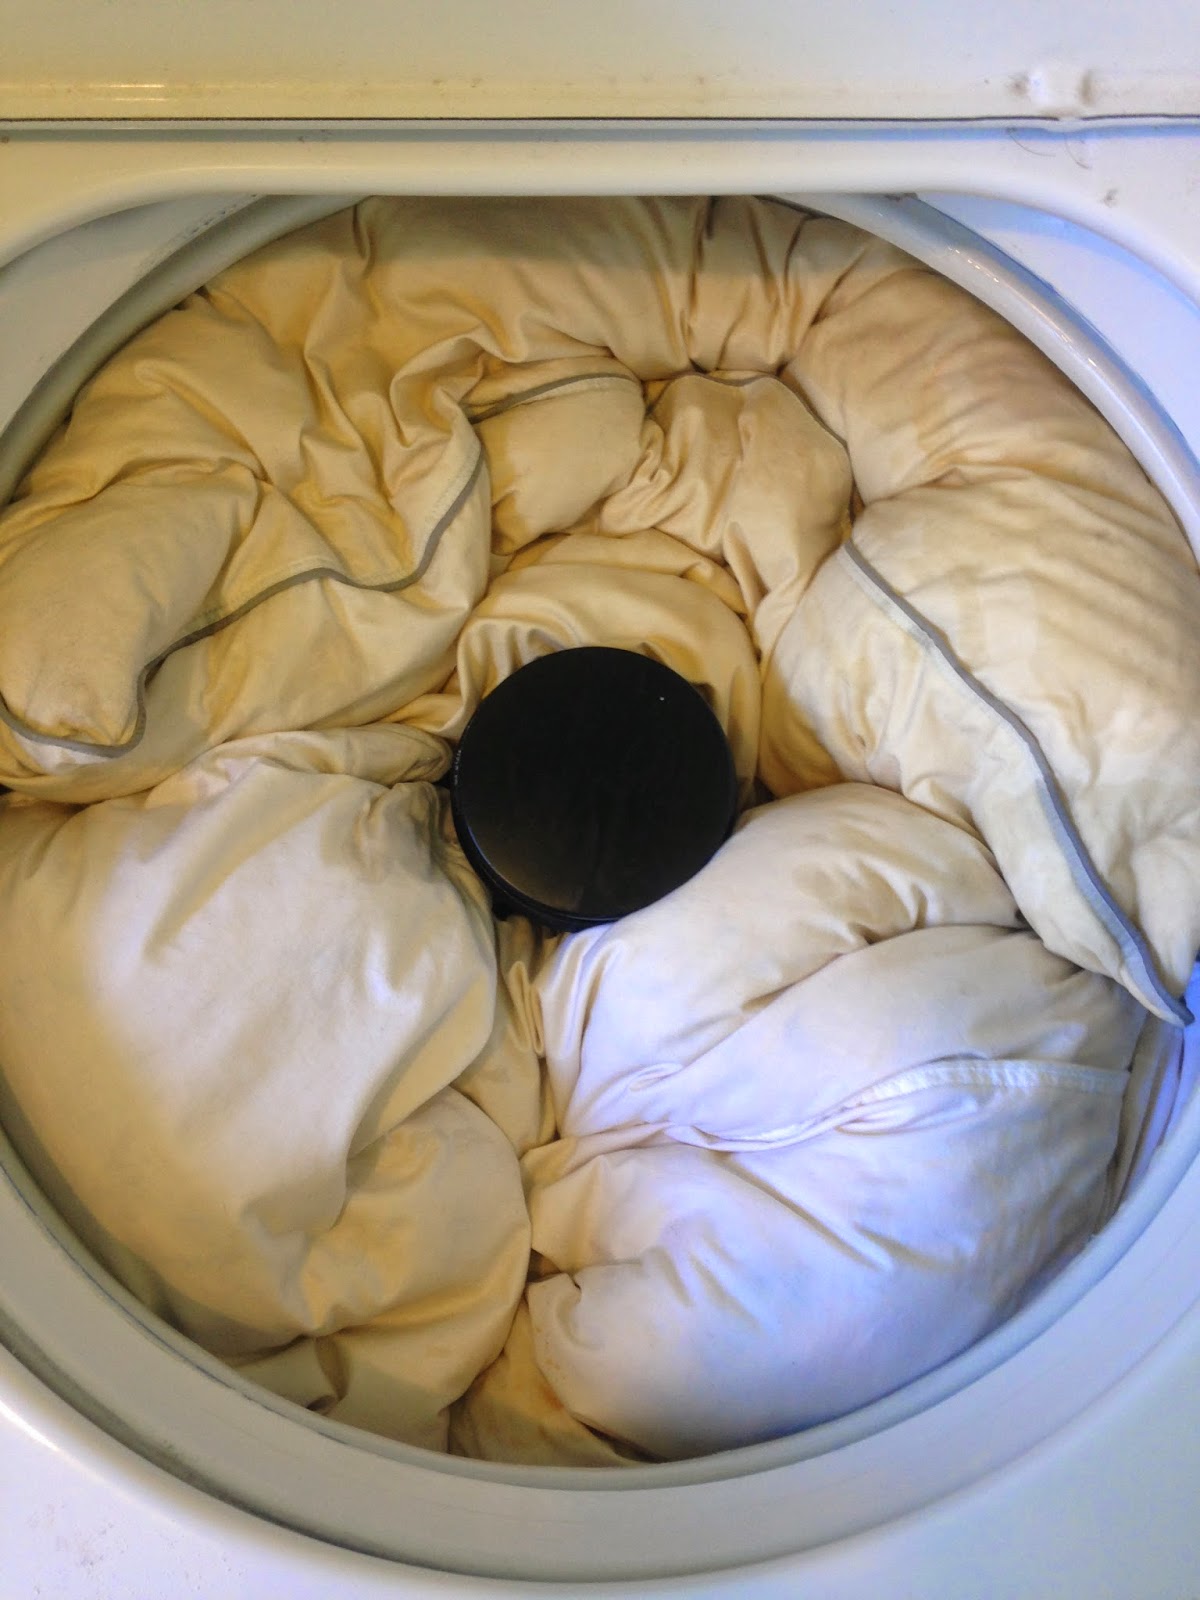
Fill the machine another 1/3 of the way with hot water before adding your pillows, to ensure the detergents/borax have completely dissolved.


Add your pillows on either side of the machine and let it fill the rest of the way. Once they've been agitated for a few minutes, the original post recommends flipping the pillows over but the water is really freakin' hot so if you do decide to do it, be careful! 

You can either run the washing machine twice or have it set to do a 2nd rinse cycle (again, depends on what kind of machine you're using).

Before washing
After washing

While the pillows are washing, prepare your dryer balls. Just stick a tennis ball inside a clean sock, tie the end, and you're done!


Note: if you do not hide these from your cat, they will think these sock balls are toys and will give you the death stare if you try to take them away. You have been warned.

"Don't even think about it, bub."
Once the washer is done, throw the pillows in the dryer with what dryer balls you were able to steal from your furry roommate. The original post recommends using the air cycle if you have down or feather pillows and the low heat setting for synthetics.


Well, I'm not rich and I don't have a fancy dryer, so I just set it to the "Whites" dry, which I didn't realize until after the fact means high heat (both are down pillows). It didn't matter, though, because after an hour on high, they were still damp! 

So after waiting a day, I tried this all over again. They were still a bit yellow so I crossed my fingers the second wash would make them white-ish again!


 Here's a before of some stains...


And here's the after... not great, but better than before!


I also decided to have these dry for 2 hours instead of 1 and while they weren't nearly as wet as the day before, they were still a little damp so I had no choice but to set them out to dry.


This certainly isn't a miracle solution but it's better than nothing. Go to your bedroom right now, take off those pillowcases, and give your pillows a long, hard stare. If they're starting to turn yellow, throw them in the washer right now. If it has been years... well... you might be better off buying new pillows altogether.

TOTAL COSTS: About $20
$5.49 laundry detergent from Vons
$2.99 for powdered dishwasher detergent from Vons
$2.29 bleach from Vons
$5.46 for 20 Mule Team Borax on Amazon (realized it was cheaper in the store after I bought it online! Note this is for about 5 pounds worth and you're only using 1-2 cups)
$2.99 for 3 tennis balls from Walgreens

TOTAL AMOUNT OF TIME: 4 hours
1 hour for 2 washes (30 minutes per wash)
3 hours for 2 dries (1 hour on Day 1, 2 hours on Day 2)

EASY-PEASY SCALE (1 super easy-5 very difficult): 2 out of 5
It's not difficult to do a load of laundry but it is cumbersome to carry all the boxes (the detergents, bleach, and borax) down to the laundry room. However, I do NOT recommend putting all the ingredients in a plastic bag for easy transport. Why? The bleach will harden the detergents and borax and will make it more difficult to dissolve in the washer (and it won't all come out of the bag). I know, it'll suck carrying all of those boxes to the washer, especially if you don't have a unit in your home. If you must, put everything in a plastic bag except the bleach and that will help. This is not a foolproof solution to getting white pillows but at least it'll be better than what you had before!

Tuesday, May 27, 2014

Apple & Applesauce Whole Wheat Bread

I can't tell you how many times I screwed up this recipe... ok, four times. FOUR different mistakes I made throughout and believe it or not, it still came out delicious. So if I can make error after error and still have this come out moist and delectable, then you certainly can too if you heed my advice! I found this recipe on HungryHealthyGirl and some of the mistakes I made were due to her lack of detail in the instructions so I'll try to go into more detail than she did.

So first, grab the following for your...

Apple mixture:
1 cup (1 large of 2 medium apples) - peeled, cored, and grated
1/4 teaspoon of cinnamon
1 Tablespoon of honey
1/2 teaspoon of lemon juice

Dry ingredients:
1 teaspoon of cinnamon
1 1/2 cups of whole wheat flour
1 teaspoon of baking soda
1/4 teaspoon of nutmeg
Pinch of allspice
1/4 teaspoon of salt

Wet ingredients:
1/4 cup of honey
1 1/2 cup of unsweetened applesauce
1/2 cup of brown sugar (I know brown sugar isn't wet but you'll be adding this with your wet ingredients. I used my homemade brown sugar recipe)
2 Tablespoons of coconut oil
1 egg
2 teaspoons of vanilla (another homemade recipe)

First, preheat your oven to 350 and grease a 9x5 bread pan. So far, I didn't make any mistakes!


Next, prepare your apples. The original post recommends peeling, coring, and grating the apples. Well, don't use one of these machines and peels, cores, and slices. Why? Because then you're stuck trying to grate a bunch of sliced apples, you end up getting chunks instead, and you'll probably scrape the back of your fingers against the grater which hurts. A lot. So what I recommend is peeling your apples and then grating. Don't worry about coring because you'll know when to stop grating. Trust me, it'll be a lot easier!


Add your cinnamon, honey, and lemon juice to the apples in a small bowl and set aside.


Next, combine all of your dry ingredients (cinnamon, whole wheat flour, baking soda, nutmeg, allspice, and salt) in a medium bowl. I added the brown sugar to the dry ingredients instead of the wet but eh, what can ya do?


Finally, combine all of your wet ingredients (honey, applesauce, brown sugar, coconut oil, egg, and vanilla) in your stand mixer. I don't know what I was thinking but I forgot to add both the vanilla and the egg until it was already in the oven (at which point I immediately pulled it out = twice = and added them in!)


Add your dry ingredients slowly in with your wet ingredients and blend on low without over mixing (which I also didn't do... I had that mixer on high, just goin' to town!)


Fold in your apples and once they're combined, transfer to your bread pan.


Bake for 55 minutes and enjoy the aroma that will transfer from your kitchen to the rest of your house. It will smell ah-may-zing.

Once it's out of the oven, let it cool for 20 minutes before slicing and serving. Even though mine did have chunks of apple in it, I didn't mind. It was really moist, and I could definitely taste the cinnamon, but I felt like it needed something else. More nutmeg maybe? More allspice? Maybe more salt? I'm not an expert taste-tester so I can't say, but it still tasted good nonetheless, despite my best efforts to ruin it!


TOTAL COSTS: About $49 (but that's if you don't have any of the ingredients - most prices from Vons)
$1.99/lb. for apples
$4.79 for cinnamon
$4.29 for honey
$2.29 for lemon juice
$4.39 for whole wheat flour
$1.59 for baking soda
$3.98 for nutmeg
$6.69 for allspice
$.99 for salt
$2.59 for unsweetened applesauce
$1.99 for store-bought brown sugar
$5.99 for coconut oil at Whole Foods
$2.49 for eggs
$4.99 for store-bought vanilla 

TOTAL AMOUNT OF TIME: 1 hour, 40 minutes
30 minutes of prep work (original site says 10 minutes! Ha!)
50 minutes to bake
20 minutes to cool

EASY-PEASY SCALE (1 super easy - 5 very difficult): 2 out of 5
It's not easy to peel, core, and grate apples and her instructions weren't very clear at times, but overall it's a piece of cake... errr... bread... Just break the recipe up into three sections -- apple mixture, dry ingredients, and wet ingredients -- and I guarantee you'll do just fine!

Monday, May 26, 2014

Pinata Cookies for Memorial Day or 4th of July!

Ok, you're probably wondering, "What the heck is a pinata cookie?" Well, you know what a pinata is, right? It's something that's decorated and filled with candy that once hit in the air with a stick, candy falls out for children to collect. Well, similar idea... it's a cookie with candy inside that falls out once cracked open! Tablespoon came up with this recipe but I added a few of my own recommendations.

First, gather your ingredients:

1. The original post used 3 tubes of 16.5oz of Pillsbury Sugar Cookie Dough but I found it was cheaper to buy 2 containers of Betty Crocker Sugar Cookie mix and have the eggs and butter for them. It'll come out to 24 cookies total.
2. Mini M&Ms
3. Powdered sugar & milk for the frosting in between the cookies (unless you have cake frosting on hand)
4. Cookie cutters
5. Food coloring
6. (optional) Flour

Start by preheating your oven to 350 and making your dough (or taking the tubes) and splitting them evenly into three bowls.


Color one bowl with red and the other bowl with blue food coloring (so they can be patriotic cookies!)


I recommend adding 1/4 cup of flour into each bowl, otherwise the dough won't have a great consistency for rolling out.


Now there are many ways you could combine these. You could take a little bit from each bowl, ball them up together, and roll it out to make a pretty marble (NOTE: if you do this too much, your dough will just taste like food coloring and come out purple!)


Another way is to take all three colors, set them next to each other, and roll them out.


Take your big cookie cutter, cut out your stars, and lay the cookies out on cookie sheets with parchment paper. You'll need 3 big cookies to equal 1 pinata cookie (so there's a top, a middle, and a bottom). For the middle cookie, cut out a piece where the M&M's will eventually be housed. I only had stars so I just cut out a little star but it could be any shape, since no one will see it. The flatter/thinner you can make the cookies, the better!


While these are baking, separate out your blue and red mini M&M's from the rest of the batch.


To assemble the cookies, start by laying out your top, middle and bottom cookies.


Next, flip over the bottom layer cookie so the bottom is facing you.


Add your frosting around the edges (I used 2 cups of powdered sugar with 8 teaspoons of milk which equalled WAY too much frosting so you might want to just use 1 cup of powdered sugar with 4 teaspoons of milk).


 Lay the middle layer cookie on top of the frosting.


Add frosting around the edges again and add your M&Ms to the center.


Place the top layer cookie on top and voila! Your pinata cookie is complete!


Now keep in mind... this is three cookies in one. It's a lot 'o cookie. And you won't be able to get many M&M's in one cookie (the photo below is for presentation only so don't let photos like this fool you!). Still, they're moist and there's candy and really, what more could you want?


TOTAL COSTS: About $13 (if you don't have any of the ingredients - prices from Vons)
$5 for 2 packages of Betty Crocker sugar cookie mix
$3.99 for mini M&Ms
$2.49 for powdered sugar
$2.29 for milk
Cookie cutter and food coloring already on hand

TOTAL AMOUNT OF TIME: 3 hours, 15 minutes to make all 72 cookies or 24 pinata cookies
50 minutes to prep the dough
15 minutes to separate out the M&Ms
1 hour, 50 minutes to bake
20 minutes to assemble them all

EASY-PEASY SCALE (1 super easy - 5 very difficult): 3 out of 5
They take a long time to make, between the mixing of the colors, the separating of M&Ms, the cutting out the stars and the middles... it's only worth it when you see the look on people's faces when they realize they're getting three cookies in one!

Sunday, May 25, 2014

Strawberry Margarita Jello Shots

A friend of mine alerted me to this video about how to make strawberry margarita jello shots and I figured they probably taste awful or they're too much work for not much in return. Since it's the holiday weekend, I figured it was a good excuse to give them a shot... see what I did there? Shot? Ahem...

Here what you'll need:
1. Strawberries (the more, the better!)
2. Strawberry jello
3. Tequila
4. Triple sec
5. An ice tray and a sharp knife
6. Kosher salt and lime (optional)

Start by boiling a cup of water and adding your strawberry jello.


Once the Jello powder has dissolved, take it off the heat and add 3/4 cup of tequila and 1/4 cup of triple sec (I used orange triple sec but you could use any flavor you want).


Now it's time to prepare your strawberries. Wash them and cut off the very bottom so they can stand straight up.

Cut out the stem and try to make the inside of the strawberry as hollow as possible. You have to be really careful or else you might accidentally cut a little hole in the bottom!


 Once your strawberry is ready, place it in an empty ice cube tray. Do this for all of your strawberries.


Pour the mixture from the pot into something with a spigit (like a measuring cup) and pour into each strawberry. I screwed up two strawberries but ended up with 24, which was perfect for my ice tray! Still, I recommend you have at least 3x the amount of strawberries or you're going to have a lot of leftover jello/tequila/triple sec mix!


Set in the fridge for 4 hours (or overnight, like I did). If you like, you can coat the rim of the strawberry with kosher salt but trust me, coming from someone who likes salt on their margaritas, you do NOT want to do it. The strawberries just aren't big enough and the salt overpowers the taste.


Speaking of taste, you think you can taste the tequila? Nope. Not at all. However, it's really less than half of a shot so that's probably why. So if you plan on getting drunk off of these, you'd have to eat a lot of strawberries and even then, you'd probably get sick of strawberries before you ever felt a buzz. Still, they're quite delicious and an excellent source of Vitamin C!

TOTAL COSTS: About $22 (if you don't have any of the ingredients - prices from Vons)
$3.99/lb. for strawberries
$.99 for jello
$11.10 for tequila
$6.29 for triple sec
Ice cube tray and knife already on hand

TOTAL AMOUNT OF TIME: 20 minutes + overnight (but you could have them chill for 4 hours instead)
20 minutes to boil water and prep all the strawberries
Overnight to harden

EASY-PEASY SCALE (1 super easy - 5 very difficult): 2 out of 5
The only "difficult" things about this might be cutting the strawberries so you don't have holes in the bottoms or sides and pouring the mixture inside the strawberries -- it'll get all over the ice cube tray, but that's what it's there for!