Friday, November 8, 2013

Cleaning Old Cookie Sheets? Don't Waste Your Time.

Cookie sheets, am I right? I'm sure you have a few... they're brown (or black!), they're dented, they don't look at all the way they did when you first bought them. Have you ever tried to make them look the way they used to? Well, this post by One Good Thing by Jillee claims with two ingredients - baking soda and hydrogen peroxide - you can make them look shiny and new once again.

The original post shows it being done to the back of cookie sheets. I don't care about the back because that's not the side that you put cookies on! So I decided to try this out on the front side, the side you would put cookies on.

Step 1 - I found an old cookie sheet


Step 2 - I poured baking soda over cookie sheet

Step 3 - I then poured hydrogen peroxide on top of baking soda

Step 4 - Finally I poured baking soda on top of hydrogen peroxide

Step 5 - Then.. the waiting game.

Now I wasn't sure how long to wait (the original post said 2 hours) so I broke up the pan into fourths so you can see what happens after 1, 2, 3, and 4 hours. Note that I did not use a sponge or scrub it, as the original post said "Minimal rubbing with my fingers was required."

Hour 1: I just wiped off the baking soda with a soapy paper towel... and found no difference whatsoever.

Hour 2: Still no difference


Hour 3: Sigh... still nothing...


Hour 4: It looks exactly. the. same.

So another case has been solved of "What's on Pinterest Should Stay on Pinterest and Not Be Tried At Home!"

TOTAL COSTS: About $3.50
$1.49 for baking soda from Vons
$1.99 for 32 fl. oz of hydrogen peroxide from Vons

TOTAL AMOUNT OF TIME: 2-4 hours
Depending on how much time you want to waste

EASY-PEASY SCALE (1 super easy - 5 very difficult): 1 out of 5
It's so easy you'll wonder why you did it at all after reading this post!

Thursday, November 7, 2013

Hanukkah Candles Picture Frame

So I found this post by Felt So Cute and thought it was very cute and easy... but I'm not a teacher and I don't have kids so a crayon picture frame seemed wrong. So then I thought, "What if I exchanged crayons for Hanukkah candles?" Good Hanukkah decorations are hard to come by so here's something I thought would make a great gift!

I'll let you be the judge.


First, gather your supplies. Hanukkah candles, scissors, a hot glue gun, a picture frame, and a marker (though I used my finger nail). Note: kittens probably won't help in this project.

Then decide how you want to lay out the candles. Do you want to keep the wicks on or off? Measure the candles with either a marker or your finger nail and shorten the candles with a knife or saw but I found scissors to work just fine, as long as you cut fast. If you don't, the wax will chip and break off very easily and it's not pretty...

About halfway through I realized this project might not look as good as I thought it might. But I'm not one to stop halfway through anything so I kept cutting and gluing, cutting and gluing. Note that the candles won't be perfectly aligned so you might see some of the back of the frame.

When it was all done, I showed it to my husband and we both agreed - it looked... ok. Ahh well... I'd say this would be a fun project for kids but considering it involves sharp objects and hot glue, you may be better off just... not... doing it... at all...

Moral of the story: not every Pinterest project is worth doing.


TOTAL COSTS: About $17
$1.99 for 3x5 wooden picture frame from Michael's
$14.99 for 135 hanukkah candles from Bed, Bath & Beyond
Hot glue already on hand

TOTAL AMOUNT OF TIME: 50 minutes

EASY-PEASY SCALE (1 super easy - 5 very difficult): 2 out of 5
It's not a difficult project, you're just shortening the candles to fit on the frame and hot gluing them on. The hard part... is making it look good!

Wednesday, November 6, 2013

Autumn DIY Candlesticks

I found a couple of easy, DIY candlestick ideas and wanted to share them with you. They're quick, easy, and festival for Autumn!

Trace candle around top

Place candle on top of apple
The first one comes to us from Indulgy - all you need are apples, a knife, and tea lights. Simply place the tea light on top of the apple, trace around the candle with either a marker or the knife, and cut about 1-1 1/2" into the apple (I cut about 1" into the apple - see below for results). Place the candle in the apple and you're good to go!

Note that the apple will turn bad after a couple hours but if you want to delay the browning, simply spray lemon juice inside the apple. This is not a long-term candle holder but certainly festive!

Don't use Elmer's glue -
it doesn't work!
 The second one comes to us from DIY-Craft. Now this one was a bit tricky for me because I don't live in an area with any trees, believe it or not. Luckily, I took a recent trip to San Francisco where they actually have things called "nature" and "parks" so I was able to pick up many twigs and sticks. First things first - find a candle holder that does not curve in (like those from IKEA). I found an old Glade candle holder and used that.

You may see glue in between
the sticks and that's ok!
Second, grab your hot glue gun. I tried using Elmer's glue and it doesn't work. Yes, you might see the hot glue in between the twigs but I don't know that many people who have glue for glass on hand.

Third, make sure your twigs are the same height as the candle holder. I wouldn't make them any taller, just to be safe. You don't have to glue down the entire twig (there were times I just glued the top or bottom to the holder and it worked just fine).

Give it some time to dry completely, stick a candle in there (I recommend a tea light since it's small and less likely to cause a fire accident), and enjoy your new candle holders!

The deeper the cut in the apples, the lower the candles will be!

TOTAL COSTS: Free!
If you have apples, a candle holder, a hot glue gun and trees nearby, it can be free for you too!

TOTAL AMOUNT OF TIME: Less than 5 minutes for apple holders, 45 minutes for twig holder 
It may be more or less time, depending on the size of your candle holder and how many twigs you use

EASY-PEASY SCALE (1 super easy - 5 very difficult): 1 out of 5
A great activity to help gussy up your home for Autumn, especially around Thanksgiving. I wonder what gourd candleholders might look like!

Tuesday, November 5, 2013

Homemade Bath Crayons... Or So They Said...

I saw these on Pinterest and thought they would be fun for any kid to have during bath time (or any adult for that matter!). Seemed simple enough:

1 bar of Ivory soap
Food coloring
Warm water

Shred soap into containers or
measuring cup
Soap will collect under grater!
So I got to work! The original post says 1C of shredded soap but 1 bar is practically 1C (maybe a liiiiitle more) so just grate the entire bar. Note that yes, your grate will be covered in soap (see right) and may cling to the back, so be sure to shake it out. If you want to skip a step, you could grate the soap into the containers you're going to use to add the food coloring, but it might get a little messy.

Once shredded, and divided into the containers you'd like to use, add the food coloring. I didn't know how much to add so I did 10 drops for each color.

Separate into containers
Now here's where I think I messed things up, so take note. It didn't say how much warm water to add so I just added a 1-2 second amount to each container, which was too much because it was very watery. The only one that didn't end up be watery was the red soap (I guess I had more soap in that container than the others!), so I was able to mold that into a heart. The others I decided to transfer to an ice tray and stick in the freezer for a while, to become a bit more solid.

So remember: keep a very watchful eye on how much water you add. It should be less than you think it needs, and mold the soap from there!

After 30 minutes, I tried the molded soap I left out (red) and while it worked, per se, it started falling apart in my hands.

After an hour and 10 minutes, I took out one of the soaps from the ice tray:


And I tried to draw on the tiles... yeah, apparently when they're cold, it's like writing with ice cubes. What's that M&M saying? "Melts in your mouth, not in your hand"? Well, the slogan for these would be, "Barely gets on the tile, falls apart in your hand."


So moral of the story is: if you're going to try these, don't expect it to look like the photo, prepare for a bit of a mess, and use very little water when molding the soap! Your kids will still have a blast with it... as long as it doesn't fall apart before they can get their hands on it!

TOTAL COSTS: $2.69 
$2.69 for a 3-pack of Ivory soap from Vons
Already had food coloring on hand

TOTAL AMOUNT OF TIME: 20 minutes (or 2 hours if you stick the in the freezer!)
5 minutes to grate soap
15 minutes to put in containers, add color and water, and form

EASY-PEASY SCALE (1 super easy - 5 very difficult): 2 out of 5
You just want to keep an eye out for how little water you add to the mixture. Other than that, you should be good to go! Let the kids help make the molds and have fun!

Monday, November 4, 2013

2 Fast and Fun Projects with Chalkboard Liner!

Different chalkboard projects float around Pinterest but I couldn't find many involving chalkboard liner so here are two fast and fun projects you can do!

Here are the instructions from the inside of the liner (take note of what you can't use it on):


Project #1 - The New Year's Eve Jars

It's quite simple: find a jar and starting on January 1st, start putting little things in it. Movie tickets, matchbooks, seashells, wine corks, jewelry, notes, whatever you want. Do this throughout the year and come December 31st, open the jar and see everything that happened that year. Best part? You can keep the jars and open them anytime you want! Maybe if you have a kid, they'll be able to open the jar from the year they were born!

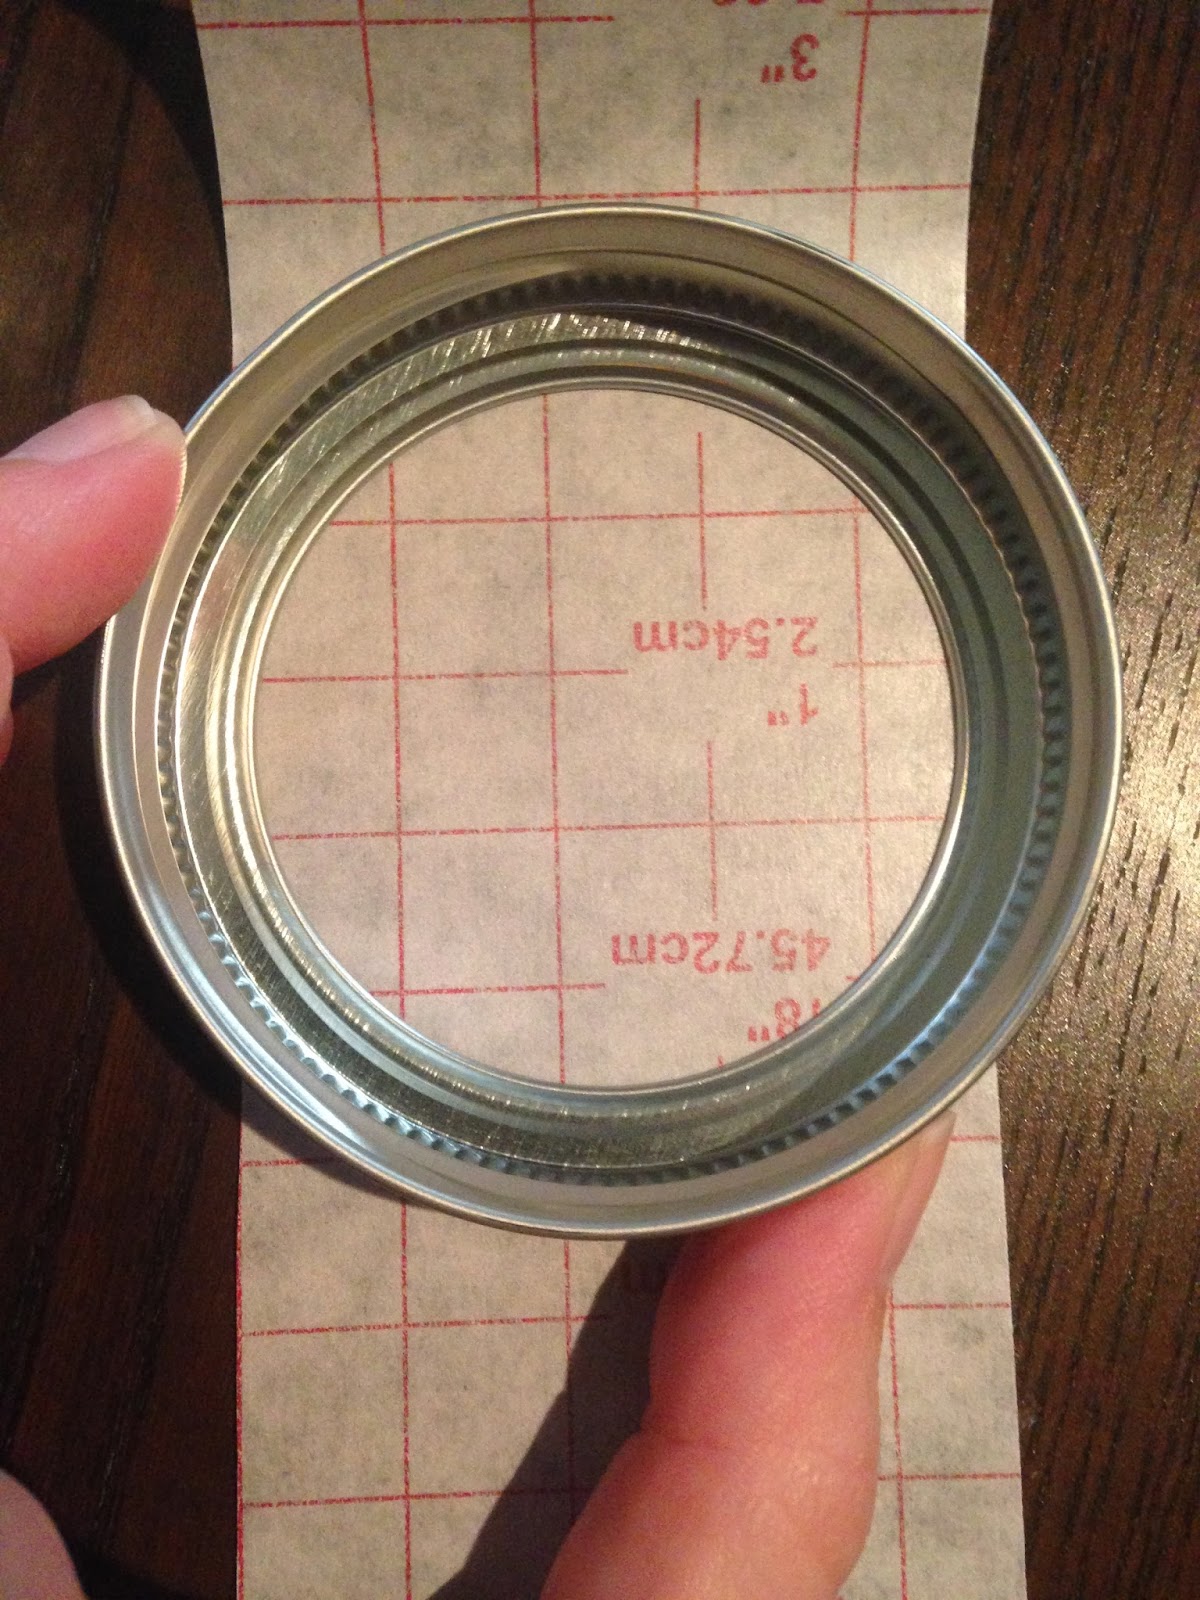
I found a Smuckers jam jar was way too small so I upgraded to a 32oz mason jar. Where does the chalkboard liner come in? You can label the top! Just take off the lid, put it on the back of the chalkboard liner, and trace around the edges. Cut out the circle you just drew, take off the backing, and stick it to the top of the lid!


Note that you may get bubbles on the top. Don't try to rub them out, it doesn't work. Trust me. Simply lift up the liner and place it back down on the lid to get the bubbles out. Once the lid is back on the jar, you're done! Just grab your chalk to label the top and start filling it with memories!

Another option is to label jars and fill them with school supplies - a great option for the teachers out there who try to keep their classrooms organized!


Project #2 - Picture Frame Turned Message Board

I had a great frame that I wanted to use for something but I broke the glass into a million pieces. Instead of going out and buying a new piece of glass, I decided to cover the back panel of the frame with chalkboard liner and turn it into a message board! It's as simple as it sounds - lay out the back panel on the liner paper, cut out however much you need to cover the back panel AND 1 cm around the edges, remove adhesive backing and cover the panel. Put it back in the frame and voila! You now have a message board you can cover with whatever you like! Grocery lists, calendars, schedules, notes to your loved ones - whatever you want to put, all you need is some chalk and you're good to go! Instructions for how to make a chalkboard coffee mug like the one in the photo can be found here.

TOTAL COSTS: $6
$6 for 6' on Amazon but it looks like it has gone up to $7
Mason jars and picture frame already had

TOTAL AMOUNT OF TIME: Less than 5 minutes
Really, you're just cutting out the liner and sticking it on whatever you like!

EASY-PEASY SCALE (1 super easy - 5 very difficult): 1 out of 5
It's something you could do in your classroom and even get the kids involved for DIY projects at home!

Saturday, November 2, 2013

How to Fold a Fitted Sheet

Are you as tired of folding fitted sheets as I am? Well, after watching about 6 different videos on how to fold a fitted sheet and failing 5 times, I finally figured it out! My arms are killing me but trust me, once you figure it out, you're going to feel very good about yourself!

The best video I can suggest is this one from Martha Stewart's show, mainly because she's expressing her pure frustration, which is what you'll be feeling at first, I assure you. But trust me, give it at least 5 tries and I promise you, you'll get it. Here's what I can offer for help... photos. I'm not going to do a video because I was getting everything backwards with the videos and it was very confusing.

Step 1 - Flip a fitted sheet inside out, so the seams are on the outside. Put your right and left hands in the corners on a long side. This is what your left hand should look like:
Step 1 - Stick hands in corners inside out

Step 2 - Bring your hands together and bring the inside out sections together, flipping over the right side onto the left
Step 2 - Put right side on top of left side

Step 3 - The correct side of the sheet should now be showing on your left hand. Shake out the sheets but keep your left hand under the sheets.
Step 3 - This is what your left hand should loo like

Step 4 - Put your left hand on your chest and go along the elastic side closest to you with your right hand. Take the corner along that edge and flip onto the left hand, this time with the inside out side sticking out. If your left arm is getting tired now, you're doing it right!
Step 4 - Go along elastic side, flip corner onto left hand
so inside seems are now showing

Step 5 - Grab the final corner and stick on top of the left hand with the correct side showing. When you hold it up, there should be two pieces inside each other and two hanging down like this -
Step 5 - Put final corner on top with correct side showing.
Note the two sheets inside each other and two hanging down

Step 6 - When you lay it down on a bed, the elastic sides will make an "L"
Step 6 - Lay it down on a bed with elastic sides away from you

Step 7 - Fold over the left elastic side into thirds
 

Step 8 - Fold down the top into thirds


 And you've done it! How'd you do?

TOTAL COSTS: Free!
Unless you get so frustrated you rip the sheets into shreds and need to buy new sheets...

TOTAL AMOUNT OF TIME: Less than 5 minutes
It depends on how quickly you get it but the more you do it, the easier it'll be.

EASY-PEASY SCALE (1 super easy - 5 very difficult): 3 out of 5
You'll be really frustrated at first but I assure you it'll get easier! Good luck!

Friday, November 1, 2013

T-Shirt Scarf

Today's post comes courtesy of a friend who recommended I try 4 Little Furgusons post about making your very own t-shirt scarf. Now I'll admit, this looked a lot easier to make than it actually was. At first it seemed straight forward - grab a t-shirt, cut off the top and bottom, cut some strips and ta-da, you've got a scarf! Alas, here are a few mistakes I made that I hope you'll learn from:

Take One: The Shredded Scarf

For me, it wasn't clear how I was supposed to fold the shirt (left side to right side or top to bottom) so I folded left to right, having 1" folded over on the left side and cut the right. Some strips broke during stretching so they hung down and I had two uncut sections, not just one. One uncut section was at the bottom and the other behind my neck. This is what happened and the video above shows how you can make this:


1st Attempt

Take Two: The Lion's Mane Scarf

This time I folded top to bottom and folded over 1" from the top and cut the bottom into strips. This is what happened and the video above shows how you can make this:
2nd Attempt
Take Three: The T-Shirt Scarf (third time's the charm!)


I didn't fold it in half but I did fold over 1" on the right side of the t-shirt and cut from the left side.

3rd Attempt - I finally got it!
Here are some things to keep in mind:

#1 - Practice first on a t-shirt you don't like and don't necessarily want to use as a scarf. That way, you can make your initial mistakes and not be concerned about what the final product looks like.

#2 - Use fabric shears, not paper scissors! If you use paper scissors, your hand will definitely cramp up halfway through!

#3 - Cut any tags that might be inside the shirt on the sides before you start cutting your strips. Also, you may have fuzzy pieces fly off so keep a lint roller handy!

TOTAL COSTS: Free
Just need some shirts and scissors and you're all set!

TOTAL AMOUNT OF TIME: Between 15-30 minutes, depending on what kind of scarf you end up making.

EASY-PEASY SCALE (1 super easy - 5 very difficult): 2 out of 5
Hopefully I made it easier for you to determine what you want your scarf to look like so you can start snipping away!