Showing posts with label toothpick. Show all posts

Tuesday, July 1, 2014

How to Bake a Brownie Inside an Eggshell

When I first joined Pinterest, this was one of the first posts I laid eyes on and I've been too intimidated to try it until now. I was intimidated partially because a.) it's in a foreign language  and  b.) it would require converting everything from grams to cups but those were easy feats to conquer. I've converted everything for you here so you can try these at home and impress (or confuse!) your guests at your next dinner party!

To make the brownies you'll need:
* 3/4 cup of chocolate to melt (I used chocolate chips)
* 1/2 cup of butter at room temperature
* 3 eggs
* 3/4 cup of sugar
* 1/2 cup of flour
* 3 Tablespoons of cocoa powder
* A pinch of salt
* Eggshells (I decided to fill four eggshells but I could have easily of filled a dozen with the amount of brownie mix I had leftover!)

To prepare the eggshells you'll need:
* 1/2 cup of salt
* 4 1/4 C of water
* Some vegetable oil
* A skewer or toothpick
* A corkscrew

Start by taking your corkscrew and poking a hole in the bottom of an egg. You'll want the hole to be the size of your pinky finger.


Once the hole has been made, peel off the shell and using a skewer or a toothpick, start to jab the egg yolk and egg whites inside the egg.


This will help make it easier for the egg to come out of the shell. Do this for all of the eggs you plan to have empty shells of. Once the egg is completely out of the shell, rinse off the inside and outside of the eggshell.


Combine your 1/2 cup of salt and 4 1/4 C of water in a bowl and dunk your eggshells into the water. Make sure the eggshells are completely submerged and filled with water, otherwise they'll float to the top. Once the bubbles have stopped coming to the top, you'll know they'll stay on the bottom.


Let them sit in the salt water for 30 minutes.


And give them another 30 minutes to dry, with the hole down on top of a paper towel.


Once they're dry, preheat your oven to 350 degrees and pour a little vegetable oil inside each eggshell. Roll it around so the oil coats the entire inside of the shell. This will help prevent the brownie from stick to the sides of the shell when baking. Pour out any excess oil that might be inside the shell.


Now it's time to make the brownie mix! Melt the butter and chocolate (as I said, I used chocolate chips and it worked just fine) in a microwave for 30 seconds and then 10 second intervals after that, so as to make sure the chocolate doesn't burn (mine took 50 seconds total).


In a separate bowl, add the 3 eggs and sugar and mix (I used what used to be inside the eggshells - no point in letting it go to waste!)


Once the chocolate has cooled, add it to the sugar and egg mixture.


Add your cocoa, flour, and pinch of salt to make your brownie mix complete!


Pour the brownie mix into a plastic bag and cut off one of the corners, as this will make it easier to fill the eggshells with brownie mix.


Slowly add the brownie mix to each eggshell, filling them up 3/4ths of the way. If you hold the eggshell up to a light, you'll be able to see how much you've filled.


Once your eggshells are filled, carefully place them in a muffin tin (you can use foil to keep them centered, if you like) and stick them in the oven for 15-20 minutes.


When you take them out, they'll be very hot but you need to cut off any excess brownie mix or else it'll be harder to do once it has cooled. I recommend holding the eggs with a wet paper towel or oven mitt and using a knife to cut off the excess brownie that has spilled over.


Let them cool completely before removing the shell (I put mine in the fridge for half an hour and that did the trick).


Remove the eggshell and eat your egg-shaped brownie! I had one right after another... needless to say, they're a little addicting! Your dinner guests will be so confused when their dessert is presented to them as an egg!


TOTAL COSTS: About $20 to make at least 9 brownie eggs (if you buy a dozen)
$2.50 for chocolate chips
$.99 for butter
$2.49 for eggs
$2.69 for sugar
$3.29 for flour
$4.49 for cocoa powder
$.99 for salt
$3 for vegetable oil
Corkscrew and toothpick/skewer already on hand but you could use a fork to poke the hole and the toothpick or skewer is only to help get the egg yolk and egg whites out faster... if you have patience, then you don't need anything.

TOTAL AMOUNT OF TIME: 2 hours, 18 minutes
5 minutes/egg to empty
30 minutes to soak in salt water
30 minutes to dry
25 minutes to make batter and fill
18 minutes to bake
30 minutes to chill

EASY-PEASY SCALE (1 super easy - 5 very difficult): 3 out of 5
These are actually a lot easier to make than one might expect. You have to be very careful not to burn yourself when getting the excess brownie off the egg but other than that, it's just a matter of being patient. Waiting for the egg to drip out of the shell, waiting for the eggs in the salt water, waiting for the eggs to dry, waiting to devour them...

Thursday, June 12, 2014

Book Cupcakes

My little niece has become an avid fan of any and all books, though her mother is a children's book librarian and author, so it should come as no surprise. So when she had a birthday coming up, I wanted to incorporate her love of books with the birthday treats. The result? Little books on cupcakes! These are a very easy and unique way to incorporate books for any party, whether it be for your library, your birthday, or even your book club!

I started by collecting .jpegs of different book covers from Google searches. Just look under "Images" of the book you want and save the photo to your desktop.

Once you've collected all the photos, I found it was easiest to work in Microsoft Word. Paste the photo to the Word document, format the picture so it's "Behind Text", change the size (all of mine were 1.5" in width), and draw a white square of the same size next to the photo. That way, when you cut them all out, the white square will serve as the back cover.


Once they're all ready, print and cut them out.


Fold them along the edge so they form little books and tape a toothpick to the inside of the book.


All that's left is decorating the cupcakes! I used a #22 Wilton tip and starting in the middle, squeezed the frosting around and around until I hit the edges. But you can decorate however you like, of course.


Stick the toothpicks in the center and voila! It doesn't get much easier than that, folks. All the kids in my niece's daycare gobbled them up and she was happy to see all of her favorite books on her cupcakes, pointing out which were her favorites to her classmates.


TOTAL COSTS: Free!
However, I had a printer, white card stock paper, and toothpicks readily available

TOTAL AMOUNT OF TIME: 1 hour, 25 minutes
45 minutes to pick out book covers and resize
25 minutes to cut out 20 books
15 minutes to tape toothpicks inside 20 books

EASY-PEASY SCALE (1 super easy - 5 very difficult): 1 out of 5
Just be careful that you don't cut off the white square. I was cutting these out while watching TV and had to tape the back and front covers together for a few because I didn't pay attention!

Thursday, May 15, 2014

DIY Marble Nails

I've never done nail art before. Heck, I've never put more than one color on my nails. Ever. But when I saw how easy these water marble nails were from TheBeautyTutorial, I knew they were easy enough for an amateur like me to give them a try. If I can knock these out of the ballpark on my first try, then I know you can too!

Start by gathering:

* 3 contrasting nail colors (I went with yellow, blue, and green)
* A plastic bag
* A toothpick
* A pair of tweezers

Start by pouring some of your base color onto the plastic bag. You can use the brush in the bottle if you like, but I found pouring to be a lot faster and easier.


Then add your contrasting colors on top. Again, you can either use the brush...


... or you can pour straight from the bottle.


Using your toothpick, make short lines up and down or swirl around to make the colors mix. Do as much mixing or as little mixing as you like.


Depending on how much nail polish you use, give it a couple hours to completely dry. Mine took 2 hours (even at an hour and a half it still wasn't completely dry and it's 100 degrees in my apartment!)


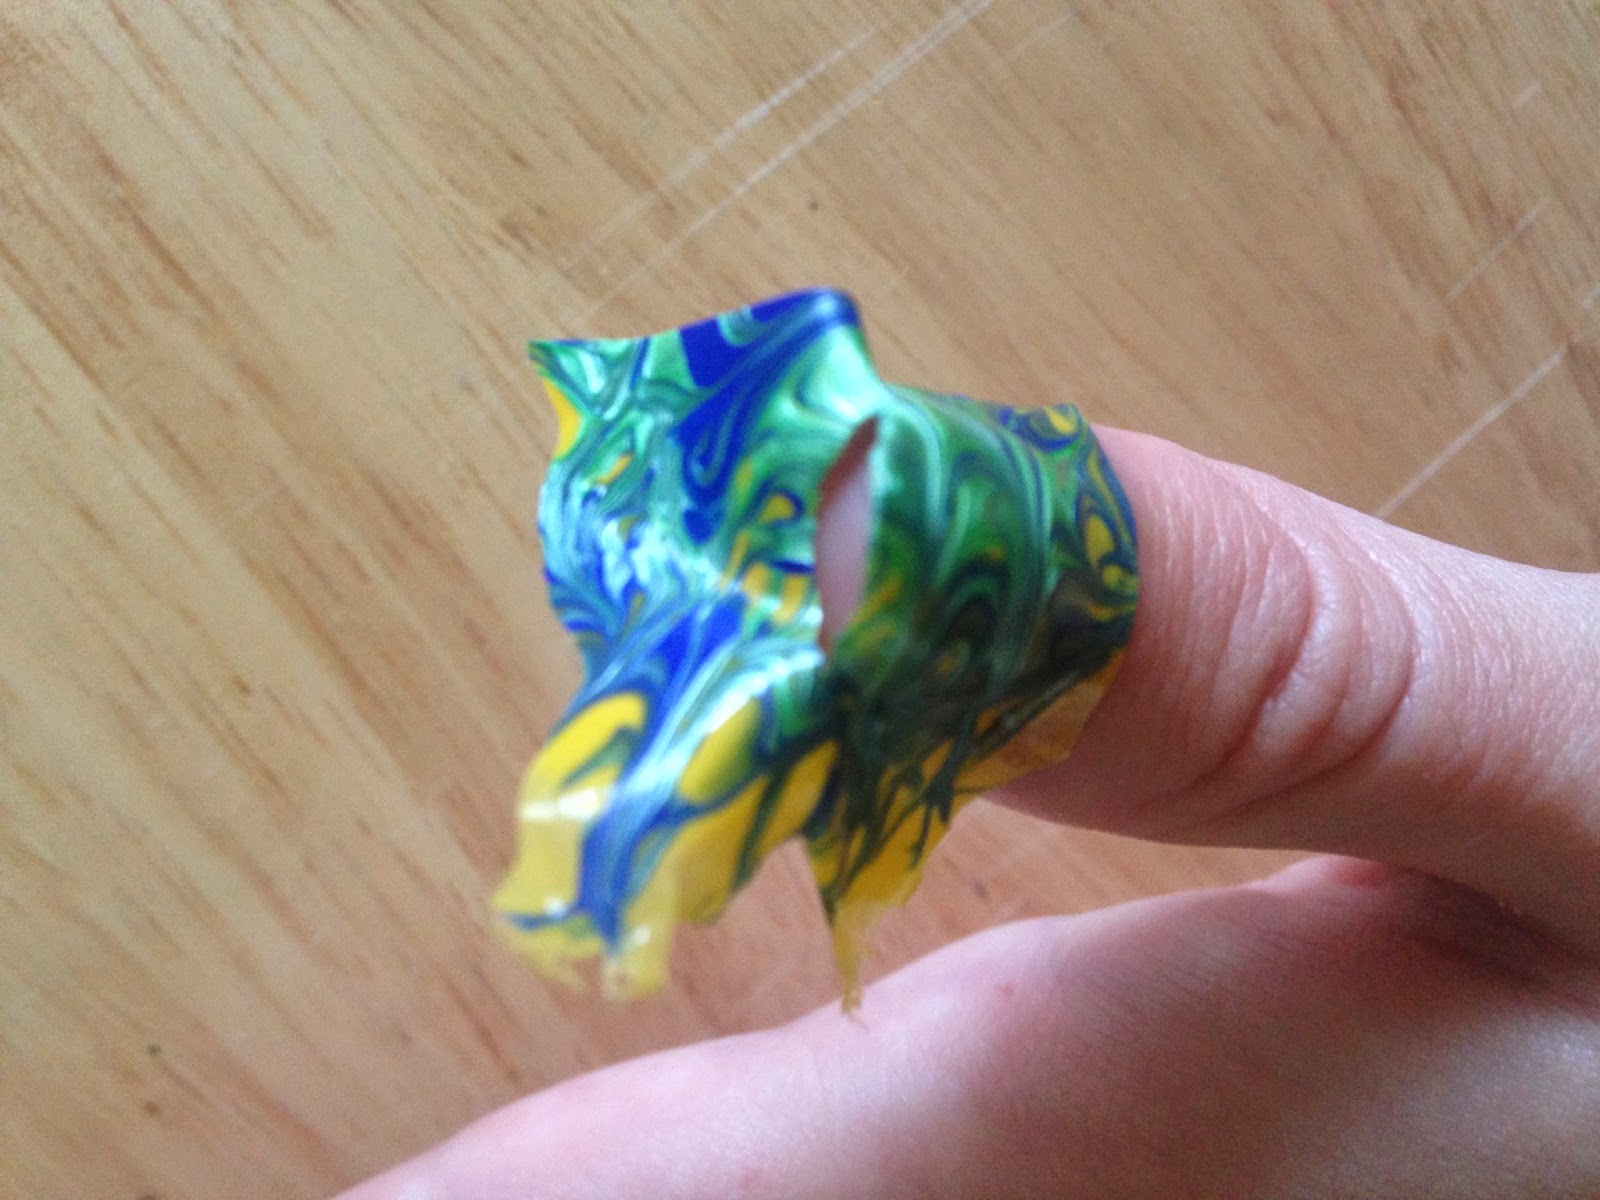
Once it's dry, very carefully take off the polish from the plastic bag. I found it worked best when I used my nails to pry off a corner and then I used the tweezers to pull off the rest. Go slow or you'll end up ripping off awkward-shaped strips.


But before you completely rip off all the polish from the plastic bag, paint your nails the base coat color and let them be tacky (almost dry) before applying the marble polish.

Now you can either do big pieces or little pieces but I found it worked best to put the marble on the nail and cut off the excess around the nail. Then go to the next nail, press the marble polish to the nail and cut off the excess. Do this for each of your nails.


Once all the nails are covered, now it's time to clean them up. I used my fingers to carefully peel and remove the excess around the nail but you could use scissors or tweezers as well, whatever's easiest for you.

I peeled off the marble polish around the nail

If you want to add a top coat, you can, but when I tried it, it started to screw up the design so I skipped that step. If you're more patient than I am, you can add it, but I did the dishes later and none of it chipped off!

Note that I only made enough for one hand so if you want to cover all fingers, cover a fair amount of the plastic in polish. You'll use more than you think.

Remaining polish

And there you have it, your very own marble nail art! Now go forth and make cool designs!


TOTAL COSTS: About $7 (prices from Rite Aid)
$.99 for NYC Long Wearing Midtown Mimosa (yellow)
$2.99 for Jesse's Girl (blue)
$2.99 for Jesse's Girl (green)
Toothpick on hand, but you could use a stick or utensil
Tweezers on hand, though you could peel it off with your fingers

TOTAL AMOUNT OF TIME: About 2 1/2 hours
5 minutes to mix colors
2 hours to let dry
5 minutes to paint nails and get tacky
15 minutes to apply marble and clean up excess

EASY-PEASY SCALE (1 super easy - 5 very difficult): 2 out of 5
I thought this was going to be a lot harder than it was but it was really quite simple. You might have some difficulty peeling the marble polish off the plastic bag but go slow and it'll eventually come right off!

Tuesday, March 25, 2014

Super Mario Piranha Plant Earrings

I didn't start my Super Mario Brothers obsession until later in life... around 10 or 11, I'd say. Hey, compared to kids nowadays, that's pretty late! It started with the Game Boy and moved on to Nintendo 64 during college and Wii thereafter. When I came across these piranha plant earrings on Instructables, I knew they would be cool enough for the 10 year old in me (or the almost-30 year old me today). However, I don't recommend making these if you have a bad case of OCD because you might drive yourself insane trying to make these perfect!

All you need is:

1. White, red, and green polymer clay
2. Earrings (front and back)
3. A hobby knife to cut the clay (I used an x-acto knife)
4. 1 toothpick (and a back-up, just in case!)


First, take your red clay and make two balls, roughly the size of large marbles. Next, take your knife and cut out 1/4 of the ball.


Stick the earrings inside the red balls with the points facing up (what I'm holding in the photo) and cover it up with clay (like the one to the right). One mistake I made was putting in the earrings at a slight downward angle, so make sure they are exactly perpendicular or you might have to bend the earrings when it comes time to wearing them!


I took photos of the clay pieces next to coins so you can see just how large the piranha's are (about the size of a quarter). You're all done with the red clay... for now.


Next, take your green clay and make the pots for the plants. They should be roughly the size of a mini marshmallow or a dime.


Roll out some green clay like a green snake and then flatten it with a rolling pin. Now I recommend you take what you just rolled out, cut it in half, and use that to wrap around the top of the pot.


So you've got the base completed, now it's time to move on to the plant's stem. Roll out two pieces of green clay and snap a toothpick in half. 


Stick the tooth pick inside each piece of clay to strengthen the stem and stick it in the pot. You can see they're much bigger than a Sacagawea coin now.


Add some leaves to make it look a little more like the original.


Once your leaves have been added, it's time to put the top (red) and bottom (green) pieces together. Start by sticking the heads on by having the toothpick go through the red head. Make sure the toothpick doesn't pop out of the mouth or the side! Next, roll white clay like a long snake (on clean paper, if possible... you'd be surprised what white clay can pick up when being rolled!). Try to make it as thin as you can and outline around the "mouth" of the plant with the white clay.


Once the mouth is outlined, take some small white piece of clay and put three dots on the back of each head.


Now your clay might have different baking instructions than mine but I put mine in the oven at 275 on parchment paper for 25 minutes and gave it ample time to cool down before moving. Too little time and they might not harden, too much time and they might burn!


Once they're cool, put 'em in and enjoy having a creative and unique pair of earrings!


TOTAL COSTS: About $10 to make at least 14 pairs (which is how many earrings came in the set)
$1.49/clay from Michael's
$2.99 for earrings front from Michael's
$2.99 for earrings back from Michael's
X-acto knife and toothpick already on hand

TOTAL AMOUNT OF TIME: 2 1/2 hours
1 hour to make the earrings (because I'm OCD and wanted the pot a different size than my first try)
25 minutes to bake
1 hour to cool (which is ample time - I'm sure it takes less time to cool)

EASY-PEASY SCALE (1 super easy - 5 very difficult): 3 out of 5
As I said, if you're super nit-picky about details and perfection, this project might drive you up the wall (white clay staying white, the thickness of the stem, the details on the leaves, etc.). However, it's a relatively easy project to knock out in an hour or two, depending on how attentive to the details you are, and would make a great gift for the gamer in your life!