Showing posts with label nail art. Show all posts

Wednesday, August 27, 2014

DIY Turquoise Nails

I love tearing Pinterest ideas apart and bringing them back to reality. Like the gingerbread TARDIS, or the marshmallow Kahlua shots, or even the spider cookies, they were all massive failures. However, when I see others tear down Pinterest ideas, I see that as a challenge. Is it really as hard as they say? Will I fail as well? When I saw this post from MeAndMySoldierMan, she rips apart these turquoise nails, claiming they're "ridiculous" and you can just buy crackle top coat instead. But I'm going to go out on a limb here and say...

...they're not ridiculous. 

If you have a half hour to spare, they're really not that hard to do yourself. All you need is:

1. White, black, blue, and clear nail polish
2. Q-tips
3. Rubbing alcohol
4. A spray bottle
5. A small container with water
6. Nail polish remover

Start by painting your nails white. Now you'll have to forgive me, I'm not the best at painting nails so bare with me and my sloppy work!


Once the white has dried, apply the blue/turquoise nail polish. Really, it can be any color you want, but I wanted mine to be as close to the original post as possible.


Once the blue has dried, it's time to prepare the black. In your small container of water, add 1 drop of black nail polish.


Spray the drop of nail polish with rubbing alcohol.


Immediately stick your finger in until the nail is completely covered (it's a quick in and out). 


Remove your nail and using your Q-tip and nail polish remover, remove the excess from around the nail. If you leave your finger in for too long, your nail will mostly turn out black (see below).


And if you wait too long before sticking your finger in the water, the rubbing alcohol and nail polish will act like algae and stick to your finger. It's kinda gross. So spray, dip in and out, and wipe off excess without any delays!


Once all the fingers are covered, paint a final clear top coat to seal the deal!


And there you have it folks - your very own turquoise nails! Sure, you could spend money on nail art to have them look like this but you'd only be able to wear it once and then you'd have to buy 'em again. This way, you can make 'em however many times you like!


TOTAL COSTS: Less than $10
$.99 for rubbing alcohol from Vons
$.99 for clear polish and white polish from Rite Aid (2 for 1)
$1.99 for black polish
$2.99 for blue polish
$1.99 for nail polish remover
Q-tips already on hand (though I suppose you could use paper towels)

TOTAL AMOUNT OF TIME: 30 minutes (almost to the second!)

EASY-PEASY SCALE (1 super easy - 5 very difficult): 2 out of 5
They're really not hard to do at all, and this is coming from someone who can't paint inside the lines very well! I like how every nail can have a different design and is completely unique to anything anyone else might have!

Thursday, May 15, 2014

DIY Marble Nails

I've never done nail art before. Heck, I've never put more than one color on my nails. Ever. But when I saw how easy these water marble nails were from TheBeautyTutorial, I knew they were easy enough for an amateur like me to give them a try. If I can knock these out of the ballpark on my first try, then I know you can too!

Start by gathering:

* 3 contrasting nail colors (I went with yellow, blue, and green)
* A plastic bag
* A toothpick
* A pair of tweezers

Start by pouring some of your base color onto the plastic bag. You can use the brush in the bottle if you like, but I found pouring to be a lot faster and easier.


Then add your contrasting colors on top. Again, you can either use the brush...


... or you can pour straight from the bottle.


Using your toothpick, make short lines up and down or swirl around to make the colors mix. Do as much mixing or as little mixing as you like.


Depending on how much nail polish you use, give it a couple hours to completely dry. Mine took 2 hours (even at an hour and a half it still wasn't completely dry and it's 100 degrees in my apartment!)


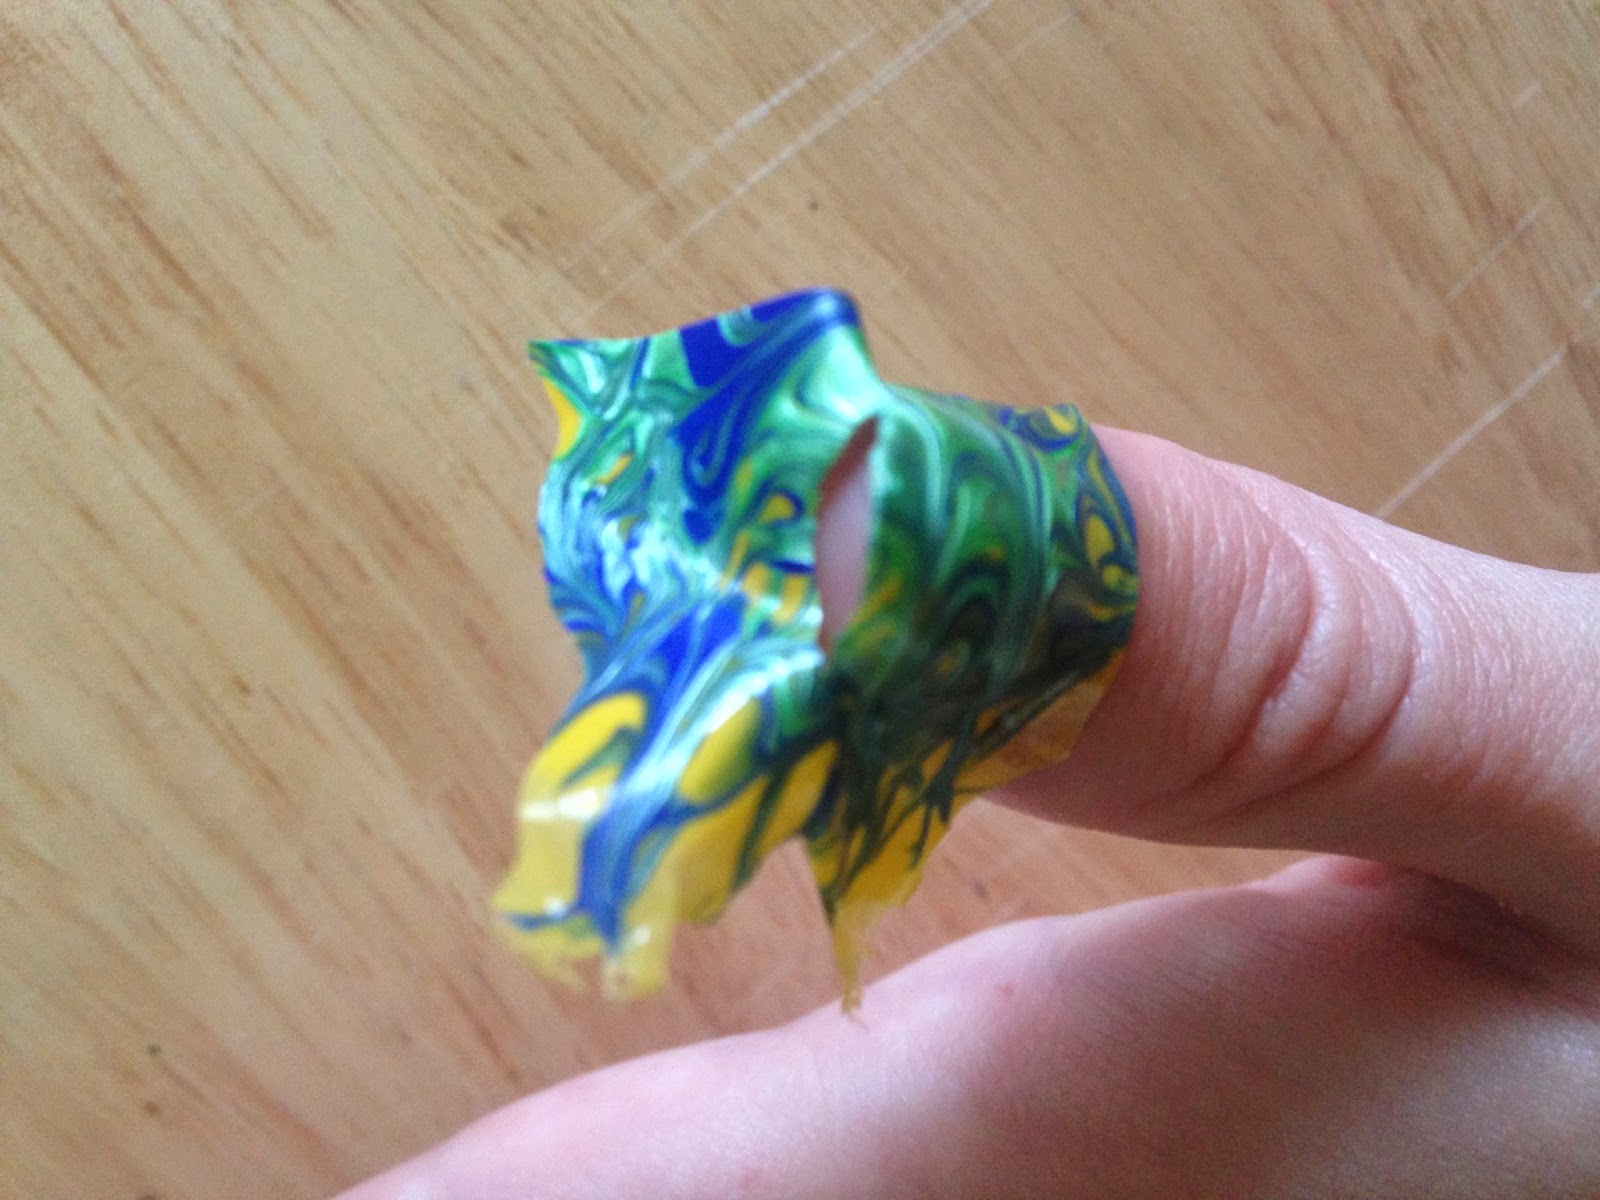
Once it's dry, very carefully take off the polish from the plastic bag. I found it worked best when I used my nails to pry off a corner and then I used the tweezers to pull off the rest. Go slow or you'll end up ripping off awkward-shaped strips.


But before you completely rip off all the polish from the plastic bag, paint your nails the base coat color and let them be tacky (almost dry) before applying the marble polish.

Now you can either do big pieces or little pieces but I found it worked best to put the marble on the nail and cut off the excess around the nail. Then go to the next nail, press the marble polish to the nail and cut off the excess. Do this for each of your nails.


Once all the nails are covered, now it's time to clean them up. I used my fingers to carefully peel and remove the excess around the nail but you could use scissors or tweezers as well, whatever's easiest for you.

I peeled off the marble polish around the nail

If you want to add a top coat, you can, but when I tried it, it started to screw up the design so I skipped that step. If you're more patient than I am, you can add it, but I did the dishes later and none of it chipped off!

Note that I only made enough for one hand so if you want to cover all fingers, cover a fair amount of the plastic in polish. You'll use more than you think.

Remaining polish

And there you have it, your very own marble nail art! Now go forth and make cool designs!


TOTAL COSTS: About $7 (prices from Rite Aid)
$.99 for NYC Long Wearing Midtown Mimosa (yellow)
$2.99 for Jesse's Girl (blue)
$2.99 for Jesse's Girl (green)
Toothpick on hand, but you could use a stick or utensil
Tweezers on hand, though you could peel it off with your fingers

TOTAL AMOUNT OF TIME: About 2 1/2 hours
5 minutes to mix colors
2 hours to let dry
5 minutes to paint nails and get tacky
15 minutes to apply marble and clean up excess

EASY-PEASY SCALE (1 super easy - 5 very difficult): 2 out of 5
I thought this was going to be a lot harder than it was but it was really quite simple. You might have some difficulty peeling the marble polish off the plastic bag but go slow and it'll eventually come right off!

Wednesday, February 26, 2014

Newspaper (or book) Nail Art

I'm not a big fan of painting my own nails, however I think I've had maybe 3 professional manicures in my life. When I saw this idea on Pinterest for newspaper art, I thought it was simple and easy enough for an amateur like me. I made a few mistakes here and there that I wouldn't want you to make, but for $2, this project is worth a try!

You'll need:

1. White nail polish 
2. Clear nail polish
3. Rubbing alcohol
4. Newspapers, phone book pages, etc. I don't recommend using book pages because I found the actual paper sticks to your nail instead of just the ink from the text (see below)

First, and this is optional and I didn't do it, put on a base layer of polish. If you want to skip this like I did, paint on your layer of white (mine was actually for french manicure tips, according to the bottle, but it worked perfectly). Wait for it to dry before applying another coat if needed.


Once it's dry, dip your finger into rubbing alcohol for 15-20 seconds.
 

Then immediately apply your newspaper/phone book pages/maps/whatever you want. I tried using old pages from a Harry Potter book that I had saved from my hollow book post. I waited for about 20 seconds before removing it.


As you can see, the book page didn't work so well...


So I tried again with pages from a phone book.


And voila! It worked!

Make sure to apply a clear top coat to all your nails so the ink doesn't come off.


And you're done! You could do crosswords, maps, receipts, whatever you like (so long as the paper isn't thick)! Be creative and enjoy this cheap and easy DIY!


TOTAL COSTS: About $2
$.99 for rubbing alcohol from Vons
$.99 for clear polish and white polish from Rite Aid (2 for 1)

TOTAL AMOUNT OF TIME: 1 hour
Keep in mind, I spent 20 minutes trying to make the book pages when I just should have given up!

EASY-PEASY SCALE (1 super easy - 5 very difficult): 2 out of 5
It's not hard, it just takes a couple of nails to get the process down pat.