Showing posts with label temporary tattoo. Show all posts

Monday, July 7, 2014

DIY Kool-Aid Henna Tattoo - Real or Fake?

Perhaps you've seen this making the rounds on the interwebs - how to make henna tattoos out of Kool-Aid and food coloring:


Sounds easy enough, right? The Kool-Aid and food coloring dyes your skin so you can "paint" whatever pattern you like. The original post says it should last over a week and judging by the photos, it's quite vibrant. So of course, I had to try it out.

As it states, you need a cup of water, green food coloring, and Orange Kool-Aid but I used Cherry instead. Figured it would make a darker imprint.


So, add one drop of food coloring to the water and Kool-Aid and mix.


Grab your paintbrush and apply a pattern to your hand. Now here's something they fail to mention - it's too wet to paint much of anything on your hand, let alone something as detailed and delicate as a henna pattern. It will just end up being a big blob of water if you're not careful.


Let it sit for one minute to dry and ta-da!


It looks like someone tried to watercolored on my hand. Not vibrant, very blotchy.

Yeah, so this one is totally debunked. I washed my hands, since it said it "should last over a week" and it didn't even last 30 seconds. Sorry kids, but unless you plan on not washing that part of your body for a week, this is a major fail.


TOTAL COSTS: About $4 (if you want to give it a try)
$.39 for packet of Kool-Aid
$3.49 for box of food coloring

TOTAL AMOUNT OF TIME: Less than 5 minutes

EASY-PEASY SCALE (1 super easy - 5 very difficult): 1 out of 5
It's not hard to make this henna tattoo fail, if you're into that sort of thing!

Tuesday, June 3, 2014

Want a DIY Temporary Tattoo? Here's One Wrong Way and One Right Way

While poking around on Pinterest, I came across this photo:


Seemed awfully easy... not sure why the baby powder or hair spray would make any difference... but I decided to give it a shot!

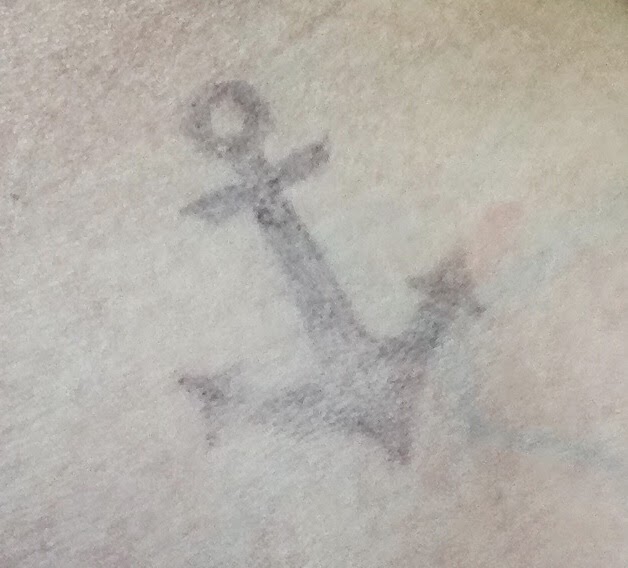
Step 1: Draw on design (my husband is in the Navy so I thought an anchor would be appropriate) -


Step 2: Cover in baby powder -


Step 3: Spray on hairspray and that's it, right?... right?... well, not exactly. There should be fine print in that original photo that states:

"NOTE: If you spray on the hairspray too close (about 12" from site), the ink will smear and you'll have to start all over." I even made sure to let the ink dry for about 20 minutes before spraying, too! Arg me matey...


This time, I decided to let the baby powder sit for a good 15 minutes before adding the hairspray, which I sprayed 24" away from the site, so as not to smear again.

So here's how it looked after 1 hour:


And here's how it looked after 24 hours:

...sorry I'm so blindingly white

So yeah, that whole "last about a month" thing? Not true at all. I had it on my hip and didn't even wash the site the entire 24 hours, it just naturally vanished because baby powder and hairspray do nothing!

Now that we've gotten that nonsense out of the way, do you want to know a right way to get a temporary tattoo (and you can put it on or off whenever you want)? Here's what you'll need:

1. A Sharpie
2. A design printed on paper
3. A small book (I used a bunch of Post-Its)
4. A pair of nylons to draw on


Start by deciding where you want your design on your leg, and then put the paper design and book (or Post-Its) inside the nylon leg.

Trace the design with your Sharpie onto the nylons.


Once you're done, remove the design and book/Post-Its, put on the nylons and ta-da! It looks like you have a tattoo!


TOTAL COSTS: Free!
Old nylons, Sharpie, baby powder (useless), and hairspray (useless) already on hand

TOTAL AMOUNT OF TIME: Depends on design
Tracing your design might take 5 minutes or 20 minutes, depending on how detailed it is

EASY-PEASY SCALE (1 super easy - 5 very difficult): 1 out of 5
Tracing a design is a piece 'o cake! And you could use different color Sharpies to make your design as colorful as you like!