Showing posts with label Sharpie. Show all posts

Tuesday, June 3, 2014

Want a DIY Temporary Tattoo? Here's One Wrong Way and One Right Way

While poking around on Pinterest, I came across this photo:


Seemed awfully easy... not sure why the baby powder or hair spray would make any difference... but I decided to give it a shot!

Step 1: Draw on design (my husband is in the Navy so I thought an anchor would be appropriate) -


Step 2: Cover in baby powder -


Step 3: Spray on hairspray and that's it, right?... right?... well, not exactly. There should be fine print in that original photo that states:

"NOTE: If you spray on the hairspray too close (about 12" from site), the ink will smear and you'll have to start all over." I even made sure to let the ink dry for about 20 minutes before spraying, too! Arg me matey...


This time, I decided to let the baby powder sit for a good 15 minutes before adding the hairspray, which I sprayed 24" away from the site, so as not to smear again.

So here's how it looked after 1 hour:


And here's how it looked after 24 hours:
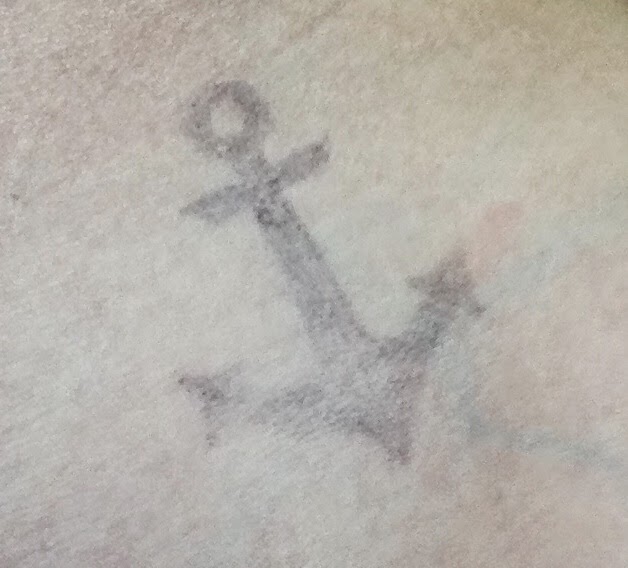
...sorry I'm so blindingly white

So yeah, that whole "last about a month" thing? Not true at all. I had it on my hip and didn't even wash the site the entire 24 hours, it just naturally vanished because baby powder and hairspray do nothing!

Now that we've gotten that nonsense out of the way, do you want to know a right way to get a temporary tattoo (and you can put it on or off whenever you want)? Here's what you'll need:

1. A Sharpie
2. A design printed on paper
3. A small book (I used a bunch of Post-Its)
4. A pair of nylons to draw on


Start by deciding where you want your design on your leg, and then put the paper design and book (or Post-Its) inside the nylon leg.

Trace the design with your Sharpie onto the nylons.


Once you're done, remove the design and book/Post-Its, put on the nylons and ta-da! It looks like you have a tattoo!


TOTAL COSTS: Free!
Old nylons, Sharpie, baby powder (useless), and hairspray (useless) already on hand

TOTAL AMOUNT OF TIME: Depends on design
Tracing your design might take 5 minutes or 20 minutes, depending on how detailed it is

EASY-PEASY SCALE (1 super easy - 5 very difficult): 1 out of 5
Tracing a design is a piece 'o cake! And you could use different color Sharpies to make your design as colorful as you like!

Sunday, May 11, 2014

Recipes on Tea Towels - Perfect for Mother's Day!

Happy Mother's Day to everyone today! I'm quite fortunate to still have my mother around and I asked her to scan some of her mother's recipes to me, because I knew when I saw this post from Sometimes Handmade, I wanted to give it a shot. I can tell you if you skip the first step, it's not too late to give as a Mother's Day gift! It'll last longer than flowers, it's something you made, it's inexpensive, and it's generational - what more could you ask for in a gift?

If you want to prep the towels (so the ink doesn't fade when washing), you'll need:

* 1/2 teaspoon of fabric softener
* 2 1/2 teaspoons of Arm & Hammer Washing Soda
* 2 Tablespoons of Alum (found in the seasonings aisle)
* 1 Cup of HOT water

If you are short on time, then just gather:
* Flour sack tea towels
* A black Sharpie (or fabric pen, but I doubt most people would have one on hand)
* Print outs of your favorite recipes

If you want to prep your towels, start by combining all of the ingredients together and letting it sit for 15 minutes so the bubbles can minimize.


Once the bubbles go down, dip your tea towels in until they're completely soaked.


Note that I only used two 30" x 30" tea towels (which is WAY too big, by the way!) and they soaked up every last drop, so if you're making more or have bigger towels, you might want to double the recipe. Give them about 10-15 minutes to set before rinsing and air dry them for 24 hours (or overnight, however long it takes).


Once the tea towels are dry, I recommend ironing them before you add the recipe (it'll be easier to transfer over the text on a flat surface).


Now some of you could:
a.) print out the recipe directly on the towel (but I'm too afraid to ruin my printer that way!) or
b.) could use freezer paper to transfer the image.

However, I'm going to stick with the original post and simply transfer the handwriting over... by hand.

Start by tracing over the recipe with your Sharpie (especially if it's an old recipe). That way, it'll be easier to see the words through the towel.


Place a tea towel over your recipe, make sure it's securely attached to the paper (I recommend taping it down so it doesn't move around during the transfer process).


If you still can't see the words through the towel, try taping it to a window. That's what I did and it worked perfectly!


Very slowly and carefully, trace the words of the recipe with your Sharpie. Don't rush it or it will look sloppy.


Once you're done tracing, take off the tape, fold it, and present to your Mom for Mother's Day or maybe even give to a bride as a bridal shower gift - it will last a lifetime!


TOTAL COSTS: $3.99 (or about $20 if you want to prep the towels)
If you want to prep the towels:
   $2.99 for fabric softener from Vons
   $4.99 for Alum from Vons
   $9.16 for Arm & Hammer super washing soda (for 55 oz. worth) on Amazon
If you want to skip the prep:
   $3.99 for tea towels from Target
   Sharpie and recipes on hand

TOTAL AMOUNT OF TIME: Varies on how many recipes, how long they are, and if you're prepping the towels
15 minutes to prep the towels & overnight to dry
10 minutes to trace each recipe
10 minutes to transfer recipe to towel

EASY-PEASY SCALE (1 super easy - 5 very difficult): 2 out of 5
The hardest part of this is having the patience to go over the text without rushing. You want to be sure to include every nuance of the original writer's text, as those are what make the recipe so special.