As we near the holiday season, I keep seeing sites that say, "Make your own candles - great Christmas gift!" or "Give the gift of homemade candles!" ... yeah... hot wax + fire + me = not a brilliant plan. Still, curiosity killed the cat but satisfaction brought it back. I figured it was worth a shot.
 |
| The candle making kit |
There are plenty of candle-making kits out there. I saw some at Michael's,
Something Turquoise recommended
this kit on eBay, but I went to trusty 'ol Amazon and bought
this kit, based on the reviews and price.
A few days later, I received the package and thought it was very convenient to have everything you need fit inside the pouring pot (which can be used multiple times for future batches). So when I emptied out the supplies, here's what I found:
1 giant bag of soy wax
1 half ounce bottle of pearberry fragrance (I didn't choose it, the company did but it smelled lovely!)
1 color square (kind of an olive green)
 |
| Everything they provide you in the kit |
1 glass votive flower pot size jar
1 7oz glass jar with a lid
4 metal tea light cups
6 wicks
1 pouring pot
1 set of instructions
Things
not included that I didn't realize until after reading said instructions:
1 thermometer (which I picked up at the grocery store shortly thereafter)
1 pot holder (which I never needed)
Covered work space (I didn't cover anything and just spilled 2 drops of wax. Easy clean-up on a kitchen countertop)
 |
| Wax pieces |
The instructions they provide and pretty self-explanatory. The first step is pouring out the 14oz of wax flakes into the pot. They're not kidding, they really are wax flakes. You then place the pouring pot into a large pot of water, creating a double boiler, as you don't want to heat the wax on a direct flame. Why, I don't know, I'm not a chemist. But bear in mind, that
the pot is going to float so you'll want to keep a steady hand on it.
 |
| Double burner |
While the wax was melting, I put the wicks in the holders (it's nice that they have little stands attached but good luck getting them to be straight up and down!). Then the instructions get very specific. Let the wax melt, then bring up to 150F degrees and add the color square (which turned into a nice emerald color). Once added, let cool until it gets to 120F (which is why the thermometer is handy) and then add the entire bottle of fragrance and "blend vigorously." Well, it felt like an eternity to get the temperature down. After a while, I removed it from the pot of water and held it. No change. I set it down on the stove between burners. No change. I put it on a completely cool burner. That seemed to have cooled it down the fastest. Maybe this was what the pot holder was for. In any case, it eventually does cool down, you just have to have patience. After adding the fragrance and stirring it in with the thermometer, I poured the wax into each candle holder.
 |
| Shortly after pouring the wax |
Here's what I thought was interesting... it said, "For better results on your glass containers, take a blow dryer and warm the glass." This is definitely not an activity for kids. You've got open flames, hot wax, and now a blow dryer involved! Please oh please be very careful!
Let me tell you right now - you're going to have
SO much melted wax you're going to wish you had extra candle holders and wicks! I started finding any candle I could find around the house and pouring in extra wax because I filled the 4 tea light cups and 2 jars to the brim. So be prepared to have a LOT of extra wax.
 |
| Blow dryer vs. no blow dryer |
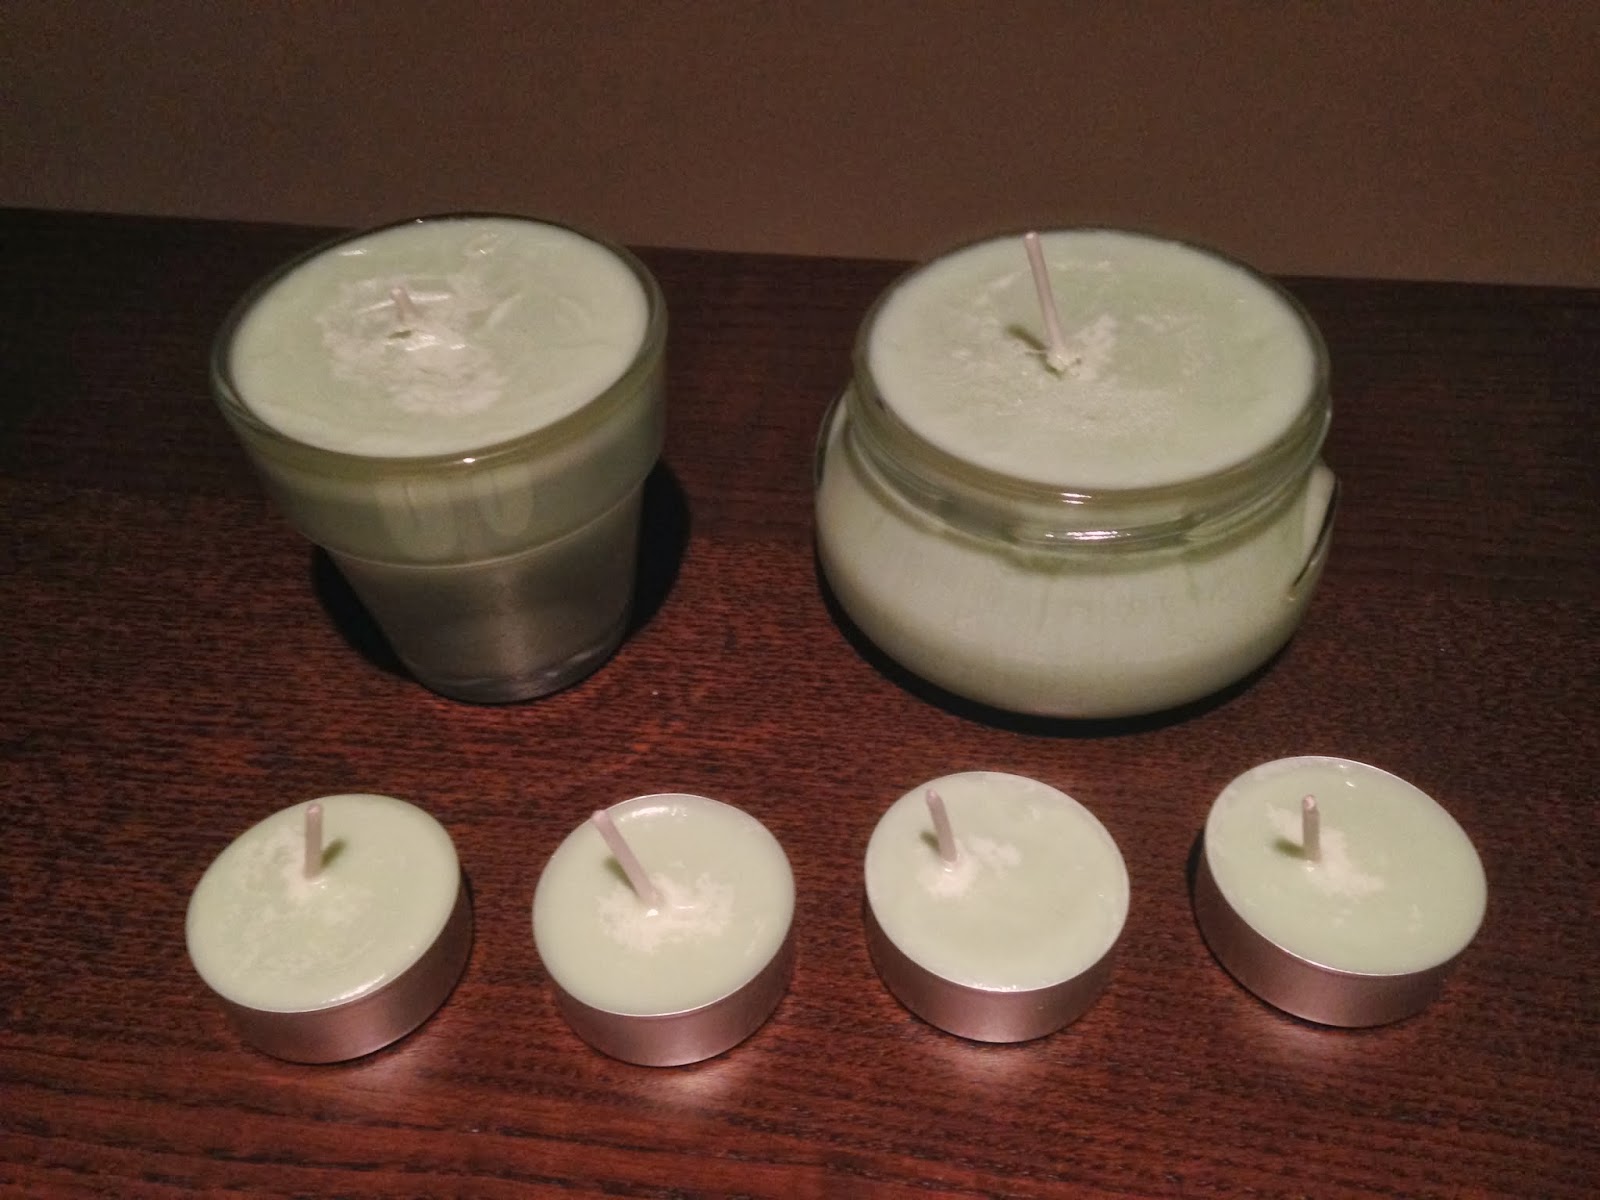
I took a close-up of the two bigger candles to show you the difference between using a blow dryer and not - the candle on the left's wax is completely smooth. The candle on the right has some lines along the sides. I guess the hotter the candle holder, the smoother the wax will be once it hardens! The candle on the right just has stretch marks... nothing wrong with that.
The color isn't completely correct in the photo but it ended up being a mint color - a very pale green. Is it cheaper than buying the candles in the store? No, I don't think so (considering you can buy a pack of 20 tea lights at IKEA for around $5) but now you can give these as a gift and honestly say you made them yourself. And hey, if you ever want to make them again, you just need to buy wax, wicks, holders, color and scents in the future!
 |
| Final products |
TOTAL COSTS: About $40
$24.99 for the Natural Soy Wax Candle Making Kit from Amazon
$10.99 thermometer from Vons
TOTAL AMOUNT OF TIME: 3 hours, 20 minutes
40 minutes to pour wax in pot, melt the wax, add color and add fragrance
40 minutes for tea lights to cool and harden
2 hours for votive candles to cool and harden
EASY-PEASY SCALE: 3 out of 5
Certainly not an activity for kids but the instructions are easy enough to understand and if you've got time to kill, a fun project to try! Happy candle making!