Thursday, September 11, 2014

Jellyfish in a Bottle [FAIL]

I'm really good at failing. Not in school or my marriage (thank goodness!), but in blog projects. I take something, assume it's really easy to do, try it out, and laugh when the 3rd time is never the charm. Today's example? The jellyfish in a bottle picture I found here on TheMetaPicture. There aren't any instructions, just photos, so I guess I can cut myself a little slack, but I tried this three different ways, each more frustrating than the last. If you want to try this at home, here are some things I recommend you don't do.

Before you start, gather your supplies. You'll need:

* 1 or 2 plastic bottles (depending on how many you want to make - I used old water bottles)
* 1 or 2 plastic bags (like what you'll find in the produce section - they're free and if you're prone to making mistakes, you'll want a few!)
* Scissors to cut the bags
* Food coloring (should you want to tint the water)
* String (or a rubber band, if you don't mind it being visible).

Attempt #1 - Judging by the pictures in the original post, here's what I did.

#1 - Opened up the bag so it was a nice big flat square...


#2 - I put my finger in the middle of the bag so as to...


#3 - ...easily find the head of the jellyfish. I secured the head with a piece of string.


#4 - Next: the tentacles. I took my scissors and started hacking away, making these really big, thick, long tentacles. Hack hack hack.


After seeing just how big it was, I decided to cut the tentacles in half. Was still quite a beast.


And after filling the "head" with water, securing it tightly, filling up my water bottle and placing my jellyfish inside... well, it looks like "jelly" and more "trashy."


I tried again.

Attempt #2 - Ok, this time I figured out what not to do. Don't have thick, long tentacles and use a more "invisible" string. Got it.

#1 - So first I cut the bag to the length of the bottle. That way I knew the tentacles wouldn't be too long.


#2 - I opted to use white thread to secure the head. Much more invisible.


#3 - I didn't use the entire bag this time. Sometimes I threw out giant chunks of plastic, just so my little jellyfish wouldn't be overwhelmed in the bottle.


#4 - I filled up the head with water... but then the head fell apart! Apparently the thread just slipped off. Let me tell you - if your thread isn't long enough, it's going to take you at least half an hour to form the head again, put the string back on, and fill up with water because when the plastic and thread get wet, it's just a slippery mess!


#5 - Since I was closer than last time, I added 1 drop of food coloring. And let me tell you - 1 drop is too much!


My little jellyfish is invisible. And still a clump of plastic floating at the top.


Sigh. Ok, one more time...

Attempt #3 - This time I was going to do it right. Water down the color, forget the string, and make even fewer (and shorter) tentacles!

#1 - This time I made the head first AND used a rubber band to secure it. Take that jellyfish!


#2 - I hacked at the little jellyfish so much he looked like a ghost of his former self.


#3 - My bottle is filled, the color diluted, and... the head won't fit. Are. You. Freaking. Kidding Me.


#4 - After 10 minutes of trying to make the head smaller, I eventually get it in the bottle and my little guy is upside down.


I flip it over and over and over and you can barely see his little head at the top.


I think, after three tries, I can call this jellyfish in a bottle an epic fail. I'm going to go curl up to, "Peanut Butter and Jellyfish" by Jarrett Krosoczka now. You're better off doing the same.

TOTAL COSTS: Free
I recycled my bags, bottles, string, and rubber bands. Scissors and food coloring also on hand.

TOTAL AMOUNT OF TIME: Would you believe me if I said over an hour? Ugh...

EASY-PEASY SCALE (1 super easy - 5 very difficult): 4 out of 5
I have no doubt that if I had used bigger bottles, this experiment might have gone differently, however I tried to replicate the exact pictures to no avail. My little jellyfish were destined to swim upside-down, sideways, and every way in between.

Tuesday, September 9, 2014

DIY Toothpaste

My cousin showed me this post from ThankYour Body on how to make your own all-natural, flouride-free toothpaste from coconut oil and bentonite clay. I liked it, but what the heck is bentonite clay? Where do you get it and what else do you use it for? And why is that toothpaste brown?! Ok, I'll admit it, I've grown to love commercial toothpaste - it's white, it's thick, and for the past 30ish years, it has done me well. But I'm open-minded so I decided to try this recipe from TheChalkboardMag. All of the ingredients were in my kitchen cupboards so I had no excuse not to try it (FYI - if you don't have any of these ingredients, just stop by Whole Foods).

All you need to make about 2oz. worth is:

1. 2 Tablespoons of baking soda
2. 2 Tablespoons of coconut oil
3. 20 drops of peppermint oil (to make it taste minty)
4. 1 teaspoon of sea salt (optional and I don't recommend it - I'll get you why later).

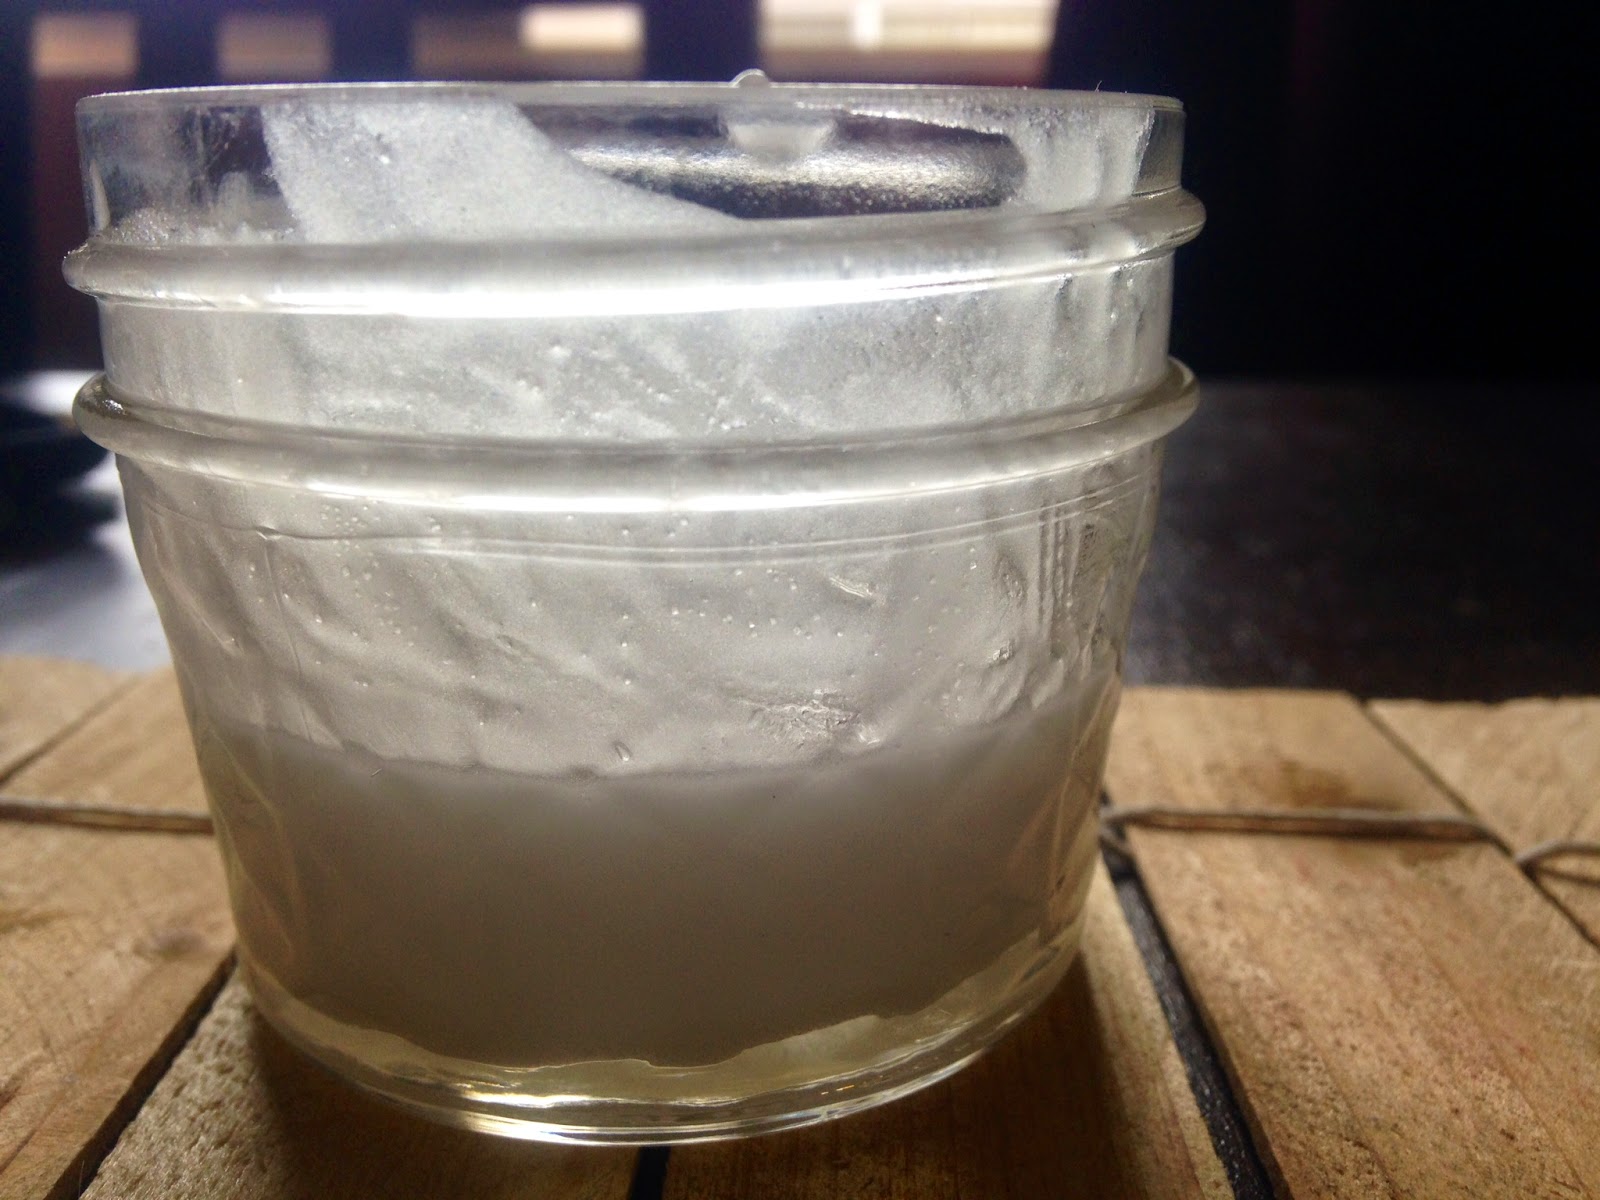
It's quite easy - just add all the contents to your little container (I used a 4 ounce mason jar).


As you can see, it barely filled up half of the jar. So hey, if you don't like it, it's not like you wasted too much!

To put it on the toothbrush, I had to dip my toothbrush into the jar (which probably isn't very sanitary but it was so runny, I had no choice! Makes sense, now, as to why people use bentonite clay).


And the results? Well, I felt like I ran out of toothpaste halfway through the brushing but even worse, it felt like I licked a salt cube. I couldn't get the taste of salt out of my mouth so I had to brush my teeth again, this time with my commercial toothpaste. While salt is a great antibacterial (remember when your doctor told you to gargle with warm salt water when you had a sore throat?), it can also be very abrasive if you have sensitive gums. That, along with the taste, makes me recommend not adding salt.

However, if you don't want to use a toothpaste with fluoride in it, this might be a good alternative for you. Just... don't use salt. Or if you do, use very little. Your taste buds will thank you.

TOTAL COSTS: About $18 to make as much as you want!
$1.59 for baking soda from Vons
$5.99 for coconut oil from Whole Foods
$7.99 for peppermint oil from Whole Foods
$1.99 for sea salt from Vons

TOTAL AMOUNT OF TIME: Less than 5 minutes

EASY-PEASY SCALE (1 super easy - 5 very difficult): 1 out of 5
This is so simple because it's only 4 ingredients (or 3, if you leave out the salt), mixed into a container, and put right onto your toothbrush. It's supposed to last up to six months, if stored properly. I doubt, though, it would last you that long if you brushed twice daily.

Sunday, September 7, 2014

How to Make Cinnamon Roll Cake

There are two things in life that are perfect, in my opinion: cake and cinnamon rolls. I can't get enough of either. So when I saw Chef-in-Training put together this recipe for cinnamon roll cake, I thought it would make an ideal breakfast option for an out-of-town guest. Before you start gathering your ingredients, though, I must warn you of two things:

#1) This is baked in a 9x13 pan, which will make more than enough! The three of us could barely tackle a third of it so if you're planning on making it, make sure enough people are there to enjoy it (or be prepared for leftovers!)

#2) When it's right out of the oven, it tastes exactly like nirvana. Absolute bliss and perfection. You have been warned.

To get started, here what you'll need for...

The cake
3 cups of flour
1/4 teaspoon of salt
1 cup of sugar
4 teaspoons of baking powder
1 1/2 cups of milk
2 eggs
2 teaspoons of vanilla extract
1/2 cup of melted butter

The cinnamon swirl topping
1 cup of softened butter
1 cup of brown sugar
2 Tablespoons of flour
1 Tablespoon of cinnamon

The glaze (totally optional but I recommend it!)
2 cups of powdered sugar
5 Tablespoons of milk
1 teaspoon of vanilla extract

Start by preheating your oven to 350 and spraying the inside of your 9x13 pan with PAM or some other cooking spray. In your mixer combine all of the cake ingredients, leaving the melted butter for last.


Once everything is combined, add it to your pan.


Next comes the topping. In the same bowl (unless you like doing dishes, you can use a separate bowl), mix all of the topping ingredients until it's creamy. Take your Tablespoon and drop spoonfuls of the topping into the cake batter.


Take a knife and start swirling it around until the topping is evenly distributed. Bake at 350 for about 35-40 minutes (or until a toothpick inserted comes out clean).


While the cake is baking, you can make your glaze. In a medium bowl, combine the powdered sugar, milk, and vanilla extract with a whisk until thoroughly combined.


Once the cake is out of the oven, evenly distribute the glaze over the top of the cake.


Cut the cake (be careful if you can't wait - it'll be quite warm!) and devour. It is so fantastically good while warm but if you refrigerate it and eat it cold, it's just as yummy! It's still moist and not dried out!

Right out of the oven with the cinnamon oogy-gooeyness

After being in the fridge overnight - just as delicious!

TOTAL COSTS: About $22 (if you don't have any of the ingredients - prices from Vons)
$3.29 for flour
$.99 for salt
$2.69 for sugar
$1.99 for baking powder
$2.29 for milk
$2.79 for eggs
$.99 for butter
$4.79 for cinnamon
$2.49 for powdered sugar
Vanilla extract and brown sugar made from scratch

TOTAL AMOUNT OF TIME: About 50 minutes

EASY-PEASY SCALE (1 super easy - 5 very difficult): 2 out of 5
The "hardest" thing might be just making sure it doesn't burn but really, 35-40 minutes should do the trick. Other than that, it's just a matter of following direction (thought I doubt you need instructions for the "enjoying" part!

Saturday, September 6, 2014

Penne Pasta with Spinach Sauce

I'm not a big proponent of vegetables but this penne with spinach recipe I found on CookingChannelTV is one of my favorite dishes and I had to share it. It's super easy to make, it feeds a lot of people, and doesn't take much time to put together. Plus, if it's wicked hot outside, it doesn't require an oven so it won't turn you into a pool of sweat.

Here's what you'll need (and what I recommend):

1 box/pound of whole wheat penne pasta
3 garlic cloves
2 ounces of goat cheese
1 ounce of cream cheese
3/4 teaspoon of salt
1/2 teaspoon of pepper
6 ounces of spinach leaves
Parmesan cheese for topping (optional)

And while it's not listed, I recommend adding 1-2 ounces of pesto sauce!

Start by boiling your water for your pasta.


Once the water is boiling, add your pasta and let it cook for about 12 minutes.

While the pasta is cooking, prepare your other ingredients. If you have a food processor, add your garlic, goat cheese, cream cheese, salt, pepper, and half of your spinach and blend until it's smooth (if you have pesto, now would be the time to add it!). I don't have a food processor so I just chopped up the garlic and spinach by hand and then added everything into a bowl.


At this point, your pasta should be ready to be drained, however you will want to save a cup or so of your pasta water. You might need it later.


Put the other half of your spinach in a bowl and place your pasta on top.


Add the spinach sauce and toss to coat, adding enough of the pasta water to moisten (I ended up only using about a 1/4 cup). I find it helps to toss it by putting a bowl on top and shaking the two bowls. If that doesn't work, a wooden spoon will do the trick!


Add a little parmesan cheese and there you have it kids - a quick, delicious, and (somewhat) healthy meal you can put together in no time!


TOTAL COSTS: About $10
$1.49 for a box of whole wheat penne pasta
$.69 for garlic
$3.99 for 4 ounces of goat cheese
$.79 for 2 ounces of cream cheese
$.99 for salt
$1.99 for 8 ounce bag of spinach
Parmesan cheese and pepper already on hand

TOTAL AMOUNT OF TIME: Almost exactly 30 minutes

EASY-PEASY SCALE (1 super easy - 5 very difficult): 1 out of 5
You don't have to worry about burning, sautéing, brining, anything really technical. If you can boil water, you can make this dish!

Friday, September 5, 2014

How to Make Mini Tacos

So a month ago I made these mini lasagnas and they turned out to be a big hit! Apparently miniaturized food is great for wedding receptions, dinner parties... so what's better than mini lasagnas? Mini tacos, of course! I took this recipe from Delish and decided to see if they were just as good as the mini lasagnas.


To make 24 mini tacos, you'll need:

1. 24 won ton wrappers (mine were in the same aisle as the cheese, tofu, yogurt, etc.)
2. 1 lb. of ground beef
3. 1 package of taco seasoning mix
4. 2 Tablespoons of Pace Picante Sauce

And for the toppings, you can add anything like:
1. Shredded Mexican cheese blend (maybe 2 oz.)
2. Sour cream
3. Salsa


Start by preheating your oven to 425 and cook your beef until it's brown.


While the beef is cooking, add 24 wonton wrappers to the inside of cupcake pans.


Once the beef is no longer pink, drain the fat and add your taco seasoning mix, as well as 2 Tablespoons of sauce (which helps if it's a bit dry).

Now I found 1 Tablespoon of beef was perfect for each won ton wrapper and filled 24 no problem (anymore than a Tablespoon and it starts to spill over). Top with salsa and cheese and place in the oven for 5 minutes.


Once the wrappers are turning golden brown and the cheese starts to melt, it's time to take them out.


Give them a few minutes to cool adding your toppings and devouring. Now... are they as good as the mini lasagnas? I give this a resounding yes! While they were a bit messier, they were still delicious and I may or may not have eaten a third of the batch... by myself... in one sitting. Whoops. However, do they make good leftovers? Well, I refrigerated mine over night and popped them in the microwave the next and the wrapper went from crispy to floppy (like hard shell tacos to soft shell). Oh well, at least they still tasted good!


TOTAL COSTS: About $14 to make 24 mini tacos
$3.19 for won ton wrappers
$3.89 for 1 lb. of ground beef
$.99 for a package of taco seasoning mix
$2.68 for Pace Picante Sauce
$3.29 for shredded Mexican cheese blend

TOTAL AMOUNT OF TIME: About 30 minutes
What took the most time was the beef cooking, since it was still pretty frozen!

EASY-PEASY SCALE (1 super easy - 5 very difficult): 1 out of 5
Seriously, if you don't know how to cook, you can easily impress your friends by making these delicious and simple appetizers! And even if there is no special occasion, make these for dinner and see just how many you eat without realizing it!

Thursday, September 4, 2014

Tips for First-Time Campers

Have you ever sat down and wrote a bucket list of things you want to do? I did that the other night and two things on the list were "go camping" and "see really big trees." Since I live in California, I thought I could knock both out at once! For those of you who have never gone camping before, or maybe you've gone camping but not in a national park, I'd like to give you some tips, given my experience. My husband and I spent 24 hours in Sequoia National Park so here's your...

Top 12 Tips for First-Time Campers:

#1. Have enough gas in your car AND know where gas stations are in/around your site. We were very fortunate to have one of the employees of the national park offer to take us to a gas station so we could fill up an empty water jug (since there weren't any gas cans available)! Nevermind the fact that there was also the smell of burning rubber and plastic under the hood...  maybe have your car get a tune-up before taking it on the road!

#2 - Know how to put up your tent AND be aware which way it's facing. If you're borrowing a tent from a friend, ask them to do a 5-minute demo. Trust me, this will save you time and headaches down the road. If your tent is missing pieces, has a tricky zipper, needs a hammer for the stakes - these are good things to know ahead of time. Also, before you set your tent down, check to see if there are rocks on the ground and if there's an incline. You don't want to put your head at the bottom of the incline, unless you like waking up to headaches the next day!

#3 - Always have your wallet on you. Need to buy firewood? Need to show your identification to check in to your campsite? You'd be surprised how easy it is to forget this step!

#4 - If you're camping at a national park, buy a passport at the Visitors Center. If you plan on camping again, you'll definitely want to pick up one of these. It's a little book that allows you to collect stamps from most national battlefields, national monuments, national parks and state parks, etc. For the collector, it's fantastic! However for the forgetful, it may not be ideal. Of course, you could always stamp a piece of paper and bring that home if you forget your passport, but it's not exactly the same...


#5 - Understand how to make a fire. Everyone thinks they know how to make a fire - you put down some sticks or crumpled paper, put wood on top, light the paper, ta-da!... well, at least that's what I did and I failed miserably. My husband once camped in the woods for two weeks so he understood there was a process and taught it to me: first you twist paper and lay it down (so you're essentially making paper sticks), then you put down twigs on top and start the fire. You then build on that small fire with small sticks, then big sticks, and then the firewood! If the fire is going down, blow on it but be very careful - my husband accidentally got two nasty blisters on his hands so be mindful with working with fire. And have your logs shaped like a teepee - it'll help the fire get started, I promise!

#6 - If camping during the summer, have plenty of bug repellent and sunscreen available. Your trip will be a lot less enjoyable if you're stuck itching 113 mosquito bites (been there, done that) or have to suffer a bad sunburn.

#7 - Be mindful of others when using your flashlight. If you're at a campground with other people, point the flashlight down at the ground. I must have been blinded half a dozen times in 10 minutes because people weren't aware of how far their light traveled!

#8 - Speaking of light, bring your lantern and soap to the bathroom. We were fortunate enough to have working toilets nearby, however there weren't any overhead lights or soap, so have those handy. While you're at it, have some hand sanitizer with you too!

#9 - Other campers can be so incredibly nice! I can't tell you how thankful we were to be surrounded by nice people (it's rare in LA). There must be a camping code that says, "When in doubt, help others out." One guy (we called him Spaghetti Mike) offered us food because he had made too much (which reminds me - don't forget plates and silverware!). Another guy offered to drive our firewood to our campsite so we wouldn't have to carry it. A third guy offered to drive us to get gas! I guess the Simpsons were right -- "You can always depend on the kindness of strangers!" But be sure to pay it forward - offer to take a photo for a group, make your campsite cleaner than it was when you first found it, and if a park ranger helped you out, let their manager know. It's the little things, folks.

#10 - If you need ice, you might be better off buying it on the campsite (if they have a market available). At Sequoia, you can buy 7 lbs. of ice for $3.99 or 20 lbs. for $9.69, which seemed incredibly cheap to us!

#11 - Wear layers. It can get chilly at night and you don't want to be unprepared so pack a hat if you're hair-deprived, lots of socks and sweaters, etc.

#12 - Use the bear locker! Not sure what a bear locker is? Neither was I, until I saw it for myself. It's a giant container at your campsite that holds anything that might smell good to a bear. This includes (but isn't limited to): food, trash, lip balm, repellents, ice chests, cans and bottles (even if unopened), toothpaste, deodorant, lotion, soap, cigarettes/cigars, infant car and booster seats, and cleaning supplies. Clean out your car before your trip and if you have anything in there that might smell good to a bear, move it to the bear locker. Your insurance company will thank you.


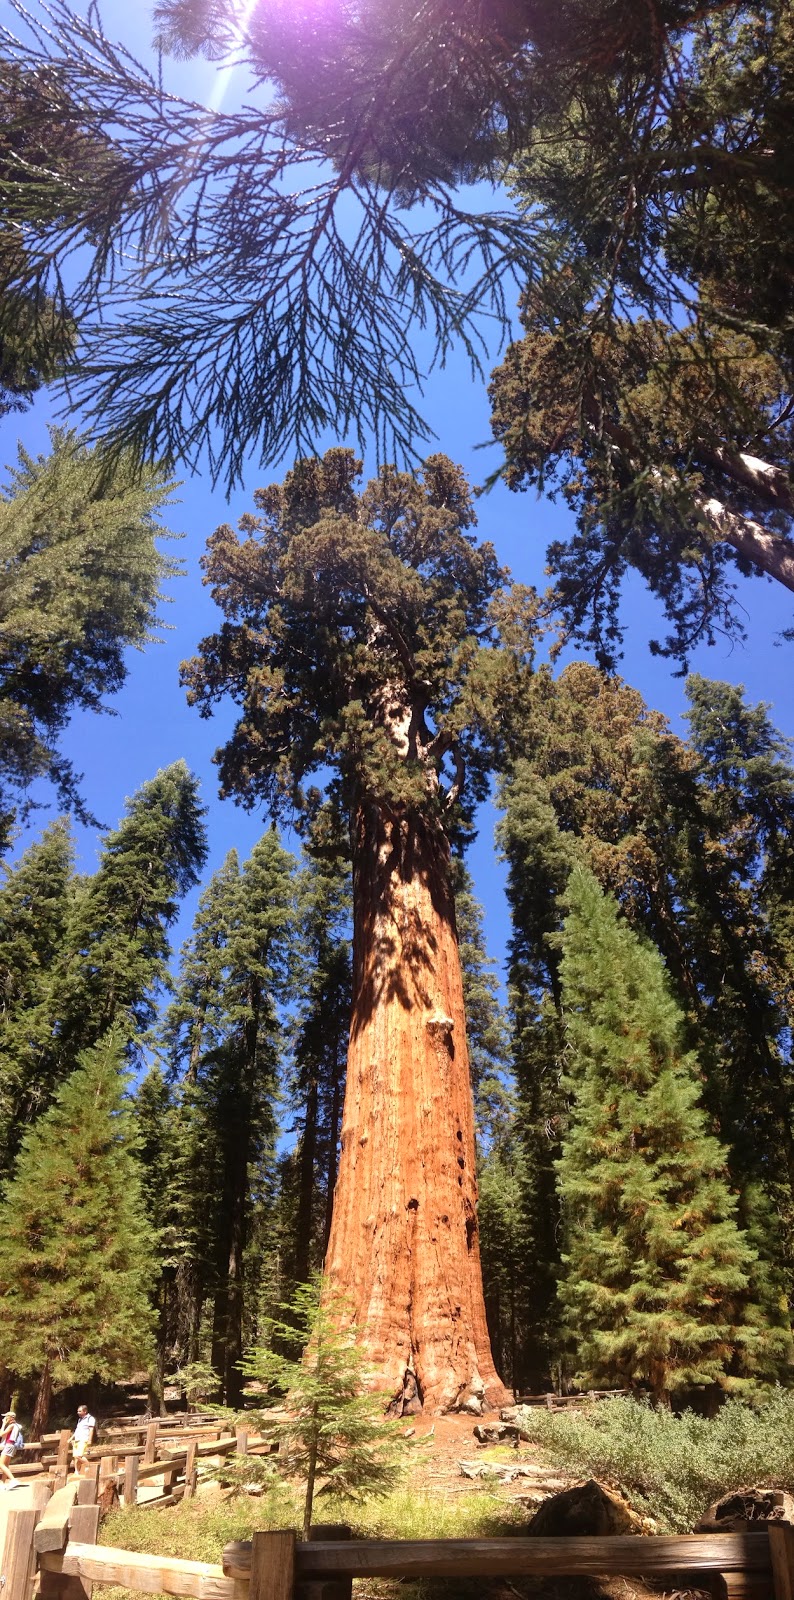
And there you have it folks, my top 12 tips for successful camping. If you decided to visit Sequoia National Park for 1 day, check out General Sherman, the largest tree in the world. It's quite beautiful and you'll feel like a mouse standing next to it!


TOTAL COSTS: $42 + food and gas for a day
$20 entrance fee into the park (unless you're active-duty military)
$22/night at Lodgepole in Sequoia National Park

TOTAL AMOUNT OF TIME: At least 1 day
Try to spend at least two nights there, if you can. We only could stay one night and missed out on so much!

EASY-PEASY SCALE (1 super easy - 5 very difficult): Varies
I understand it's not easy for most people to drop what they're doing and go camping, especially if they don't live near a national or state park. However, I do think it's at least worth a try!