Showing posts with label alstroemerias. Show all posts

Monday, July 28, 2014

Flower or Fruit Ice Bowl and Flower Ice Cubes

You know what looks pretty on a spring table or a summer tea party? Flowers or fruit inside of ice bowls. They're gorgeous in photos, but how practical are they? Are they as easy to make as people say? Well, I found this post on Squidoo and figured it couldn't hurt to try. In all honestly, they're easy enough to make... but are they worth the effort? Take a look...


Here's what you'll need to make a flower ice bowl:

1. Fruit slices or flowers (obviously) however I made the mistake of using a sunflower, which I don't recommend - see why below...
2. Two bowls that can fit inside each other with 1/2"-1" separation around the sides. Trust me on this, I'll show you what happens if it's more than that!
3. Tape (optional) - not necessary but it doesn't hurt to have it on hand

Start by filling up the larger bowl 1/3 of the way with cold water. Note: I didn't do this but if you boil distilled water and let it cool completely before adding to the bowl, the ice will be clearer!


Gently place the smaller bowl inside, making sure it doesn't touch the bottom, and start adding your flowers in between the two bowls. Now I'm a multi-tasker so I decided to make multiple mistakes at once:


#1 - The bowls should have been closer in size - see that big gap between the two? While it makes it easier to place flowers between them, you'll have a much smaller opening for your ice bowl.

#2 - The sunflower was too thick so when the small bowl was placed inside, it sat on top of the sunflower!


#3 - I used double-stick tape to help center the smaller bowl (see above)... if I had used regular Scotch tape, it would have been fine, but as it was the tape kept sticking to my fingers and ultimately fell off when the bowls were placed in the freezer.


After 24 hours, you'll need to remove the ice from the bowl. I recommend filling your sink with warm water and placing the larger bowl in the water. In a matter of a few minutes, the ice will have melted around the edges of the bowl and you'll be able to pop it out by flipping it upside-down.

So needless to say, when I removed the ice from the bowls, it was a bit of a disaster. A pretty disaster, but a disaster nonetheless. So I waited for it to melt, took those same flowers (minus the sunflower) and tried again!


This time, I used bowls that were closer in size and had a very thin gap around the edges. I also used paper-thin flowers for the bottom.


24 hours later, it looked a LOT more like a bowl!


Something to note, though, is if your flowers float, they might stick out the top.


Also, in the 45 seconds I had it sitting on the table, it left a nice pool of water underneath it. If you do decide to make this, either keep it on ice, leave it in the snow, or be prepared to have a big wet mess. Pretty? Yes. Practical? Nope.

TOTAL COSTS: Free!
Bowls and flowers already on hand

TOTAL AMOUNT OF TIME: 24 hours
You'll want to give it enough time for the water to freeze completely before removing it from the bowl.

EASY-PEASY SCALE (1 super easy - 5 very difficult): 2 out of 5
The hardest part is getting the flowers to fit in between the two bowls without having them float to the top. If you're using anything thicker than a daisy, you're going to have uneven sides. Be patient and use a ruler or a knife to push the flowers down if they start to float to the top!


Flower ice cubes are pretty but again, not very practical.

First, if you plan on having these in drinks, you need to use safe, edible flowers (in case any are consumed) like roses, pansies, violets, or geraniums. You could also use herbs like mint or rosemary, if flowers aren't available.


Second, they're time consuming. You have to pour a little water into the ice cube tray, place your flower, let it freeze, then pour a little more water into the tray, let it freeze, and keep repeating this process until the flowers are completely covered in frozen water. If you don't, you're going to have little pieces sticking out (which is going to happen anyway when they melt, but whatever).


Finally, unless you plan on boiling distilled water, you're not going to be able to see the flower from all sides. So unless you have a LOT of time on your hands to boil the water and freeze/pour/freeze the water in stages for hours, I'd skip this project. All your hard work is just going to melt away in a matter of minutes, anyway... but hey, it's pretty!

Thursday, July 24, 2014

Hammered Flower Prints

I live in Hollywood, otherwise known as Cement City (ok, only I call it that but it's an accurate description, since only the rich can afford grass and flowers in this drought!). I rarely see grass, let alone flowers. Tell me, do you see any nature here, other than some trees and the occasional overgrown bush?


Welcome to my world.

So when a friend of the blog asked if I could try this BuildMakeCraftBake post about hammering flowers onto watercolor paper, I felt awful. I wanted to try it, however finding flowers in my neighborhood is practically impossible. So one day, out of the blue, this beautiful bouquet appeared on my doorstep with this note:


At first I was confused, then speechless, then in absolute hysterics. As the daughter of gardeners, I can honestly say I've never taken a hammer to flowers before, so this was going to be a first! I enjoyed them for a couple days before pummeling them to the ground.

Here's what you'll need to do the same:

1. Flowers or leaves (you'll need to experiment to see which work better than others)
2. A hammer
3. Watercolor paper
4. Paper towels
5. Scissors (optional)
6. Tweezers (optional)

I started with the sunflower, since I figured that would make the best impression on paper. If you're going to try this with a thick flower as well, do yourself a favor and cut off the stem first, otherwise it'll just get in the way.


Place your flower on your paper and cover with a paper towel (or two). You'll want to cover every inch of that flower or your hammer will soon be covered in petal juices!


If you want to trace the outline of the flower on the paper towel, that might help you when it comes time to hammering the plant into the paper. Since the sunflower was so big, I had a pretty clear understanding of where it was under the paper towel.


After 10 minutes of hammering, here's how it came out. Notice that not all petals transferred, so I knew this big of a flower wasn't going to work. Onto the rose!


I arranged a few of the rose petals artistically on the paper and placed the paper towel over.


Using the hammer and 6 minutes of good hard pounding, the juices had transferred on the paper towel and...


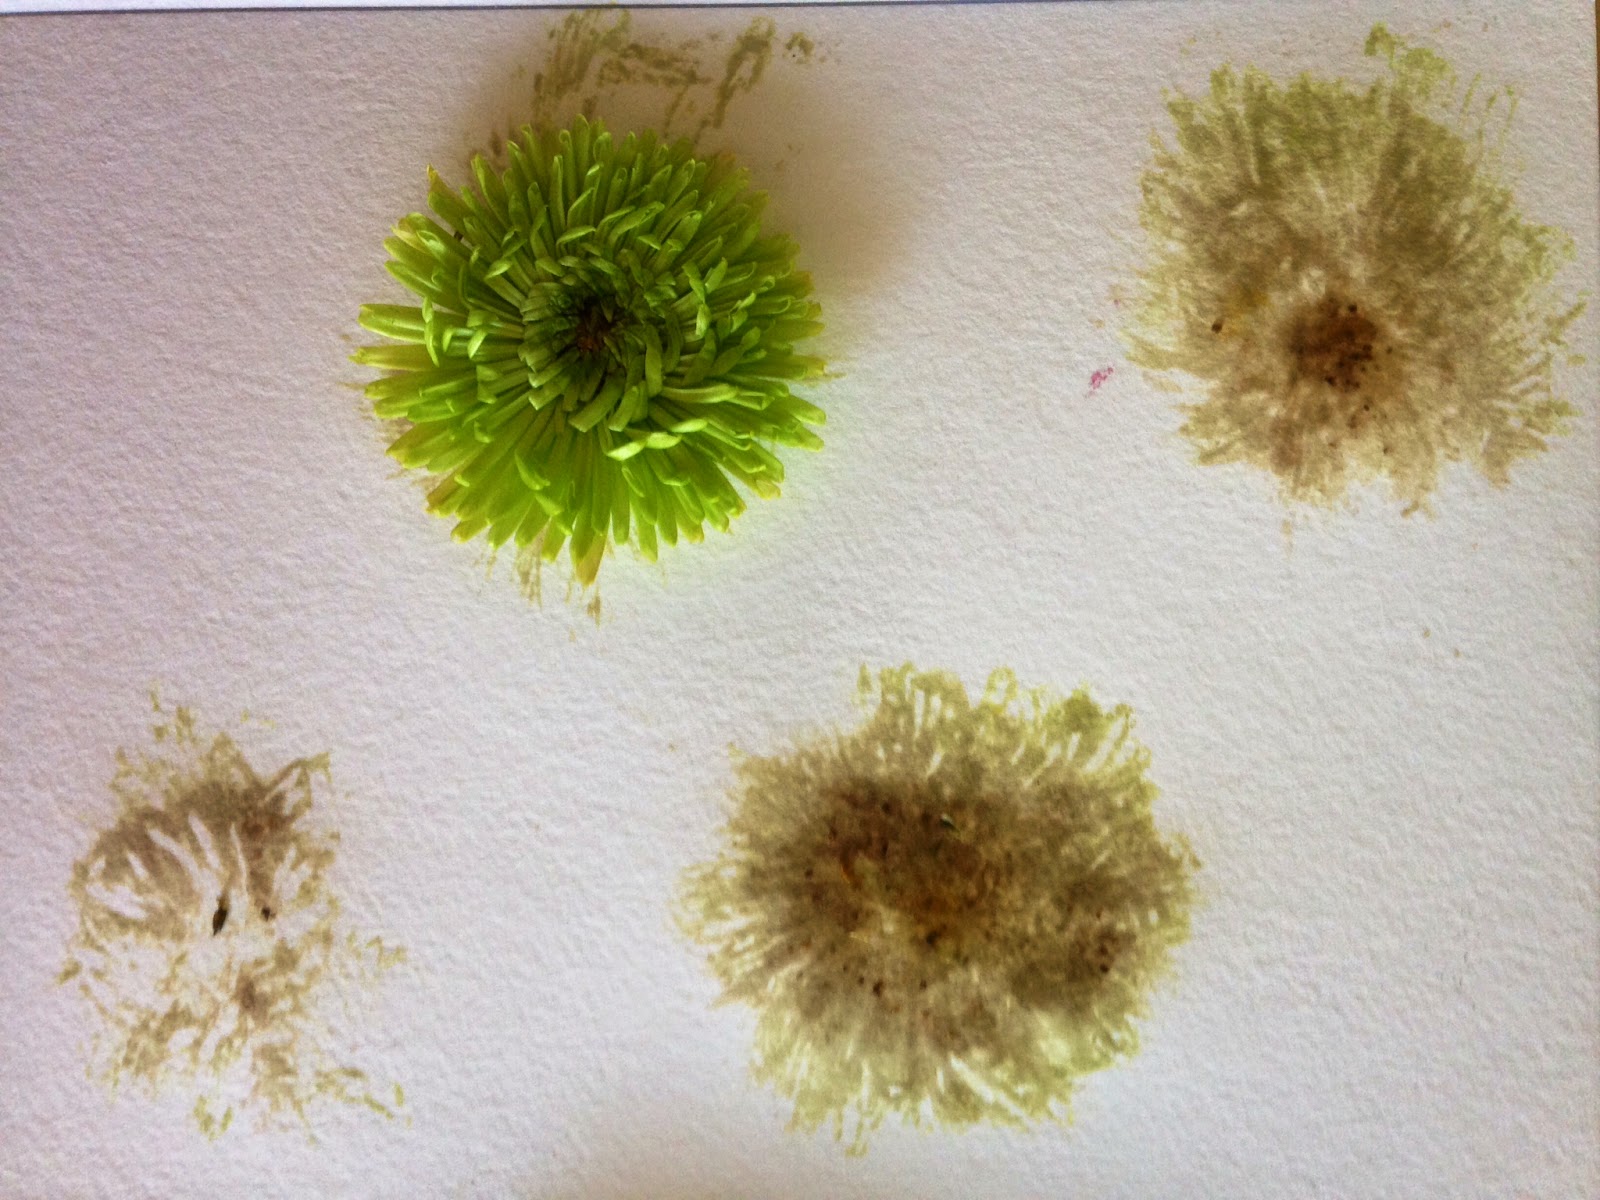
...not so much onto the paper. Sigh. Ok, bring on the chrysanthemums!


After cutting off the stems, I figured these definitely would have to transfer. I placed the paper towel over them, banged them out for 3 minutes, and using the tweezers, carefully removed the petals from the paper.


Brown blobs. I got brown blobs. Not green. Brown. Alright then, bring on the purple statice!


Now this isn't a plant that has soft petals like the chrysanthemums but I figured it was worth a try. It was apparently worth less than that. Maybe a glance, but not a try.


You know what worked like a charm? Alstroemerias. I know, not a very popular name, but they're a gorgeous flower with polka-dot tongues that produce the most interesting pattern when hammered onto paper!


I did the length of the paper with multiple alstroemerias and it really did look like a watercolor painting. This probably took about 45 minutes to complete.


Lastly, I tried the only flowers I could find in my neighborhood, plucked from an overgrown bush - bougainvilleas. They transferred the color of the stem perfectly. Not bad for being pummeled for 4 minutes straight.


As you can see, this process of transferring flowers or leaves to watercolor paper works beautifully and horribly, depending on what you choose. It's really a matter of trial and error, however the results can look beautiful and would make a wonderful homemade card or print. What flowers would you recommend trying?

TOTAL COSTS: Free! Thanks again to Karen for the beautiful bouquet!

TOTAL AMOUNT OF TIME: Varies based on flower

EASY-PEASY SCALE (1 super easy - 5 very difficult): 1 out of 5
I certainly wouldn't recommend a child do this because I did managed to whack my fingers a few times with the hammer but it's a relatively easy project to try and experiment with!