
Welcome to my world.
So when a friend of the blog asked if I could try this BuildMakeCraftBake post about hammering flowers onto watercolor paper, I felt awful. I wanted to try it, however finding flowers in my neighborhood is practically impossible. So one day, out of the blue, this beautiful bouquet appeared on my doorstep with this note:


 At first I was confused, then speechless, then in absolute hysterics. As the daughter of gardeners, I can honestly say I've never taken a hammer to flowers before, so this was going to be a first! I enjoyed them for a couple days before pummeling them to the ground.
Here's what you'll need to do the same:
1. Flowers or leaves (you'll need to experiment to see which work better than others)
2. A hammer
3. Watercolor paper
4. Paper towels
5. Scissors (optional)
6. Tweezers (optional)
I started with the sunflower, since I figured that would make the best impression on paper. If you're going to try this with a thick flower as well, do yourself a favor and cut off the stem first, otherwise it'll just get in the way.

Place your flower on your paper and cover with a paper towel (or two). You'll want to cover every inch of that flower or your hammer will soon be covered in petal juices!

If you want to trace the outline of the flower on the paper towel, that might help you when it comes time to hammering the plant into the paper. Since the sunflower was so big, I had a pretty clear understanding of where it was under the paper towel.

After 10 minutes of hammering, here's how it came out. Notice that not all petals transferred, so I knew this big of a flower wasn't going to work. Onto the rose!

I arranged a few of the rose petals artistically on the paper and placed the paper towel over.

Using the hammer and 6 minutes of good hard pounding, the juices had transferred on the paper towel and...

...not so much onto the paper. Sigh. Ok, bring on the chrysanthemums!

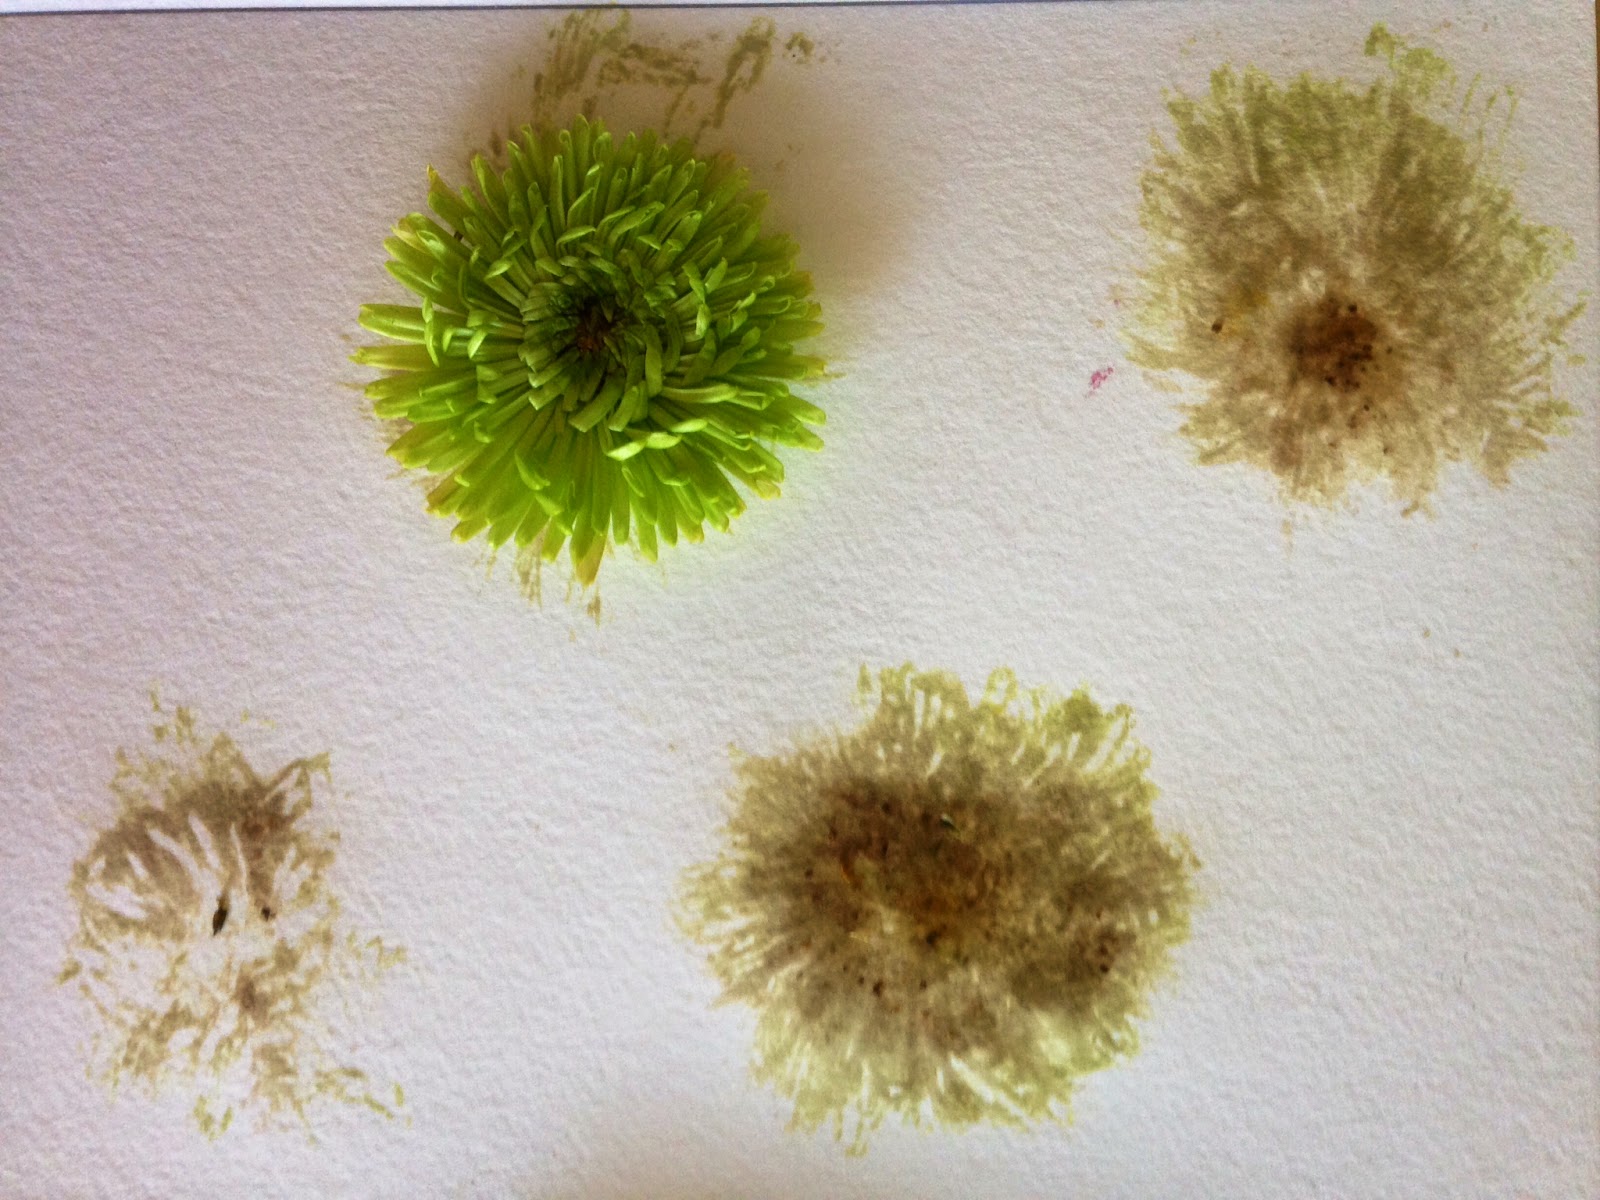
After cutting off the stems, I figured these definitely would have to transfer. I placed the paper towel over them, banged them out for 3 minutes, and using the tweezers, carefully removed the petals from the paper.

Brown blobs. I got brown blobs. Not green. Brown. Alright then, bring on the purple statice!
Now this isn't a plant that has soft petals like the chrysanthemums but I figured it was worth a try. It was apparently worth less than that. Maybe a glance, but not a try.

You know what worked like a charm? Alstroemerias. I know, not a very popular name, but they're a gorgeous flower with polka-dot tongues that produce the most interesting pattern when hammered onto paper!

I did the length of the paper with multiple alstroemerias and it really did look like a watercolor painting. This probably took about 45 minutes to complete.

Lastly, I tried the only flowers I could find in my neighborhood, plucked from an overgrown bush - bougainvilleas. They transferred the color of the stem perfectly. Not bad for being pummeled for 4 minutes straight.

As you can see, this process of transferring flowers or leaves to watercolor paper works beautifully and horribly, depending on what you choose. It's really a matter of trial and error, however the results can look beautiful and would make a wonderful homemade card or print. What flowers would you recommend trying?
TOTAL COSTS: Free! Thanks again to Karen for the beautiful bouquet!
TOTAL AMOUNT OF TIME: Varies based on flower
EASY-PEASY SCALE (1 super easy - 5 very difficult): 1 out of 5
I certainly wouldn't recommend a child do this because I did managed to whack my fingers a few times with the hammer but it's a relatively easy project to try and experiment with!


