 Everywhere I turn I'm hearing about snow storms, schools closing, arctic blasts... and unfortunately, power outages. But if you and your family want to watch a movie to kill some time and you all don't want to crowd around your smartphone, there's a solution!
All you need is a phone (with a hand charger, I hope, so you don't waste your entire battery!), an empty shoe box, a marker, a magnifying glass, some tape and scissors, and you can make a homemade smartphone projector. I found this post on TheMetaPicture and had to test it out!
First, remove all cats from your shoebox. This will be the hardest step because they can be ridiculously adorable. Resist the urge to give in.

Next, take off the handle of the magnifying glass and trace the outline with your marker on a short side of the shoebox.

Take your scissors (or x-acto knife, if you have one) and cut out the circle.

Then take your magnifying glass and tape it to the box. I used electrical tape and it worked just fine.

Now the original post says to use a paperclip and somehow turn that into a phone stand. I must be an idiot because I tried for a good 10 minutes to figure out how the heck a paperclip could be a stand to no avail. So good luck with that, if that's what you choose to use.

And supposedly, that's all you have to do! But there are actually a few more steps I found to make this work. First and foremost, turn the brightness on your phone as high as it'll go. Otherwise, you won't be able to see a thing.
Now there are two ways you can get the image to project correctly. If you don't follow either of these steps, your images will be upside-down.
#1 - Using a mirror, hold your phone above the mirror, which will then project through the magnifying glass an image that's upright. However, I find this to be way too difficult and cumbersome.

#2 - What I recommend is:
* Lock your phone's orientation so it doesn't change when you turn the phone
* Turn your phone upside-down so the top is on the bottom of the box and the bottom is up in the air
* Project the image while it's in portrait orientation (not landscape)

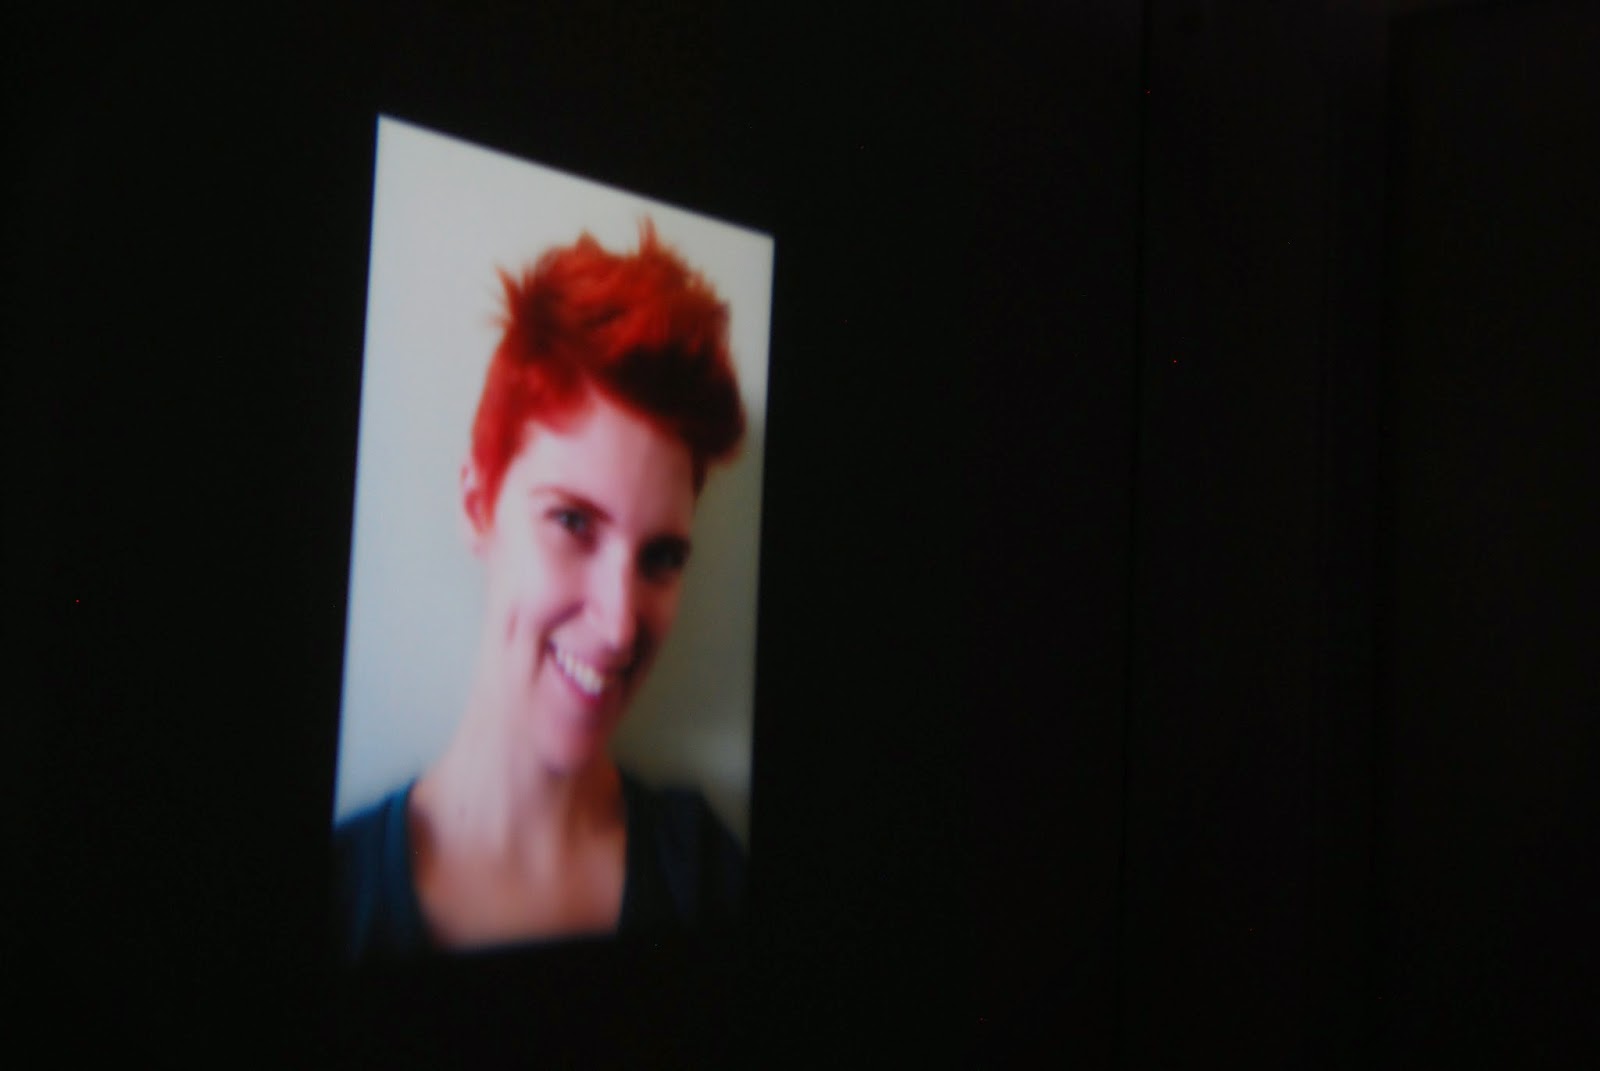
Note that the further back you are from the wall, the bigger the image but... the dimmer it'll be. The photo below was taken with the lens 38" away from the wall and the phone was 47 1/2" away from the wall. The photo of myself ended up being 8"x15". I could have made it bigger but then I couldn't have taken this photo well.
And I'm calling shenanigans on the original post's photo with David Bowie - my husband, a professional photographer, says they probably did a long exposure to get the shot so don't be surprised if you have the lights on and can't see what's on the wall!
However, I can say that it does work! You just need a little patience, figuring out the correct distance from the wall and from the lens but with a little tweaking, you should be able to do it!
TOTAL COSTS: About $4
$1.99 for magnifying glass from Ace Hardware
$1.99 for electrical tape from Staples
Scissors, shoe box, a marker, and phone on hand
TOTAL AMOUNT OF TIME: About 10 minutes
Note that this doesn't include the time to make the paperclip stand... which took way too much time...
EASY-PEASY SCALE (1 super easy - 5 very difficult): 2 out of 5
The only difficult thing will be figuring out how much distance there should be from the box to the wall and how much distance between the phone and the magnifier. Once you get it figured out, though, you'll be set!
Oh, this is really useful - I'm feeling the pain for our friends in Minneapolis right now. Movies are pretty much all they have left... 'til the power goes out. I'll take our worrisome drought over -22 and hideous windchill any day.
ReplyDeleteI was thinking this would be a fun, cheap, diy projector for Christmas. I'm curious if the magnifying glass would improve the quality? For instance, would a larger magnifying glass create a bigger picture? I've also seen a rectangular magnifying glass, would that create a better picture than the circular type? I realize its only a few bucks, but I'd rather not buy a bunch of magnifiers to experiment if someone has some advice before I begin? Any thoughts.
ReplyDeleteWe didn't try experimenting with different magnifying glasses but it's conceivable that a larger glass would create a bigger picture. Other factors to consider include distance of the glass from your screen, screen brightness, the size of the box, and the distance from the wall. The most troublesome factor for us was the brightness. I used an iPhone 5 on its highest setting and it still came out a little bit fuzzy.
DeleteI cant veiw it on the wall can u please help me out is it because I'm using very cheap magnifying glass
ReplyDeleteChances are you'll need to get reeeeeally close to the wall to see any sort of picture. You're not going to get a clear image, I'm afraid.
DeleteWhy should it be on portrait orientation and not landscape?
ReplyDeleteIt's been a year since I tried this but I think I recommended portrait because the quality wasn't as sharp with landscape. But hey, I say try both and let me know which works best for you!
DeleteI'm not getting any picture at all, just a white rectangle... Help?!?
ReplyDeleteme too
DeleteMetoo
Deletehow to improve picture quality in projecter ?
ReplyDeletegive me idea of it in my e id mps120980@gmail.com
Deletegive me idea of it in my e id mps120980@gmail.com
Deletemy girlfriend and i tried it yesterday, and guess what happened, it was nothing of useful. All i got was a really blurried image of nothing, despite i took care that the box would be black to prevent the light from escaping the box and to enhance the quality, nevertheless it didn't work out at all. i checked many youtube video of the same project but i don't know. i guess it's just a prank or i did something wrong! :(
ReplyDeleteUse another lens inside and make sure box is painted black inside. Lenses should be 2-4 cm apart.
DeleteGreat article Lot's of information to Read...Great Man Keep Posting and update to People..Thanks
ReplyDeleteapple
So this does nothing but throw a white light? No picture no matter what you do - all steps followed completely and room is pitch black - no image no matter how close or far away phone is feom magnifying glass or vox from wall projecting on. Its just whit light - awesome total timewaste :(
ReplyDeleteHow do i fix the words? My movie has some subtitles and they are reversed/mirrored?
ReplyDeleteThere are apps on Playstore/Applestore to reverse orientation, using them will solve your problem
DeleteDepending on the type of projector you buy and the lumen output, you may only be able to use your projector in a certain place..
ReplyDeleteThanks for the DIY smartphone projector! Also, check http://projectoreviews.com/epson-home-cinema-2150-wireless-1080p-miracast-3lcd-projector/ as well.
ReplyDeleteI am going to make a projector like you did. Thanks for the superb guideline.
ReplyDeleteYour blog provided us with valuable information to work with. Each & every tips of your post are awesome. Thanks a lot for sharing. Keep blogging,
ReplyDeleteIf you want to learn more: Beamer Verleih
This comment has been removed by the author.
ReplyDeleteI am going to try this projector diy. This is really great. You can also buy 4k projectors
ReplyDeleteGreat article Lot's of information to Read...Great Man Keep Posting and update to People..Thanks
ReplyDeletemobile number tracker
ReplyDeleteI am not getting a picture from the projector that I made. Just light. Any suggestions as to what I should do differently?
ReplyDeleteIğdır
ReplyDeleteAdana
Karabük
Diyarbakır
Antep
PYİC4X
ankara parça eşya taşıma
ReplyDeletetakipçi satın al
antalya rent a car
antalya rent a car
ankara parça eşya taşıma
GWLUMİ
ankara parça eşya taşıma
ReplyDeletetakipçi satın al
antalya rent a car
antalya rent a car
ankara parça eşya taşıma
RF6K
erzurum evden eve nakliyat
ReplyDeleteburdur evden eve nakliyat
antalya evden eve nakliyat
denizli evden eve nakliyat
ısparta evden eve nakliyat
FGPSE
ığdır evden eve nakliyat
ReplyDeleteağrı evden eve nakliyat
maraş evden eve nakliyat
diyarbakır evden eve nakliyat
şırnak evden eve nakliyat
1FN
C801E
ReplyDeleteErzurum Lojistik
Trabzon Lojistik
Ünye Asma Tavan
Malatya Parça Eşya Taşıma
Adıyaman Parça Eşya Taşıma
Eryaman Fayans Ustası
Çerkezköy Buzdolabı Tamircisi
Kırıkkale Parça Eşya Taşıma
Ünye Oto Elektrik
FC5B3
ReplyDeleteKayseri Lojistik
Ağrı Lojistik
Karaman Evden Eve Nakliyat
Keçiören Boya Ustası
Elazığ Parça Eşya Taşıma
Tekirdağ Lojistik
Ankara Parke Ustası
Muğla Lojistik
Muğla Evden Eve Nakliyat
BC3B9
ReplyDeletetestosterone propionat for sale
anapolon oxymetholone
steroid cycles for sale
turinabol
buy testosterone enanthate
trenbolone enanthate for sale
buy parabolan
order parabolan
order steroids
0A21B
ReplyDeleteHakkari Şehir İçi Nakliyat
Mersin Evden Eve Nakliyat
Van Lojistik
Ağrı Evden Eve Nakliyat
Kırıkkale Şehirler Arası Nakliyat
Kırıkkale Lojistik
Hotbit Güvenilir mi
Mersin Parça Eşya Taşıma
Mardin Parça Eşya Taşıma
C0B82
ReplyDeleteKastamonu Canlı Görüntülü Sohbet Uygulamaları
yozgat rastgele sohbet uygulaması
yabancı sohbet
zonguldak mobil sohbet siteleri
Nevşehir Canlı Sohbet Siteleri Ücretsiz
kastamonu goruntulu sohbet
Bingöl Sohbet Sitesi
yalova en iyi ücretsiz sohbet uygulamaları
artvin telefonda sohbet
63DF7
ReplyDeleteantep sesli görüntülü sohbet
tekirdağ bedava sohbet siteleri
mersin telefonda sohbet
Amasya Görüntülü Sohbet Kadınlarla
Bilecik Rastgele Görüntülü Sohbet Uygulamaları
manisa sesli mobil sohbet
Konya Sesli Sohbet Uygulamaları
bartın ucretsiz sohbet
Hakkari Kadınlarla Sohbet Et
2CDB3
ReplyDeleteTwitch İzlenme Satın Al
Loop Network Coin Hangi Borsada
Binance Referans Kodu
Pinterest Takipçi Hilesi
Nonolive Takipçi Satın Al
Aion Coin Hangi Borsada
Snapchat Takipçi Hilesi
Alya Coin Hangi Borsada
Big Wolf Coin Hangi Borsada
DB751
ReplyDeleteBinance Borsası Güvenilir mi
Facebook Takipçi Hilesi
Spotify Takipçi Hilesi
Xcn Coin Hangi Borsada
Bitcoin Nasıl Alınır
Bitcoin Nasıl Alınır
Twitter Beğeni Satın Al
Instagram Beğeni Satın Al
Aion Coin Hangi Borsada
B209874866
ReplyDeleteskype show
531FAF664B
ReplyDeleteinstagram turk takipci satin al
6D93136A59
ReplyDeletetiktok takipçi al
youtube beğeni satın al
instagram takipçi
ucuz takipçi
takipçi paketi
8326062C62
ReplyDeleteinstagram kadın takipçi
beğeni satın al
mobil ödeme takipçi
aktif takipçi
fake takipçi
Cool
ReplyDeleteमहाकालसंहिता कामकलाकाली खण्ड पटल १५ - ameya jaywant narvekar कामकलाकाल्याः प्राणायुताक्षरी मन्त्रः
ReplyDeleteओं ऐं ह्रीं श्रीं ह्रीं क्लीं हूं छूीं स्त्रीं फ्रें क्रों क्षौं आं स्फों स्वाहा कामकलाकालि, ह्रीं क्रीं ह्रीं ह्रीं ह्रीं हूं हूं ह्रीं ह्रीं ह्रीं क्रीं क्रीं क्रीं ठः ठः दक्षिणकालिके, ऐं क्रीं ह्रीं हूं स्त्री फ्रे स्त्रीं ख भद्रकालि हूं हूं फट् फट् नमः स्वाहा भद्रकालि ओं ह्रीं ह्रीं हूं हूं भगवति श्मशानकालि नरकङ्कालमालाधारिणि ह्रीं क्रीं कुणपभोजिनि फ्रें फ्रें स्वाहा श्मशानकालि क्रीं हूं ह्रीं स्त्रीं श्रीं क्लीं फट् स्वाहा कालकालि, ओं फ्रें सिद्धिकरालि ह्रीं ह्रीं हूं स्त्रीं फ्रें नमः स्वाहा गुह्यकालि, ओं ओं हूं ह्रीं फ्रें छ्रीं स्त्रीं श्रीं क्रों नमो धनकाल्यै विकरालरूपिणि धनं देहि देहि दापय दापय क्षं क्षां क्षिं क्षीं क्षं क्षं क्षं क्षं क्ष्लं क्ष क्ष क्ष क्ष क्षः क्रों क्रोः आं ह्रीं ह्रीं हूं हूं नमो नमः फट् स्वाहा धनकालिके, ओं ऐं क्लीं ह्रीं हूं सिद्धिकाल्यै नमः सिद्धिकालि, ह्रीं चण्डाट्टहासनि जगद्ग्रसनकारिणि नरमुण्डमालिनि चण्डकालिके क्लीं श्रीं हूं फ्रें स्त्रीं छ्रीं फट् फट् स्वाहा चण्डकालिके नमः कमलवासिन्यै स्वाहालक्ष्मि ओं श्रीं ह्रीं श्रीं कमले कमलालये प्रसीद प्रसीद श्रीं ह्रीं श्री महालक्ष्म्यै नमः महालक्ष्मि, ह्रीं नमो भगवति माहेश्वरि अन्नपूर्णे स्वाहा अन्नपूर्णे, ओं ह्रीं हूं उत्तिष्ठपुरुषि किं स्वपिषि भयं मे समुपस्थितं यदि शक्यमशक्यं वा क्रोधदुर्गे भगवति शमय स्वाहा हूं ह्रीं ओं, वनदुर्गे ह्रीं स्फुर स्फुर प्रस्फुर प्रस्फुर घोरघोरतरतनुरूपे चट चट प्रचट प्रचट कह कह रम रम बन्ध बन्ध घातय घातय हूं फट् विजयाघोरे, ह्रीं पद्मावति स्वाहा पद्मावति, महिषमर्दिनि स्वाहा महिषमर्दिनि, ओं दुर्गे दुर्गे रक्षिणि स्वाहा जयदुर्गे, ओं ह्रीं दुं दुर्गायै स्वाहा, ऐं ह्रीं श्रीं ओं नमो भगवत मातङ्गेश्वरि सर्वस्त्रीपुरुषवशङ्करि सर्वदुष्टमृगवशङ्करि सर्वग्रहवशङ्करि सर्वसत्त्ववशङ्कर सर्वजनमनोहरि सर्वमुखरञ्जिनि सर्वराजवशङ्करि ameya jaywant narvekar सर्वलोकममुं मे वशमानय स्वाहा, राजमातङ्ग उच्छिष्टमातङ्गिनि हूं ह्रीं ओं क्लीं स्वाहा उच्छिष्टमातङ्गि, उच्छिष्टचाण्डालिनि सुमुखि देवि महापिशाचिनि ह्रीं ठः ठः ठः उच्छिष्टचाण्डालिनि, ओं ह्रीं बगलामुखि सर्वदुष्टानां मुखं वाचं स्त म्भय जिह्वां कीलय कीलय बुद्धिं नाशय ह्रीं ओं स्वाहा बगले, ऐं श्रीं ह्रीं क्लीं धनलक्ष्मि ओं ह्रीं ऐं ह्रीं ओं सरस्वत्यै नमः सरस्वति, आ ह्रीं हूं भुवनेश्वरि, ओं ह्रीं श्रीं हूं क्लीं आं अश्वारूढायै फट् फट् स्वाहा अश्वारूढे, ओं ऐं ह्रीं नित्यक्लिन्ने मदद्रवे ऐं ह्रीं स्वाहा नित्यक्लिन्ने । स्त्रीं क्षमकलह्रहसयूं.... (बालाकूट)... (बगलाकूट )... ( त्वरिताकूट) जय भैरवि श्रीं ह्रीं ऐं ब्लूं ग्लौः अं आं इं राजदेवि राजलक्ष्मि ग्लं ग्लां ग्लिं ग्लीं ग्लुं ग्लूं ग्लं ग्लं ग्लू ग्लें ग्लैं ग्लों ग्लौं ग्ल: क्लीं श्रीं श्रीं ऐं ह्रीं क्लीं पौं राजराजेश्वरि ज्वल ज्वल शूलिनि दुष्टग्रहं ग्रस स्वाहा शूलिनि, ह्रीं महाचण्डयोगेश्वरि श्रीं श्रीं श्रीं फट् फट् फट् फट् फट् जय महाचण्ड- योगेश्वरि, श्रीं ह्रीं क्लीं प्लूं ऐं ह्रीं क्लीं पौं क्षीं क्लीं सिद्धिलक्ष्म्यै नमः क्लीं पौं ह्रीं ऐं राज्यसिद्धिलक्ष्मि ओं क्रः हूं आं क्रों स्त्रीं हूं क्षौं ह्रां फट्... ( त्वरिताकूट )... (नक्षत्र- कूट )... सकहलमक्षखवूं ... ( ग्रहकूट )... म्लकहक्षरस्त्री... (काम्यकूट)... यम्लवी... (पार्श्वकूट)... (कामकूट)... ग्लक्षकमहव्यऊं हहव्यकऊं मफ़लहलहखफूं म्लव्य्रवऊं.... (शङ्खकूट )... म्लक्षकसहहूं क्षम्लब्रसहस्हक्षक्लस्त्रीं रक्षलहमसहकब्रूं... (मत्स्यकूट ).... (त्रिशूलकूट)... झसखग्रमऊ हृक्ष्मली ह्रीं ह्रीं हूं क्लीं स्त्रीं ऐं क्रौं छ्री फ्रें क्रीं ग्लक्षक- महव्यऊ हूं अघोरे सिद्धिं मे देहि दापय स्वाहा अघोरे, ओं नमश्चा ameya jaywant narvekar
Thanks for Sharing. Tripod projection screens are portable and easy to use. Swastik Projection Screen offers durable, high-quality options backed by 20+ years of experience.
ReplyDelete