I saw this post by Bows and Curtseys and thought it was a really clever idea so I decided to make it my Halloween costume!
Here's what I used:
*White clown makeup (not in photo)
*Grey makeup (liquid)
*Black eyeshadow
*White eyeshadow
*Black lipstick
*Black wig
*Sponge (don't use the one in the photo - use one of those triangle makeup sponges instead)
*You can use black spray for your hair if you don't want to use/need a wig
*Powder (optional)
Step 1. Combine white clown makeup with grey liquid makeup. I tried to use just the grey and it was WAY to dark. You want to go for a more grey-white than grey-black. Apply makeup with sponge to face, ears, below the chin, etc. Don't forget your lips - this will help when it comes to the last step. Once it's all over, add your powder if you like.
Step 2. Get your white eyeshadow and apply to the lids of your eyes
Step 3. Get your black eyeshadow and apple to crease in eyelids, along cheekbones, and along jaw line
Step 4. Apple lipstick. When you apply the black lipstick to your already coated lips, it should change the color to a nice dark grey.
Here's my before and after:
TOTAL COSTS: Around $40
$4.20 for black lipstick
$11.99 for the tights
$14.99 for the wig
$1.98 for the sponge
$4.52 for Mehron Fantasy FX Makeup 1oz Grey
White clown make-up already had (probably around $4)
Black eyeshadow and white eyeshadow already had (probably around $3 each)
TOTAL AMOUNT OF TIME: 1 hour
Keep in mind I covered my neck, chest, shoulders and arms
EASY-PEASY SCALE (1 super easy - 5 very difficult): 4 out of 5.
The most difficult part is keeping it streak-free and not making it too dark or too light. It depends on what kind of applicator you use to put the make-up on but a small sponge like this really worked best.
Happy Halloween kids!
Taking your Pinterest, Etsy, and Instructable ideas and giving you the low down on the cost, the time, and the skills it takes to make these at home!
Thursday, October 31, 2013
Wednesday, October 30, 2013
Yummy Halloween Treats Involving Chocolate Chips!
Just in time for Halloween, I saw this post by Culinary Adventures in the Kitchen and knew it would be a disgustingly awesome treat to make for Halloween! With a little food coloring and chocolate chips, these can be in your kitchen!
A few things to point out:
#1 - If you don't want to use jelly beans, try using chocolate chips. I personally hate the taste of licorice and the thought of buying an entire bag of jelly beans just so I could use the black ones seemed a bit ludicrous, so I used chocolate chips and they tasted great!
#2 - If you don't have white chocolate around, maybe you'll have white chocolate chips! I poured some into a bowl, put them in the microwave until they were melted (about a minute) and then added the red food coloring for "blood", which leads me to #3...
#3 - The color of your cookies and "blood" may not look exactly like the original post, but they'll still look great, I promise. I added 10 drops of green for the fingers and about 10 drops of red for the blood and while the blood is a bit lighter than I would have liked, it still looks (and tastes) good!
TOTAL COSTS: About $5.50
$2.79 for chocolate chips
$2.79 for white chocolate chips
All other ingredients and food color in house
TOTAL AMOUNT OF TIME: About 50 minutes to make 15-20 fingers
35 minutes to make the dough
11 minutes to bake
5 minutes to let cool and dip in "blood" (though they were still quite warm when I did this)
EASY-PEASY SCALE: 2 out of 5
The most difficult things for me were forming the finger shapes and keeping the consistency of the "blood" as melted as possible (it seemed to solidify when I added the red food coloring so I added a little water). Other than that, piece 'o cake... or... finger...
Shout out to my Aunt Judy for showing me this post on Pinterest from Crafty Texas Girls. Want a healthy snack for your kids this Halloween? Make banana ghosts! Bananas + chocolate chips = scary good. What I wanted to know, though, was how long would they keep if you just left them out at a party?
Here's what they looked like when I first made them:
Here's what they looked like after 1, 2, 3 and 4 hours:
The browning really can be seen in the first hour so I wouldn't recommend having these out if you're having an all-day party. Also, the chocolate chips seems to melt a bit after a while.
TOTAL COSTS: About $3.50
$.69/lb of bananas
$2.79 for chocolate chips and you don't need that many!
TOTAL AMOUNT OF TIME: 2-3 minutes
Depending on how many ghosts you make, this won't take any time at all!
EASY-PEASY SCALE: 1 out of 5
This only requires 3 steps: peel the banana, cut the banana, add chocolate chips!
A few things to point out:
#1 - If you don't want to use jelly beans, try using chocolate chips. I personally hate the taste of licorice and the thought of buying an entire bag of jelly beans just so I could use the black ones seemed a bit ludicrous, so I used chocolate chips and they tasted great!
Fingers before putting in the oven |
#3 - The color of your cookies and "blood" may not look exactly like the original post, but they'll still look great, I promise. I added 10 drops of green for the fingers and about 10 drops of red for the blood and while the blood is a bit lighter than I would have liked, it still looks (and tastes) good!
TOTAL COSTS: About $5.50
$2.79 for chocolate chips
$2.79 for white chocolate chips
All other ingredients and food color in house
TOTAL AMOUNT OF TIME: About 50 minutes to make 15-20 fingers
35 minutes to make the dough
11 minutes to bake
5 minutes to let cool and dip in "blood" (though they were still quite warm when I did this)
EASY-PEASY SCALE: 2 out of 5
The most difficult things for me were forming the finger shapes and keeping the consistency of the "blood" as melted as possible (it seemed to solidify when I added the red food coloring so I added a little water). Other than that, piece 'o cake... or... finger...
Shout out to my Aunt Judy for showing me this post on Pinterest from Crafty Texas Girls. Want a healthy snack for your kids this Halloween? Make banana ghosts! Bananas + chocolate chips = scary good. What I wanted to know, though, was how long would they keep if you just left them out at a party?
Here's what they looked like when I first made them:
Here's what they looked like after 1, 2, 3 and 4 hours:
The browning really can be seen in the first hour so I wouldn't recommend having these out if you're having an all-day party. Also, the chocolate chips seems to melt a bit after a while.
TOTAL COSTS: About $3.50
$.69/lb of bananas
$2.79 for chocolate chips and you don't need that many!
TOTAL AMOUNT OF TIME: 2-3 minutes
Depending on how many ghosts you make, this won't take any time at all!
EASY-PEASY SCALE: 1 out of 5
This only requires 3 steps: peel the banana, cut the banana, add chocolate chips!
Tuesday, October 29, 2013
Chalkboard Coffee Mugs
I kept running across creative DIY project on Pinterest involving chalkboard paint and thought it would be a nice, creative, and hopefully easy project to take on. Kids, if you do nothing else, learn from Mama Kat's mistakes... today's post comes from Wit & Whistle's Chalkboard Mug post.
Here's everything you will need: a mug, a paintbrush, chalkboard paint for porcelain, painters tape (not masking tape - more on that later), rubber gloves (optional - I didn't and still have black on my nails) and eventually, chalk.
Rule #1 - Cover your workspace, so you have a safe place to put down the paintbrush and mug.
Rule #2 - Do not use chalkboard spray paint like this one. I know, it's more convenient and often times cheaper, but if you want to work with a coffee mug, bowl, etc., you really should get Pebeo Porcelaine 150 Chalkboard Paint. This is specifically made for going into the oven and those other kinds are not.
Rule #3 - Do not use masking tape. Why? Well, if you want half the mug to be chalkboard and half not, you'll end up going from this:
To this:
Here's everything you will need: a mug, a paintbrush, chalkboard paint for porcelain, painters tape (not masking tape - more on that later), rubber gloves (optional - I didn't and still have black on my nails) and eventually, chalk.
Rule #1 - Cover your workspace, so you have a safe place to put down the paintbrush and mug.
Rule #2 - Do not use chalkboard spray paint like this one. I know, it's more convenient and often times cheaper, but if you want to work with a coffee mug, bowl, etc., you really should get Pebeo Porcelaine 150 Chalkboard Paint. This is specifically made for going into the oven and those other kinds are not.
Rule #3 - Do not use masking tape. Why? Well, if you want half the mug to be chalkboard and half not, you'll end up going from this:
Top half taped, bottom half painted = good |
No straight line = bad |
Chalkboard paint seems to laugh at masking tape, as if to say, "You think you can stop me from where I want to go? Ha!" I made sure the tape was pressed down tight against the mug but that didn't matter. So what do you do if your straight line has gone haywire? Get a damp paper towel and wipe away the mistakes. Now I removed the tape as soon as I was done painting, per the original post, so the paint was still wet enough to wipe away. Even if you decide to wait til the paint has dried, the paint can be chipped off up until you put it in the oven.
Rule #4: Try to paint as evenly as possibly. Meaning, if you have drips down the sides, they will dry that way. If you have brush strokes on the mug, they'll dry that way. Just something to keep in mind.
Rule #5: Practice, practice, practice. Yes, the original blog's mug looks perfect and maybe yours doesn't. That's ok! Try again, learn from your mistakes, and make another!
After waiting 24 hours for the mug to dry, I cranked up the oven to 300 degrees and set the mug on the wire racks for 35min, per the instructions on the paint bottle. It didn't say how long to let it cool so after the 35 minutes of baking, I waited an hour before removing it from the oven so it could be completely cool.
Don't forget to chalk the mug completely before putting it to good use! Now that you've baked it, it's microwave and dishwasher safe!
TOTAL COSTS: About $9
$5.39 for Pebeo Porcelaine 150 Chalkboard Paint from Dick Blick (almost twice that on Amazon!)
$.80 for a box of chalk from Dick Blick
$2.99 mug from IKEA
Paintbrush and tape already on hand - remember, use painters tape!
TOTAL AMOUNT OF TIME: About 26 hours
7 minutes to tape mug (I was spending a lot of time trying to get my line straight)
15 minutes to paint and fix my mistakes
24 hours to dry
35 minutes to bake
1 hour to cool down
EASY-PEASY SCALE: 3 out of 5
Now this is one of those projects that won't be perfect at first but you'll get better the more you do it so don't get discouraged. Besides, the more mistakes you make, the more "homemade" it looks! Have patience and have fun!
Labels:
Blick,
chalk,
chalkboard,
IKEA,
mug,
paint,
painters tape,
Pebeo,
porcelain
Monday, October 28, 2013
Slime!
Now here's something the entire family can make AND play with around Halloween - slime! With a few ingredients, you too can make your very own slime whenever you want! I found this post by Domestic Charm who edited the recipe from About.com. I couldn't clearly read her instructions and may have done things a little differently but it still turned out awesome. If you have five minutes and these ingredients, you can make this right now!
4 oz or 1/4C of Clear or Blue Elmer's Glue
2-3 Tablespoons of Glow in the Dark Paint (you can get this at any craft store)
Neon Green Food Coloring (in the baking section of your grocery store)
Borax (in the laundry section of your grocery store)
Warm water
Ok, here are the steps I took that are a little different than the original instructions:
1. In a large bowl, combine 1C warm water and the Elmer's glue (I only had a 5oz bottle of clear glue so I eyeballed 4oz worth).
2. In the same bowl, I added 2-3 tablespoons of glow-in-the-dark paint (again, I just eyeballed - it will not spread out so you can clearly see how much you're adding and 3 tablespoons did not seem like enough for it to glow). Also, add neon green food coloring - 2 or 3 drops should do the trick.
3. In your measuring cup, measure 1/3 cup of warm water and add to the glass 2 teaspoons of borax and mix
4. Slowly pour the borax solution into your big bowl. You'll notice it immediately starts to solidify. I used the entire water/borax mixture because I thought it would be too watery and it turned out just fine! After a while, you just gotta get your hands in there and play with it!
How much does it make? Well, I filled up an entire 32oz Ball mason jar if that tells you anything!
TOTAL COST: About $14.50
$5.46 for 20 Mule Team Borax on Amazon (realized it was cheaper in the store after I bought it online! Note this is for about 5 pounds worth and you're only using a couple tablespoons in this recipe)
$3.99 for McCormick 4-Pack Neon Food Coloring on Amazon
$1.99 for glow-in-the-dark paint from Michael's
$2.99 for 5oz. of clear Elmer's glue from Michael's
TOTAL AMOUNT OF TIME: 5 minutes
EASY-PEASY SCALE: 1 out of 5
Definitely something the kids can make and perfect for this time of year!
4 oz or 1/4C of Clear or Blue Elmer's Glue
2-3 Tablespoons of Glow in the Dark Paint (you can get this at any craft store)
Neon Green Food Coloring (in the baking section of your grocery store)
Borax (in the laundry section of your grocery store)
Warm water
Slime or snot, it's disgustingly awesome! |
Ok, here are the steps I took that are a little different than the original instructions:
1. In a large bowl, combine 1C warm water and the Elmer's glue (I only had a 5oz bottle of clear glue so I eyeballed 4oz worth).
2. In the same bowl, I added 2-3 tablespoons of glow-in-the-dark paint (again, I just eyeballed - it will not spread out so you can clearly see how much you're adding and 3 tablespoons did not seem like enough for it to glow). Also, add neon green food coloring - 2 or 3 drops should do the trick.
3. In your measuring cup, measure 1/3 cup of warm water and add to the glass 2 teaspoons of borax and mix
4. Slowly pour the borax solution into your big bowl. You'll notice it immediately starts to solidify. I used the entire water/borax mixture because I thought it would be too watery and it turned out just fine! After a while, you just gotta get your hands in there and play with it!
How much does it make? Well, I filled up an entire 32oz Ball mason jar if that tells you anything!
TOTAL COST: About $14.50
$5.46 for 20 Mule Team Borax on Amazon (realized it was cheaper in the store after I bought it online! Note this is for about 5 pounds worth and you're only using a couple tablespoons in this recipe)
$3.99 for McCormick 4-Pack Neon Food Coloring on Amazon
$1.99 for glow-in-the-dark paint from Michael's
$2.99 for 5oz. of clear Elmer's glue from Michael's
TOTAL AMOUNT OF TIME: 5 minutes
EASY-PEASY SCALE: 1 out of 5
Definitely something the kids can make and perfect for this time of year!
Labels:
Amazon,
borax,
food coloring,
glow in the dark,
glue,
Mason Jars,
Michael's,
neon,
slime,
snot
Sunday, October 27, 2013
Sheet Music Candles
As a musician, I thought this was a clever post by Can't Stop Making Things, as it combined two of my favorite things: candles and sheet music. Now, before anyone says anything... yes, the sheet music on the smallest candle is backwards. I even highlighted it in the photos below so that is an example of what not to do. So it was really on purpose. Yeah. That's it. Ahem.
The directions are pretty self-explanatory in the post so here's the shorthand: take an 8 1/2x11 piece of white tissue paper, tape it to a piece of cardstock, print off sheet music (pdfs are provided in original post), take said tissue paper off cardstock, cut tissue paper to the size of the candle and glue in place, and adhere via heat until tissue paper has melted.
Here are some things the original post fails to mention:
1. When you are cutting the tissue paper to size, leave 1/4 of an inch off the top of the candle (like the smallest candle). I found when you cut it exactly to the size of the candle, it's harder to melt the very top of the tissue paper to the candle, so leave yourself some breathing room.
2. If you don't have a heat gun, use a blow dryer. I used mine on "High" for 5 minutes for the tall candle, 3 minutes for the medium size candle, and 2 minutes for the small candle.
3. When you're using the heat gun or blow dryer, you'll start to notice the color of the tissue paper fades and the color of the candle come through. That's when you know you're done. If you still see white tissue paper, it hasn't completely melted yet. You've heated it for too long when wax starts to drop down the sides of the candle.
4. Don't touch the candle while you're adhering the tissue paper to it. Instead, put the candle on the cardstock you used and spin the cardstock on the table so you don't have to touch the candle.
TOTAL COSTS: Anywhere between $3-$12
$1.99 for white tissue paper from Vons
$9.99 for a pack of 5 candles (different sizes) at IKEA, though you could find plain white candles anywhere for cheap (probably around $2/candle)
Sheet music was free
Already had glue
TOTAL AMOUNT OF TIME: 45 minutes, almost to the second
EASY-PEASY SCALE: 3 out of 5. Not too difficult but not a cakewalk. Be careful with any heat gun/blow dryer so you don't burn yourself. Also try not to have any wrinkles in the tissue paper or they'll adhere to the candle.
Sheet music candles |
The directions are pretty self-explanatory in the post so here's the shorthand: take an 8 1/2x11 piece of white tissue paper, tape it to a piece of cardstock, print off sheet music (pdfs are provided in original post), take said tissue paper off cardstock, cut tissue paper to the size of the candle and glue in place, and adhere via heat until tissue paper has melted.
Here are some things the original post fails to mention:
1. When you are cutting the tissue paper to size, leave 1/4 of an inch off the top of the candle (like the smallest candle). I found when you cut it exactly to the size of the candle, it's harder to melt the very top of the tissue paper to the candle, so leave yourself some breathing room.
Example of what not to do: put sheet music on backwards |
2. If you don't have a heat gun, use a blow dryer. I used mine on "High" for 5 minutes for the tall candle, 3 minutes for the medium size candle, and 2 minutes for the small candle.
3. When you're using the heat gun or blow dryer, you'll start to notice the color of the tissue paper fades and the color of the candle come through. That's when you know you're done. If you still see white tissue paper, it hasn't completely melted yet. You've heated it for too long when wax starts to drop down the sides of the candle.
4. Don't touch the candle while you're adhering the tissue paper to it. Instead, put the candle on the cardstock you used and spin the cardstock on the table so you don't have to touch the candle.
TOTAL COSTS: Anywhere between $3-$12
$1.99 for white tissue paper from Vons
$9.99 for a pack of 5 candles (different sizes) at IKEA, though you could find plain white candles anywhere for cheap (probably around $2/candle)
Sheet music was free
Already had glue
TOTAL AMOUNT OF TIME: 45 minutes, almost to the second
EASY-PEASY SCALE: 3 out of 5. Not too difficult but not a cakewalk. Be careful with any heat gun/blow dryer so you don't burn yourself. Also try not to have any wrinkles in the tissue paper or they'll adhere to the candle.
Labels:
blow dryer,
candles,
heat gun,
IKEA,
sheet music,
tissue paper,
Vons
Saturday, October 26, 2013
My First Blog Requests - Keep 'Em Comin'!
If there is ever something you're curious how long it took to do or how much it might be, shoot them on over and I'll break it down for you Mythbuster-style! Today's spoooooky recommendations came from my former neighbor, Mrs. Martin -
#1 - Glow in the dark eyes
Perhaps you've seen the pictures going around Pinterest or Facebook. Glow lights + paper towel/toilet paper rolls = creepy eyes in the bushes. Does it work?
Well, yes and no. A few things to keep in mind:
a.) You need to cut the eyes fairly large so you can see the light but not so big that you can see the glow stick
b.) Depending on how long the glow sticks are, you might have to curl them inside the rolls. For these that were 8" long, I had to fold them so they were 4" long so that the stick wouldn't go outside of the roll. If you hide them in bushes, perhaps the bushes can hide the sticks if they go outside of the rolls, but it might be better to get 4" glow sticks.
c.) Certain colors work better than others. As you see below, the green shows up the best, then pink, then blue
d.) Remember to draw your design before cutting. Having a template for the eyes will make it so much easier!
TOTAL COSTS: $3.50 (glow sticks from Vons)
TOTAL AMOUNT OF TIME: About 15 minutes (to make 3)
EASY-PEASY SCALE: 1 out of 5. A great activity for kids, super easy, and an excuse to be creative!
#2 - "Spooky Teeth"
Here's another that has been making the rounds on Facebook and Pinterest but was also on Cosmopolitan's website. Pretty straight forward - apples, marshmallows, peanut butter. Are they any good?
Yes. Yes yes yes. I don't know why I've never seen marshmallows and peanut butter together but man is it addicting. A recipe I saw called for "1 medium apple, 1/4 cup creamy peanut butter, 25 mini marshmallows" but I did 2 small apples and chunky peanut butter and they tasted ah-may-zing. If you want to make them more like teeth, you can clean them up a bit but I promise you, they won't be on the plate long enough for anyone to care. Great Halloween snack!
TOTAL COSTS: About $9
$2.00 for mini marshmallows, $3.00 for peanut butter, and $4 for 3 lbs. of apples
TOTAL AMOUNT OF TIME: About 15 minutes
...though some of that time may have been spent eating ingredients...ahem...
EASY-PEASY SCALE: 1 out of 5
If you don't already have an apple slicer/corer like this, I highly recommend you get one. Saves you a lot of time and energy!
#1 - Glow in the dark eyes
Perhaps you've seen the pictures going around Pinterest or Facebook. Glow lights + paper towel/toilet paper rolls = creepy eyes in the bushes. Does it work?
Well, yes and no. A few things to keep in mind:
a.) You need to cut the eyes fairly large so you can see the light but not so big that you can see the glow stick
b.) Depending on how long the glow sticks are, you might have to curl them inside the rolls. For these that were 8" long, I had to fold them so they were 4" long so that the stick wouldn't go outside of the roll. If you hide them in bushes, perhaps the bushes can hide the sticks if they go outside of the rolls, but it might be better to get 4" glow sticks.
c.) Certain colors work better than others. As you see below, the green shows up the best, then pink, then blue
d.) Remember to draw your design before cutting. Having a template for the eyes will make it so much easier!
TOTAL COSTS: $3.50 (glow sticks from Vons)
TOTAL AMOUNT OF TIME: About 15 minutes (to make 3)
EASY-PEASY SCALE: 1 out of 5. A great activity for kids, super easy, and an excuse to be creative!
#2 - "Spooky Teeth"
Here's another that has been making the rounds on Facebook and Pinterest but was also on Cosmopolitan's website. Pretty straight forward - apples, marshmallows, peanut butter. Are they any good?
TOTAL COSTS: About $9
$2.00 for mini marshmallows, $3.00 for peanut butter, and $4 for 3 lbs. of apples
TOTAL AMOUNT OF TIME: About 15 minutes
...though some of that time may have been spent eating ingredients...ahem...
EASY-PEASY SCALE: 1 out of 5
If you don't already have an apple slicer/corer like this, I highly recommend you get one. Saves you a lot of time and energy!
Friday, October 25, 2013
It's Candle Makin' Time!
As we near the holiday season, I keep seeing sites that say, "Make your own candles - great Christmas gift!" or "Give the gift of homemade candles!" ... yeah... hot wax + fire + me = not a brilliant plan. Still, curiosity killed the cat but satisfaction brought it back. I figured it was worth a shot.
There are plenty of candle-making kits out there. I saw some at Michael's, Something Turquoise recommended this kit on eBay, but I went to trusty 'ol Amazon and bought this kit, based on the reviews and price.
A few days later, I received the package and thought it was very convenient to have everything you need fit inside the pouring pot (which can be used multiple times for future batches). So when I emptied out the supplies, here's what I found:
1 giant bag of soy wax
1 half ounce bottle of pearberry fragrance (I didn't choose it, the company did but it smelled lovely!)
1 color square (kind of an olive green)
1 glass votive flower pot size jar
1 7oz glass jar with a lid
4 metal tea light cups
6 wicks
1 pouring pot
1 set of instructions
Things not included that I didn't realize until after reading said instructions:
1 thermometer (which I picked up at the grocery store shortly thereafter)
1 pot holder (which I never needed)
Covered work space (I didn't cover anything and just spilled 2 drops of wax. Easy clean-up on a kitchen countertop)
The instructions they provide and pretty self-explanatory. The first step is pouring out the 14oz of wax flakes into the pot. They're not kidding, they really are wax flakes. You then place the pouring pot into a large pot of water, creating a double boiler, as you don't want to heat the wax on a direct flame. Why, I don't know, I'm not a chemist. But bear in mind, that the pot is going to float so you'll want to keep a steady hand on it.
While the wax was melting, I put the wicks in the holders (it's nice that they have little stands attached but good luck getting them to be straight up and down!). Then the instructions get very specific. Let the wax melt, then bring up to 150F degrees and add the color square (which turned into a nice emerald color). Once added, let cool until it gets to 120F (which is why the thermometer is handy) and then add the entire bottle of fragrance and "blend vigorously." Well, it felt like an eternity to get the temperature down. After a while, I removed it from the pot of water and held it. No change. I set it down on the stove between burners. No change. I put it on a completely cool burner. That seemed to have cooled it down the fastest. Maybe this was what the pot holder was for. In any case, it eventually does cool down, you just have to have patience. After adding the fragrance and stirring it in with the thermometer, I poured the wax into each candle holder.
Here's what I thought was interesting... it said, "For better results on your glass containers, take a blow dryer and warm the glass." This is definitely not an activity for kids. You've got open flames, hot wax, and now a blow dryer involved! Please oh please be very careful!
Let me tell you right now - you're going to have SO much melted wax you're going to wish you had extra candle holders and wicks! I started finding any candle I could find around the house and pouring in extra wax because I filled the 4 tea light cups and 2 jars to the brim. So be prepared to have a LOT of extra wax.
I took a close-up of the two bigger candles to show you the difference between using a blow dryer and not - the candle on the left's wax is completely smooth. The candle on the right has some lines along the sides. I guess the hotter the candle holder, the smoother the wax will be once it hardens! The candle on the right just has stretch marks... nothing wrong with that.
The color isn't completely correct in the photo but it ended up being a mint color - a very pale green. Is it cheaper than buying the candles in the store? No, I don't think so (considering you can buy a pack of 20 tea lights at IKEA for around $5) but now you can give these as a gift and honestly say you made them yourself. And hey, if you ever want to make them again, you just need to buy wax, wicks, holders, color and scents in the future!
TOTAL COSTS: About $40
$24.99 for the Natural Soy Wax Candle Making Kit from Amazon
$10.99 thermometer from Vons
TOTAL AMOUNT OF TIME: 3 hours, 20 minutes
40 minutes to pour wax in pot, melt the wax, add color and add fragrance
40 minutes for tea lights to cool and harden
2 hours for votive candles to cool and harden
EASY-PEASY SCALE: 3 out of 5
Certainly not an activity for kids but the instructions are easy enough to understand and if you've got time to kill, a fun project to try! Happy candle making!
The candle making kit |
A few days later, I received the package and thought it was very convenient to have everything you need fit inside the pouring pot (which can be used multiple times for future batches). So when I emptied out the supplies, here's what I found:
1 giant bag of soy wax
1 half ounce bottle of pearberry fragrance (I didn't choose it, the company did but it smelled lovely!)
1 color square (kind of an olive green)
Everything they provide you in the kit |
1 7oz glass jar with a lid
4 metal tea light cups
6 wicks
1 pouring pot
1 set of instructions
Things not included that I didn't realize until after reading said instructions:
1 thermometer (which I picked up at the grocery store shortly thereafter)
1 pot holder (which I never needed)
Covered work space (I didn't cover anything and just spilled 2 drops of wax. Easy clean-up on a kitchen countertop)
Wax pieces |
Double burner |
Shortly after pouring the wax |
Here's what I thought was interesting... it said, "For better results on your glass containers, take a blow dryer and warm the glass." This is definitely not an activity for kids. You've got open flames, hot wax, and now a blow dryer involved! Please oh please be very careful!
Let me tell you right now - you're going to have SO much melted wax you're going to wish you had extra candle holders and wicks! I started finding any candle I could find around the house and pouring in extra wax because I filled the 4 tea light cups and 2 jars to the brim. So be prepared to have a LOT of extra wax.
Blow dryer vs. no blow dryer |
The color isn't completely correct in the photo but it ended up being a mint color - a very pale green. Is it cheaper than buying the candles in the store? No, I don't think so (considering you can buy a pack of 20 tea lights at IKEA for around $5) but now you can give these as a gift and honestly say you made them yourself. And hey, if you ever want to make them again, you just need to buy wax, wicks, holders, color and scents in the future!
Final products |
TOTAL COSTS: About $40
$24.99 for the Natural Soy Wax Candle Making Kit from Amazon
$10.99 thermometer from Vons
TOTAL AMOUNT OF TIME: 3 hours, 20 minutes
40 minutes to pour wax in pot, melt the wax, add color and add fragrance
40 minutes for tea lights to cool and harden
2 hours for votive candles to cool and harden
EASY-PEASY SCALE: 3 out of 5
Certainly not an activity for kids but the instructions are easy enough to understand and if you've got time to kill, a fun project to try! Happy candle making!
Thursday, October 24, 2013
5 Minutes or Less Halloween Ideas
If you just found out you're hosting a Halloween party and you only have 20 minutes to get ready (I don't think that would actually happen but lets pretend, shall we?), here are four 5-minute ideas to get your place ready! And all of this didn't cost me a thing because I already had all the supplies so hopefully you do too!
#1 - The food
Cookies take too long to make and you don't have time to run to the store. What do you do? Grab some ingredients out of your cupboards and fridge and make these Band-Aid Appetizers from Likes.com.
INGREDIENTS: Graham crackers, cream cheese, and jelly
TOTAL AMOUNT OF TIME: 4 minutes, 45 seconds to make 9.
Notice that I didn't flatten out the cream cheese and make it square but if you get your kids to make these, they probably won't either!
EASY-PEASY SCALE: 1 out of 5. They're so easy to make and they'd be a fun project for the kiddos! Now whether they taste any good... well... that's up to your taste buds.
#2 - The mood
So you don't have any fake cobwebs laying around? No zombies? That's ok, you can still make your space spooky! Cut out black paper, or print on black ink and cut out, different designs like jack o'lantern faces or bats! If you want to be really fancy, you could cut out one of these templates from Martha Stewart but it would take more than 5 minutes. Anyone else wish there was a face of Martha Stewart template to cut out? Maybe I'd only be spooked by that...
SUPPLIES NEEDED: Paper, scissors, tape (I recommend double-sided but if you don't have any, just make loops) and tape to the front of the design and the inside of the lampshade. Remember not to show the tape outside of the design or it will show through!
TOTAL AMOUNT OF TIME: 4 minutes, 25 seconds
2 minutes, 25 seconds for the bat, 1 minute 30 seconds for the jack o'lantern, and 1 minute to tape them inside of lampshades
EASY-PEASY SCALE: 2 out of 5. It depends on how difficult of a design you're cutting out but again, something the kids could do and looks great! Just remember not to have paper too close to the hot lightbulb or you might have another kind of scary night!
#3 - The oooed (just go with it)
What if the electricity has gone out? Well, put those candles to good use! This post from Thrifty Decor brings to "light" two different ideas and they're super quick and easy!
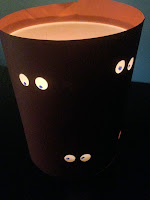
SUPPLIES NEEDED: For the mummy: Gauze or cheesecloth, googly eyes (I used Wilton Candy Eyeballs but you could easily cut eyes out of paper), candle, mason jar, glue. For creepy eyes: dark paper, scissors, tape, marker, hole puncher, candle, and candle holder
TOTAL AMOUNT OF TIME: 2 minutes, 25 seconds for the mummy and 2 minutes, 30 seconds for the creepy eyes
EASY-PEASY SCALE: 2 out of 5. Again, very easy and very quick to put together. I didn't even tape the gauze for the mummy, I just tucked it in in the back and I didn't glue the eyes on but you certainly can. And while the original creepy eyes calls for strips of paper with eyes cut out, I opted for one sheet of paper wrapped around the candle holder to save on time, taped the paper to the holder, then punched out eye holes. I probably should have drawn the pupils bigger, though.
#4 - The booed
I used to make these as a kid and when I saw this post, I was so happy to see Jen Banks at A Busy Mommy does it for her kids as well! This is probably my favorite but for sentimental reasons.
SUPPLIES NEEDED: Tissues, string or yarn (I used black thread which is harder to see from far away), and a marker
TOTAL AMOUNT OF TIME: 1 minute per ghost (I made three), and 30 seconds to hang per ghost...unless you have a really difficult chandelier
EASY-PEASY SCALE: 1 out of 5. As I said, I used to make these as a kid so they're really easy to make. The most tissue ghosts, the better!
Happy Halloween!
Mmmm...bloody bandaids.... |
Cookies take too long to make and you don't have time to run to the store. What do you do? Grab some ingredients out of your cupboards and fridge and make these Band-Aid Appetizers from Likes.com.
INGREDIENTS: Graham crackers, cream cheese, and jelly
TOTAL AMOUNT OF TIME: 4 minutes, 45 seconds to make 9.
Notice that I didn't flatten out the cream cheese and make it square but if you get your kids to make these, they probably won't either!
EASY-PEASY SCALE: 1 out of 5. They're so easy to make and they'd be a fun project for the kiddos! Now whether they taste any good... well... that's up to your taste buds.
#2 - The mood
Pumpkin silhouette |
Bat silhouette |
SUPPLIES NEEDED: Paper, scissors, tape (I recommend double-sided but if you don't have any, just make loops) and tape to the front of the design and the inside of the lampshade. Remember not to show the tape outside of the design or it will show through!
TOTAL AMOUNT OF TIME: 4 minutes, 25 seconds
2 minutes, 25 seconds for the bat, 1 minute 30 seconds for the jack o'lantern, and 1 minute to tape them inside of lampshades
EASY-PEASY SCALE: 2 out of 5. It depends on how difficult of a design you're cutting out but again, something the kids could do and looks great! Just remember not to have paper too close to the hot lightbulb or you might have another kind of scary night!
#3 - The oooed (just go with it)
Mummy |
Creepy eyes |
TOTAL AMOUNT OF TIME: 2 minutes, 25 seconds for the mummy and 2 minutes, 30 seconds for the creepy eyes
EASY-PEASY SCALE: 2 out of 5. Again, very easy and very quick to put together. I didn't even tape the gauze for the mummy, I just tucked it in in the back and I didn't glue the eyes on but you certainly can. And while the original creepy eyes calls for strips of paper with eyes cut out, I opted for one sheet of paper wrapped around the candle holder to save on time, taped the paper to the holder, then punched out eye holes. I probably should have drawn the pupils bigger, though.
Tissue ghosts |
I used to make these as a kid and when I saw this post, I was so happy to see Jen Banks at A Busy Mommy does it for her kids as well! This is probably my favorite but for sentimental reasons.
SUPPLIES NEEDED: Tissues, string or yarn (I used black thread which is harder to see from far away), and a marker
TOTAL AMOUNT OF TIME: 1 minute per ghost (I made three), and 30 seconds to hang per ghost...unless you have a really difficult chandelier
EASY-PEASY SCALE: 1 out of 5. As I said, I used to make these as a kid so they're really easy to make. The most tissue ghosts, the better!
Happy Halloween!
Wednesday, October 23, 2013
Spider Cookies
As we near Halloween, we look for easy and fun sweets to devour... ok, maybe that's just me. I already had bloody cupcakes, I destroyed some pumpkin cake, and when I came upon this post from Bubblews, I knew I had to make these. Seemed easy enough... chocolate chips = spiders = cool looking (and tasty!) cookies for Halloween.
Looks can be deceiving.
Here's what I did and what I recommend you NOT do:
Take #1 - I first tried with a pre-made package of cookie dough. You know, those packs you can buy that have the dough all cut up for you and you just have to put them on a cookie sheet and stick in the oven? Well, when I took them out of the oven, the chocolate chips were so hard I ended up putting destroying them. Mangling them. I practically put holes in the cookies! "Ok," I thought, "maybe it's just because it's not from scratch." So I ate all the cookies I made and tried again.
Take #3 - I thought, "Ok, maybe if I make sure there's no cookie dough on top of the chocolate chips and I put two chips together to make for more melted chocolate to work with." Nope, no change. I even considered using a paintbrush instead of a toothpick but the original post specifically says you can use a toothpick.
Looks can be deceiving.
Here's what I did and what I recommend you NOT do:
Take #1 - I first tried with a pre-made package of cookie dough. You know, those packs you can buy that have the dough all cut up for you and you just have to put them on a cookie sheet and stick in the oven? Well, when I took them out of the oven, the chocolate chips were so hard I ended up putting destroying them. Mangling them. I practically put holes in the cookies! "Ok," I thought, "maybe it's just because it's not from scratch." So I ate all the cookies I made and tried again.
Take 1: Pre-made cookie dough = holes |
Take #2 - I made a batch of cookies from scratch (I just used the recipe on the back of the chocolate chip cookie bag) and as soon as they were out of the oven, I grabbed my toothpick and tried making legs. Same problem! I ended up swirling the chocolate chip to loosen it up and draw the legs from there but as you can see, it didn't look like the original post AND it took forever just to get one done:
Take 2: Crabs or spiders? |
Original cookie in the post. Yeah. Right. |
And then I realized. Whoever originally posted the article... never... even... tried it. Their specific wording states, "It apparently, should turn out like the picture above." It apparently, does not.
I recommend you give this a try and let me know how it goes. Best case scenario? You have awesome looking cookies. Worst case scenario? You have to eat all those cookies you just made (though it sounds like two best case scenarios to me!)
TOTAL COSTS: $2.59
$2.59 for a pack of pre-made packages of cookie dough from Vons
All other ingredients I already had, including toothpicks
TOTAL AMOUNT OF TIME: About 30 minutes
Unless you decide to make 3 or 4 batches, just account for 15 minutes to mix the ingredients and 10-12 minutes in the oven per batch
EASY-PEASY SCALE: 4 out of 5
While it's not hard to take a toothpick to a cookie, it is difficult to make the spiders look realistic. Perhaps the legs should have been longer. Perhaps an up-and-down process is better than left-to-right. Perhaps you really do need to use a small paintbrush instead of a toothpick. In any case, the moral of the story is: don't believe everything you see on the internet.
Tuesday, October 22, 2013
Literary Jewelry
Did you go to an 80s party once (or did you live through the 80s?) and still have those horrible, tacky, thick bracelets? Or maybe you have a headband that's a bit worse for wear? Never fear, your favorite book is near!
I saw this book bracelet by larking on Etsy and thought, "If I could make one, it could be a great holiday gift!" Yes, it's time to start thinking about winter shopping, I hate to admit it. Instead of spending $25, though, this was a cheap and fun project and straight from the heart. The hardest part? Finding the right book.
So since I don't have that many thick bracelets hangin' around, I decided to buy the cheapest one I could find on Amazon, since I knew I'd be covering it up anyway. Our lucky contestant? A pink and black/brown/orange zebra print 1.25" wide felt bracelet. Eww.
Next, the text to cover it up! Since my sister Betsy Bird just recently came out with a children's book (do you have a kid and do they love to dance??), I thought that a bracelet made with her own words might be something unique.
SUPPLIES NEEDED:
1. Bracelet/Headband/whatever it is you're decorating
2. Paper (printer paper, cardstock, parchment, etc.)
3. Scissors
4. Mod Podge
5. Foam brush (optional)
Now here's a list of mistakes I did so you don't follow in my footsteps:
#1 - Don't try to cover up felt. Make sure your bracelet/headband/whatever it is you're covering is something non-porous - plastic, wood, etc. I learned this the hard way - I tried to cover up felt and not only did the paper rip but showed pink through. Bad plan.
#2 - Print out your text in Word single-spaced and cut out each line of text before doing any gluing. Since I used a 1.25" wide bracelet, I had my text only be 2.75" long so I could wrap the text around to the bracelet. The bracelet was 10" long, which equaled to a page and a quarter of text (Times New Roman, Size 11). You can use regular printer paper but I went with Southworth Parchment Paper so it looked a bit more like the original posting.
#3 - Use Mod Podge and either a foam applicator to apply or use your finger but wear gloves. I used my finger to rub Mod Podge on top of and underneath the strips of text, but halfway through, my fingers were very sticky and it took a while to eventually get it off my nails. When you're adding the text, remember to not leave any spaces showing! And don't worry about the inside not being perfect, no one is going to be seeing that once it's worn.
TOTAL COSTS: About $11
$1.99 for the bracelet from Amazon
$8.99 for 16 oz. of Mod Podge from Michael's (I used maybe 2 Tablespoon's worth)
$.99 for 2" foam brush from Michael's (that I ended up not using)
TOTAL AMOUNT OF TIME: 2 hours, 15 minutes
1hr. 15 minutes to print out text, cut it up, and glue to bracelet
1hr. to dry
EASY-PEASY SCALE: 2 out of 5
Not hard at all, just a bit time consuming (especially if you have to type out the text yourself) but overall, half the price of what's being offered on Etsy and more personal too!
I saw this book bracelet by larking on Etsy and thought, "If I could make one, it could be a great holiday gift!" Yes, it's time to start thinking about winter shopping, I hate to admit it. Instead of spending $25, though, this was a cheap and fun project and straight from the heart. The hardest part? Finding the right book.
Before shot |
Next, the text to cover it up! Since my sister Betsy Bird just recently came out with a children's book (do you have a kid and do they love to dance??), I thought that a bracelet made with her own words might be something unique.
SUPPLIES NEEDED:
1. Bracelet/Headband/whatever it is you're decorating
2. Paper (printer paper, cardstock, parchment, etc.)
3. Scissors
4. Mod Podge
5. Foam brush (optional)
Now here's a list of mistakes I did so you don't follow in my footsteps:
#1 - Don't try to cover up felt. Make sure your bracelet/headband/whatever it is you're covering is something non-porous - plastic, wood, etc. I learned this the hard way - I tried to cover up felt and not only did the paper rip but showed pink through. Bad plan.
#2 - Print out your text in Word single-spaced and cut out each line of text before doing any gluing. Since I used a 1.25" wide bracelet, I had my text only be 2.75" long so I could wrap the text around to the bracelet. The bracelet was 10" long, which equaled to a page and a quarter of text (Times New Roman, Size 11). You can use regular printer paper but I went with Southworth Parchment Paper so it looked a bit more like the original posting.
#3 - Use Mod Podge and either a foam applicator to apply or use your finger but wear gloves. I used my finger to rub Mod Podge on top of and underneath the strips of text, but halfway through, my fingers were very sticky and it took a while to eventually get it off my nails. When you're adding the text, remember to not leave any spaces showing! And don't worry about the inside not being perfect, no one is going to be seeing that once it's worn.
After shot |
TOTAL COSTS: About $11
$1.99 for the bracelet from Amazon
$8.99 for 16 oz. of Mod Podge from Michael's (I used maybe 2 Tablespoon's worth)
$.99 for 2" foam brush from Michael's (that I ended up not using)
TOTAL AMOUNT OF TIME: 2 hours, 15 minutes
1hr. 15 minutes to print out text, cut it up, and glue to bracelet
1hr. to dry
EASY-PEASY SCALE: 2 out of 5
Not hard at all, just a bit time consuming (especially if you have to type out the text yourself) but overall, half the price of what's being offered on Etsy and more personal too!
Monday, October 21, 2013
Holiday Soaps
I wanted to do a project that would a.) get men/boys interested and b.) stick with the Halloween theme. After seeing this post by Jourdan Crouch Fairchild on CountryLiving's website, I figured I'd run to Michael's and give it a try. I've never made soap before but it can't be that hard, right? And if I add some creepy crawlers inside the soap, how cool would that be??
First off, I had no idea there are so many different kinds of soaps you could buy! And honestly, I picked the Higher Temperature Glycerin Soap primarily because of the price (it was the cheapest for the amount provided - $11.99 for 2lbs. or 8 soaps total). As to whether or not that was the best choice, we shall see.
Next, I knew I needed to put the melted soap into some sort of a mold. "How many should I get?" I asked my husband, who was a saint for being there in the first place but definitely wasn't interested. I went with a pack of 3 by the same company (ArtMinds), figuring that'd be a good place to start. I can always reuse them. Too bad only 2 out of the 3 survived (more on that later).
Ok, so we've got soap, we've got molds, now we need something to go in the soap, like plastic insects or spiders. Note: Michael's does NOT have any small plastic bugs in bulk, except for a tube of 9-10 insects (most over 3") for $8.99. Yeah. I don't think so. So I decided to use some plastic spider rings that I received as a Halloween grab bag gift and cut off the "ring" part.
Lastly, a fragrance for the soap. I didn't know what glycerin soap smelled like but I knew I'd want to cover it up. Now what smells like spiders? Mint seemed like the best choice. Don't question, just go with it.
Onto the soap making! Ok instructions, tell me what to do:
And remember, if you do add a toy, put it in the center of the mold and try to remove the bubbles or it's going to look foggy, like this -
First off, I had no idea there are so many different kinds of soaps you could buy! And honestly, I picked the Higher Temperature Glycerin Soap primarily because of the price (it was the cheapest for the amount provided - $11.99 for 2lbs. or 8 soaps total). As to whether or not that was the best choice, we shall see.
Next, I knew I needed to put the melted soap into some sort of a mold. "How many should I get?" I asked my husband, who was a saint for being there in the first place but definitely wasn't interested. I went with a pack of 3 by the same company (ArtMinds), figuring that'd be a good place to start. I can always reuse them. Too bad only 2 out of the 3 survived (more on that later).
Ok, so we've got soap, we've got molds, now we need something to go in the soap, like plastic insects or spiders. Note: Michael's does NOT have any small plastic bugs in bulk, except for a tube of 9-10 insects (most over 3") for $8.99. Yeah. I don't think so. So I decided to use some plastic spider rings that I received as a Halloween grab bag gift and cut off the "ring" part.
Lastly, a fragrance for the soap. I didn't know what glycerin soap smelled like but I knew I'd want to cover it up. Now what smells like spiders? Mint seemed like the best choice. Don't question, just go with it.
Onto the soap making! Ok instructions, tell me what to do:
That's it? Ok, but how much do I cut? What do I do after it has cooled? What about bubbles? I had to make up the answers to these questions, because the instructions were definitely lacking.
SUPPLIES YOU'LL NEED THAT THEY DON'T MENTION:
Gloves
Knife
Cutting board
Microwave safe bowl or measuring cup to put soap in
Something to stir soap with (I used a plastic knife so I could throw it away later)
Fun toy to put in soap
Oven mitts
Oven mitts
Step 1 - Put on gloves and cut the soap. I didn't wear gloves and my hands smell something awful. Turns out 4 squares = 1 mold, so I cut up 12 squares (since I had 3 molds).
Step 2 - put 4 squares in microwave safe bowl or measuring cup and put in microwave (I used a bowl and it spilled a lot, so you might want to go with a measuring cup). I put it on high for 30 seconds, stirred the contents, put back in the microwave for 15 seconds, stirred, then 15 more seconds in the microwave. One of my tries, the soap was still hard so I put it in for another 15 seconds. Just keep adding 10-15 seconds until it's all melted. Once it was all liquid, I added 6 drops of Mint soap fragrance and stirred it up with a plastic knife.
Step 3 - Be very careful with this next step. Wearing oven mitts (because the bowl/measuring cup will be HOT), pour the bowl/cup of melted soap halfway into the mold, put in your toy, and pour in the rest. Now the spiders I used were too light so they floated to the top/bottom of the soap.
One thing I didn't think of until it was too late was the bubbles. Try and remove those as soon as you've poured the soap into the mold, otherwise you'll have bubbles in your soap. Not a big deal but something to think about. You should be able to scrape them out with a knife.
Step 4 - Set aside mold for 1 hour
Step 5 - Immediately clean up your work area (or the microwave), in case you spilled any soap.
Once the hour is up, removing the soap from the mold is the most frustrating step. The first mold, I swore a lot, took out a pair of scissors, and hacked the mold to pieces. Ahem. The second mold, I regained my composure and tried to separate the sides first, before pushing out the soap from the mold. That seemed to have done the trick! I even tried out one of the soaps and by golly, it works! Whichever soaps you're not using, be sure to wrap in clear plastic wrap to preserve the freshness of the soap bar. Another thing they forget to tell you in the instructions :-/
Bubbles in the corner of my mold I forgot to remove |
Step 5 - Immediately clean up your work area (or the microwave), in case you spilled any soap.
Once the hour is up, removing the soap from the mold is the most frustrating step. The first mold, I swore a lot, took out a pair of scissors, and hacked the mold to pieces. Ahem. The second mold, I regained my composure and tried to separate the sides first, before pushing out the soap from the mold. That seemed to have done the trick! I even tried out one of the soaps and by golly, it works! Whichever soaps you're not using, be sure to wrap in clear plastic wrap to preserve the freshness of the soap bar. Another thing they forget to tell you in the instructions :-/
And remember, if you do add a toy, put it in the center of the mold and try to remove the bubbles or it's going to look foggy, like this -
Swimming in a sea of soap and bubbles |
TOTAL COSTS: About $20
$11.99 at Michael's for 2lbs of ArtMinds Higher Temperature Glycerin Soap
$2.99 at Michaels for 3 ArtMinds Embossing Soap Molds
$4.99 for ArtMinds Mint Soap Fragrance (.05 fl oz)
Spiders were free
TOTAL AMOUNT OF TIME: 1 hour, 11 minutes
3 minutes to cut 12 squares of soap
1 minute/soap mold in microwave (and I did 3)
1 hour to wait for soap to cool
5 minutes to remove soaps from their molds
EASY-PEASY SCALE: 3 out of 5
Not super hard, just need some nails and upper-body strength to remove the soap from the molds!
Sunday, October 20, 2013
State to State Love - A Perfect Engagement/Wedding/Anniversary Gift!
Philly/Kalamazoo Love |
Of course there weren't any instructions available so I made it up as I went along - feel free to tweak these however you see fit! The original design was all on 1 print so if you have a color printer and Photoshop, you're welcome to print it out there on an 8 1/2 x 11 sheet. I, however, wanted to make it pop just a little more:
Step 1 - Pick your states
Since I'm from Michigan and my husband is from Pennsylvania, I figured those would be ideal for this project.
Step 2 - Take outlines of those states and put them onto a Word doc.
I found perfect examples here: http://www.netstate.com/states/maps/(enter initials of state here)_maps.htm. So for Michigan, I put in http://www.netstate.com/states/maps/mi_maps.htm and clicked on "Blank Outline Map". For Pennsylvania, I entered http://www.netstate.com/states/maps/pa_maps.htm and did the same thing. Just click and drag those states onto a Word doc.
After you've dragged them to the Word doc, double-click on them and click on "Layout". Make sure they are "Behind Text". Also, you'll want your document to have .5" margins around the borders.
Step 3 - Decide where you want to place the states and the ampersand sign (&)
This took the longest for me, because I'm so picky. In the original design, the ampersand sign takes up a quarter of the entire page, the states are relatively the same size, they're close together, and not near the borders. For a perfectionist, this proved to be more difficult than I anticipated. Because the states I chose are so awkwardly shaped (damn you Upper Peninsula!), it took a while to figure out where I wanted to place them. After 45 minutes of moving, resizing, and moving them again, I finally got them where I wanted them. My ampersand was Size 450 and Times New Roman.
Step 4 - Print out your states on white cardstock and cut them out
I recommend states like Colorado or Wyoming...
Step 5 - Print out the ampersand only on whichever color paper you like
In the original design, the ampersand is lighter than the color of the paper. I had to go darker because otherwise it wouldn't show up at all. My color printer wouldn't print out white. Who knew?
Step 6 - Tape or glue the cut-out states to the paper with ampersand
Now I used Elmer's glue and I regret that decision. You can see the bumps under the paper where there was too much glue used so the state is not flush with the paper, which is why you might want to use double-sided tape. However, if your state has a bunch of little ins and outs, the tape might not be your friend.
Step 7 - Print out and cut tiny red hearts and tape/glue them to where your hometowns are on the states
Step 8 - Draw on a dotted line between the two hearts. Another mistake I did - doing it freehand, which allowed for my dotted line to look sloppy. If you can follow the curve of a cup or bowl, do that.
Step 9 - Put in frame!
TOTAL COSTS: FREE
I already had these supplies:
1. Colored cardstock
2. White cardstock
3. Glue (though you might want to use tape)
4. A 8x10 Frame
I bought the frame from Target over a year ago in West Hollywood and I think it cost somewhere in the ballpark of $15-$20.
TOTAL AMOUNT OF TIME: 1 hour, 30 minutes
45 minutes trying to figure out the layout of the states
10 minutes with printer issues
The rest of the time used to cut out states and hearts, glue them to paper, draw dotted line, and put in frame
EASY-PEASY SCALE: 3 out of 5
If you're not a tech-savvy person, placing the states and getting them the size you want on the Word doc might be a little more difficult for you, but not impossible. You're just putting them on the Word doc to see how big they should be before printing and cutting them out. If you're familiar with editing photos in a Word doc, this will be a piece of cake.
Labels:
anniversary,
art,
engagement,
Etsy,
frame,
home state,
Michigan,
Pennsylvania,
states,
Target,
wedding,
Word
Kat's California Apple Butter - Slow Cooker Style
One sunny Saturday afternoon, my husband and I decided to pick apples... too bad the closest apple orchard was an hour and a half away. By the time we arrived, most of the trees had been picked and all that remained were the worm-holed and the rotten. Still determined to have a good time, we grabbed our 3lb. bag (does anyone else think 3lbs for $15 is WAY to much?!) and scoured the quarter acre for good apples.
We heard a couple next to us say, "Why did we pay $15 to pick rotten apples?" and after 15 minutes of finding nothing, I was starting to feel the same way. One of the workers at the orchard could tell we were getting frustrated and pointed out that the apples that fall onto the ground aren't always bad. Even if you see a hole, if it's not squishy when you press into it, it's fine. After scouring under the trees, we did end up finding a lot of apples that were pretty good. We went home and the apple butter makin' was underway (ok, technically we waited two weeks but we were busy... with... stuff... ahem...).
First thing's first: if you're using a brand new slow cooker straight out of the box, remember to remove the cardboard around the base of the pot. If you don't, you might smell burning. I gotta learn things the hard way, I guess!
Second: Whenever you're dealing with apples, either for cakes, pies, or apple butter, always use an apple peeler (I bought this one for $13.29 but it looks like Amazon has raised the price since then). It. Works. Wonders. You'll save yourself a lot of time, energy, and maybe a finger or two since it peels, cores, and slices at the same time. My husband didn't believe me until I showed him and he was astonished by the engineering of the little machine. If you don't believe me, here's a little video showing how it works (and you don't have to hold it down, there's a suction cup on the bottom, I just wanted to be extra careful):
I followed this recipe by Jamie at My Baking Addiction but since I only had half the amount of apples the recipe called for, I cut the recipe in half (1/2C of sugar instead of 1C, 1/8t ground cloves, etc.).
TOTAL COSTS: $25
Apples = $15 for 3lbs. at Riley's Apple Farm
Mason Jars = $10 for 12 4 oz. Ball mason jars
TOTAL AMOUNT OF TIME: 12 hours, 50 minutes
25 minutes to peel, core, and slice 3 lbs. of apples
10 minutes to add ingredients
12 hours to cook
15 minutes to puree, pour mixture into jars, and write labels
EASY-PEASY SCALE: 2 out of 5
Another easy recipe - the only hard-ish part is preparing the apples and having the patience to wait 12 hours!
We heard a couple next to us say, "Why did we pay $15 to pick rotten apples?" and after 15 minutes of finding nothing, I was starting to feel the same way. One of the workers at the orchard could tell we were getting frustrated and pointed out that the apples that fall onto the ground aren't always bad. Even if you see a hole, if it's not squishy when you press into it, it's fine. After scouring under the trees, we did end up finding a lot of apples that were pretty good. We went home and the apple butter makin' was underway (ok, technically we waited two weeks but we were busy... with... stuff... ahem...).
First thing's first: if you're using a brand new slow cooker straight out of the box, remember to remove the cardboard around the base of the pot. If you don't, you might smell burning. I gotta learn things the hard way, I guess!
Second: Whenever you're dealing with apples, either for cakes, pies, or apple butter, always use an apple peeler (I bought this one for $13.29 but it looks like Amazon has raised the price since then). It. Works. Wonders. You'll save yourself a lot of time, energy, and maybe a finger or two since it peels, cores, and slices at the same time. My husband didn't believe me until I showed him and he was astonished by the engineering of the little machine. If you don't believe me, here's a little video showing how it works (and you don't have to hold it down, there's a suction cup on the bottom, I just wanted to be extra careful):
I followed this recipe by Jamie at My Baking Addiction but since I only had half the amount of apples the recipe called for, I cut the recipe in half (1/2C of sugar instead of 1C, 1/8t ground cloves, etc.).
Here's what it looked like when I first turned on the slow cooker (the 0 hour mark):
Here's what it looked like after 6 hours in the slow cooker:
Here's what it looked like after 10 hours, after I added the vanilla (note: at this point, your house will smell ah-may-zing!)
So after 12 hours, the instructions call for using an immersion blender, but I don't have one of those, so I improvised by pouring the apple mixture into a bowl and used my hand mixer (thought using it in the slow cooker might be a bad idea). Once pureed, into the mason jars they went! I guess 3lbs. of apples equals 8 4oz mason jars -
TOTAL COSTS: $25
Apples = $15 for 3lbs. at Riley's Apple Farm
Mason Jars = $10 for 12 4 oz. Ball mason jars
TOTAL AMOUNT OF TIME: 12 hours, 50 minutes
25 minutes to peel, core, and slice 3 lbs. of apples
10 minutes to add ingredients
12 hours to cook
15 minutes to puree, pour mixture into jars, and write labels
EASY-PEASY SCALE: 2 out of 5
Another easy recipe - the only hard-ish part is preparing the apples and having the patience to wait 12 hours!
Subscribe to:
Posts (Atom)